|
Thanks for visiting the The Badger's Den (the blog for Badger Ridge). If an internet search brought you here looking for muzzleloader solutions, please stick with us: we have the solution to your Remington 700 ML/MLS and Ruger 77/50 woes. I update this blog frequently and what you are looking for is probably one or two clicks away. This blog is sorted categorically and chronologically. So you can find what you want by looking in the appropriate category, or if you know when it was published, you can use the time line. Or just keep scrolling down! If you are new to our site: YES WE STILL SERVICE AND CONVERT THESE OLD MUZZLE LOADERS But for this installment I'd like to tell you about a new product service we offer: Remington VersaMax Cam Pin, Hammer, Spring, & Plunger Replacement Parts I purchased a VersaMax about 7 years ago and have been very happy hunting waterfowl with it. Its a bit on the heavy side to carry all day upland hunting, but its been my "go-to" gun for waterfowl. It recoils softly. It smoothly cycled everything from the lightest trap/skeet loads, to the heavy 3.5" magnum waterfowl loads with out a hitch (well almost... there was one time I wore a supper fluffy warm glove on my left hand that jammed up the loading port... but that was hardly the gun's fault). I bought mine due to the reviews I read, and was really exited to own a US made "Benelli clone." I couldn't ever come to believe I could afford a Benelli, and being able to own one made in the USA.... with an improved gas system was a great thing to me. If you didn't know: the VersaMax is a clone of a Benelli M4 (the only autoloading shotgun to pass US military trials) adopted by the USMC as the M1014. After USMC adoption I understand Remington cloned it secretly, improved the Benelli Argo gas system (and called that the VersaPort system) and then waited. They waited for the day the Benelli M4's patents expired to patent their improvement as the VersaMax and began selling it. Unlike the M4/M1014 Remington gave the Versa Max a standard sporting shotgun stock and barrel, and a few other changes. And I flat out love it. I've shot some of my best trap ever with it, and I've killed a lot of waterfowl with it too. And did I mention it's super soft recoil and reliable with every factory load I've fed it? I've also installed an extended magazine system on my VersaMax. I switch back and forth between the stock system and the extended system when I go on snow goose hunts. I really love my VersaMax. Well... I must say it 'cycled' perfectly (past tense) until one snow goose hunt I started getting lots of soft primer strikes. The gun would still cycle smoothly (feed and eject), but frequently when I swung on a goose, and hit the trigger I'd get a 'click'. I'd cycle a new shell in, and most of the time it would go off. Typically the first shell would go off, but the second one would not. Some times it didn't matter if it was the first or one of the subsequent shots. I looked at the shells that didn't fire and saw a slight primer indent. When I put the same shell in my back up gun, it went bang. These soft primer strikes occurred after I'd put over 1000 rounds through my VersaMax (probably closer to 1500, as I wasn't counting I can't be sure). So I hunted my back up gun to finish the day, and that evening cleaned the VersaMax. I didn't really find it too dirty to function. Especially considering how dirty I'd gotten the same gun before (and it had never had a hiccup with about 300-400 rounds per deep clean). Notably, my friend on the same hunt swung a VersaMax and he had the same issue start on the same day of the same hunt. His gun was pretty clean when we disassembled it as well. We both use lubes that deal well with the cold, and had hunted our guns in even colder weather. It was not lubes/greases gelling and causing the failure to fire. He can't be sure how many rounds total his VersaMax had through it (he had purchased his used, before I'd even met him), but he had shot less than 500 shells through it himself. When we both tried our VersaMax's the next day (after the thorough cleaning), we both had the same frequently intermittent "click... no bang" soft primer strikes. Again, when I fed the same shells with light indents into my backup gun, & again, they went bang. So it was clear the issue was the gun... not the lubes... not from failing to clean per the owner's manual... and strangely at that point both VersaMax's had the same issue. So while most malfunctions of well made firearms are related to poor service/cleaning/lubrication... or poor quality ammo, something else was wrong with both our VersaMax's. Obviously I had missed something during the tear down and cleaning. My mind raced about bad chambers (checked that: no finish issues, no burs, nor crud, nor corrosion) and everything else possible causing the issue. I'll save you the grief of all the posts online I read, and things I thought it could be, in my search for a solution. Once I knew what to look for it was pretty obvious (and was the same on both guns). So if you are getting soft primer strikes, and have been cleaning and lubing per the owner's manual with good cold weather lubes, here's what 3 things almost certainly are the issue and how to fix them: Problem #1: The original Bolt Cam Pins from Remington don't hold up and it seems Remington left burs in the bolt carriers cam pin slot. I'm convinced the original Remington cam pins are too soft to last. To determine the state of a cam pin: follow the Remington owners manual's procedures (only work on an unloaded firearm) to remove the barrel and remove the bolt assembly. Then use the manual's procedures to tear the bolt assembly down. Remember the firing pin is under spring tension and will shoot out! That is why Picture 23 shows a thumb holding the Firing Pin while the Retaining Pin is removed. Clean & inspect all parts. Inspect the cam pin and the slot it rides in the bolt carrier for deformation. (see pic of damaged cam pin) Look for burs on the slot machined into the bolt carrier (that the cam pin rides in). Again: while you got the bolt carrier apart, make sure there are not any burs in the bolt carrier's cam pin slot. Replace worn cam pins, and remove any burs in the carrier with some emery cloth or a fine round file. I, like most others, consider the Benelli Cam Pin to be a better solution in the VersaMax than buying the Remington part. Even if you don't find any deformation on an original Remington cam pin, I recommend replacing it with a Benelli cam pin... and lubing it well! 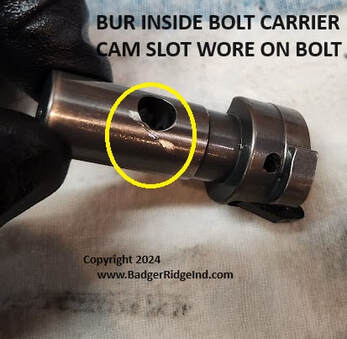 I found a wear mark on my bolt where a bur in the cam slot in the bolt carrier wore on it. I buffed the gouged area of the bolt smooth. Then I took a tapered round file and removed the bur with a file. REMEMBER: It doesn't take much filing or polishing with an emery cloth, sand paper, or fine stone to remove burs or to polish out gouges. You don't want to remove too much metal! You can check your progress with your finger nails. You may have to use your little finger inside the bolt carrier to check for burs. It must be emphasized that the owner's manual didn't tell you to lube the cam pin. This further accelerates the wear this area sees. Though I must acknowledge the new RemArms V3 shotguns come with an extra insert warning shooters to grease bolt carrier cam pins. We can only hope whenever the VersaMax2 comes out, RemArms will clarify the need to lubricate the cam pin. It is commonly held amongst competitive Benelli shooters that the Cam Pin's slot in the bolt carrier should be lubed with grease. Greasing cam pins works well in warm weather, but can be a bad idea for hunters who typically are out in the cold. The USMC M1014 service manual says to use "medium" lube on the cam pin every 500 rounds. USMC "medium" lube is putting BreakFree CLP on it such that "doesn't run down the side when turned vertical." Then the USMC M1014 service manual specifies even thinner oil in extreme cold. I'd suggest hunters omit the grease and lube the cam pin well with a good gun oil like BreakFree CLP, RemOil etc. The main thing is to lube the cam pin with something that will not gel in the weather you expect to shoot your VersaMax. 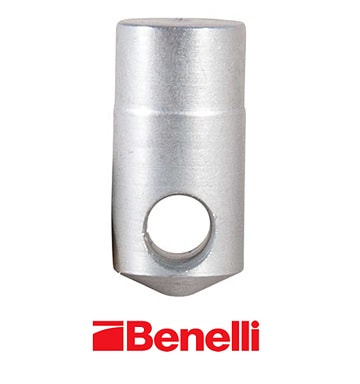 I replaced my cam pin with a new Benelli Cam Pin. The Benelli Cam pin was highly recommended on all the forums I visited, and has been working well for me. But you aren't done once you find and replace the bad cam pin. The new Benelli cam pin did reduce the frequency of light strikes, however my next hunt I still had a few light primer strikes. So it wasn't solved. From this I learned every VersaMax owner having light primer strikes needs to also deal with problem #2 below. No matter the condition of the cam pin. These pictures were excerpted from the VersaMax owner's manual. The numbers with red lines show where Remington directs one to use Rem Action Cleaner to clean the trigger assembly. Line 4 shows the hammer. In the other picture the left thumb is resting on the hammer to gently release it. 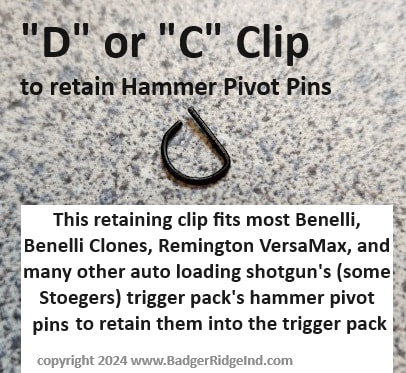 Problem #2: The original Remington hammer, hammer spring, and plunger are prone to fail. I have heard that some of the very first VersaMax's had some sort of recall issued because of poorly made hammers. But it seems that even the later Remington hammer version doesn't hold up. Both my shotgun's and my buddy's shot gun had peened hammers. To determine the condition of the usual suspects in the trigger pack, use the owner's manuals instructions to remove the trigger pack from the action, & clean. Then using gunsmith procedures (not in the owner's manual), remove the Hammer, Hammer Plunger, and Hammer spring from the trigger assembly. Be careful! There are lots of small parts in the trigger assembly that are easy to lose and the hammer plunger and spring will shoot in your face or all over the shop if you aren't careful. Also the "D" clip pin that holds the hammer assembly together isn't intuitively removed until you see how it's done... and it's easily damaged or lost. Some times you will see this clip described as a C clip... whatever you call it: we also offer replacement D or C clips for sale. 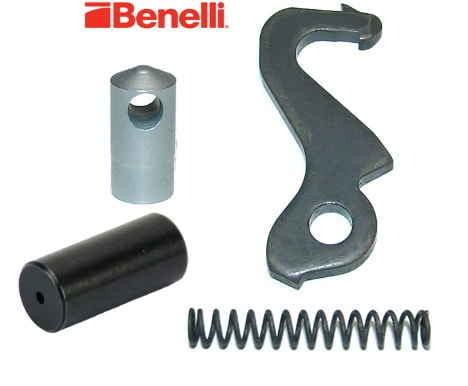 Once I got my Remington original hammer plunger out, I saw that it was chrome plated, but the plating was chipped off. This created a mess of abrasive hard chrome flaked crud that jammed up the plunger. You couldn't see this crud nor remove it when the hammer plunger and spring were in the housing. Moreover the edge of where the chrome was chipping off would bind, slowing plunger when the trigger was pulled. And that brings me back to items we sell: -Benelli Cam Pin -Benelli Hammer -Benelli Hammer Spring -Benelli Hammer Spring Plunger/Cap all the parts needed to fix this issue in a VersaMax are frequently called "Remelli" parts): You might think doing all four is over kill. I'm convinced it's not overkill. It's not wise to pick at any problem and wait for it to get worse when its understood and predictable. While you can see peening and deformation of the face of the hammer without disassembling the trigger assembly, you cannot tell if the chrome of the original Remington plunger is pealing without removing the plunger and spring. Nor can you clean the hard abrasive crud the chrome turns into from the assembly, unless the hammer spring & plunger are removed from the trigger pack. The best course is to tear it down once and fix it all while you are in there. Again, even if some of these parts are ok, experience shows that they will eventually fail as noted above. No matter the original parts' condition: I'm convinced the best fix is to, tear it all down, clean, replace the Cam Pin, Hammer, Hammer Plunger, and Hammer Spring with Benelli components, and lube. After that there typically isn't much more that needs to be done besides standard regular maintenance (that the owner's manual didn't tell you about... we'll get to those details later... keep reading). I realize that diving into problem #2 above is probably beyond most folks comfort levels and even the owner's manual lists it as something to have a gunsmith do. I figured it out by watching YouTube videos on how to work on Benelli trigger packs (the Remington is a clone). I've been working on my own guns since I was in elementary school, so this sort of stuff doesn't scare me. If tearing down a trigger pack is beyond your comfort level: you can purchase our new service and ship your shotgun's trigger pack to us: The service is simple: - Add our "Remelli Parts kit" to your cart - Add "send us your trigger pack - labor only" to your cart - Complete a check out (and get us paid) - We'll hold all the parts and other items that were purchased as part of the order whenever we see the install service purchased. All you have to do is pull the trigger assembly from your VersaMax, pad it well, & ship it to us. - We will send the trigger pack back with the new cam pin, and anything else you purchased. You put the cam pin in your bolt assembly yourself... the directions for tearing a bolt assembly down are in the owner's manual. REMEMBER: if you want your old parts back, let us know with a note accompanying the trigger pack (or they'll just end up in my recycling bin). Problem #3: Gummed up recoil spring &/or weak recoil spring On this one, the recoil spring may be gummed up... (or less likely, the spring may have weakened... or both). During my hunt I didn't have the tools to take the recoil spring assembly apart. As a matter of fact, I'd never cleaned the recoil spring/action tube. I had put good lube in there and cycled to bolt, but I regret that I never took the recoil spring and plunger out and cleaned them. Now I do it as part of my regular maintenance. I've learned that If I don't clean it, and it's cold, the crud in there will gel up and cause light primer strikes all on their own. Unfortunately the following procedures and the requirement to clean and lube the recoil spring were omitted from the Owner's Manual. So here's how I'd proceed to address issue #3: To clean the recoil spring: 1. On an unloaded gun, use the owner's manual procedures to remove the barrel, bolt assembly, and trigger assembly from the action. Warning failure to remove the bolt assembly from the action can make removing the recoil spring a very difficult and somewhat dangerous task! 2. Use a Phillips screw driver to remove the two screws holding the butt-pad to the buttstock. A little spit on the screw driver tip helps get it in the small rubber holes of the butt-pad. Then, use a 3/16 hex drive (commonly called an "Allen" drive) to remove the buttstock from the action/spring tube. 3. Use a 19mm (or 3/4") 6 point socket or wrench to remove the retaining cap keeping the recoil spring trapped inside the action spring tube. BE CAREFULL THE 19mm CAP IS UNDER SPRING TENSION. WARNING: ITS UNDER TONS MORE IF THE BOLT ASSEMBLY WAS NOT REMOVED IN STEP 1 ABOVE! 4. Remove the spring and action plunger from the tube. 5. Thoroughly clean the tube, spring, plunger, and the receiver. Apply gun oil that won't gel in the cold to the plunger and a few drops inside the tube (BreakFree CLP, RemOil etc). 6. Clean, lube, and fully reassemble the shotgun by following the procedures above in reverse. So, the action spring may be ok, or it may be worn out. If there was a bunch of crud in there, I'd probably try the original spring with the Remelli parts kit (to correct issue #1 and #2 above). I've seen where a 'gunked-up' action spring will work OK in warm temperatures, but cause light primer strikes in the cold (and the action spring was OK). If the spring was worn out, it probably wouldn't work in any temperature. Noting that the gun only has light strikes when cold soaked typically confirms that the recoil spring is probably gunked up but otherwise is ok. Cleaning the recoil spring regularly removes this probability. So, If I continued to get light strikes after fixing #1 & #2 with a "Remelli Kit", and thoroughly cleaning and lubing the action spring at every cleaning... that is when I'd replace the action spring. Remember: Light strikes can result from the bolt carrier not being pushed fully forward... and the action spring does that. But also, #1, #2, and a dirty action spring are the typical primary culprits, not the action spring being too weak. Some folks want to put more powerful springs in the action spring tube. I don't think that is wise as it can cause issues with low powered trap/skeet (low-brass) ammo. Putting a heavier recoil spring in jeopardizes function with light loads. Fiddling with stronger or lighter springs anywhere in the gun can cause issues. It's a well engineered delicate balance of forces. Replacing the old spring with a factory original action spring should bring the gun back to similar factory new performance, but replacement is only necessary when the action spring is cleaned and lubed and still generating light strikes. Thus, replacing the recoil spring may be warranted, or it may be over kill. We offer them as a separate item to meet your desire. Either way cleaning, evaluating, and perhaps replacing the action spring is something you will have to do yourself, as we aren't interested in shipping/receiving guns/receivers. Removing, cleaning. and lubing the action spring should be part of your regular maintenance. Swapping it while you are in there is easy. Bottom line to keep a VersaMax running: Some of the Remington original parts wear quickly & fail. Action springs get gunked up, and springs eventually will wear out. Do the maintenance, evaluate the parts, and replace the primary culprits as you see fit. Our recommendation is to start with fixing #1 & #2 with our "Remelli Parts kit", then cleaning the recoil spring and shoot it to see if the light primer strikes persist... then -if- after putting the "Remelli" parts in, you continue to get light strikes on a clean action spring, you need to fix #3 with a new action spring. But you could just replace the action spring right along with the other parts. It's up to you. FIXING #1, #2, & #3 FIX 99% OF THE VERSAMAX'S OUT THERE... IF YOU ARE CLEANING & LUBING PROPERLY AND RUNNING THESE NEW PARTS AND STILL HAVING LIGHT PRIMER STRIKES, THERE IS PROBABLY SOMETHING WRONG THAT REQUIRES A SKILLED GUNSMITH'S ATTENTION Got suggestions? Lessons learned? Think I'm full of it? Did our products help you? Post a comment below to let us know!
Or if you are shy & don't want to discuss stuff publicly call us at +1 989 795 2526 or use our contact form to initiate an email conversation.
0 Comments
Thanks for visiting the The Badger's Den (the blog for Badger Ridge). If an internet search brought you here looking for muzzleloader solutions, please stick with us: we have the solution to your Remington 700 ML/MLS and Ruger 77/50 woes. I update this blog frequently and what you are looking for is probably one or two clicks away. This blog is sorted categorically and chronologically. So you can find what you want by looking in the appropriate category, or if you know when it was published, you can use the time line. Or just keep scrolling down! If you are new to our site: YES WE STILL SERVICE AND CONVERT THESE OLD MUZZLE LOADERS But for this installment I'd like to tell you about: A new product we'd like to share with you! Pigeon Decoy Shells!I tend to turn what I've learned from my hobbies into our products. In this installment I'd like to share a product that helps me better enjoy one of my Off-Season passions: Pigeon Hunting. We are pleased to offer what I believe is the best compromise between effectiveness, low cost, rapid setup, and portability: Pigeon decoy shells. A Brief Overview of Pigeon's Origin, Habits, & IDIn the United States: pigeon are feral (non-native). A long time ago what we call pigeon were domesticated from Rock Doves, and then eventually brought to the US. Pigeon are raised by many enthusiasts, and released in races and tournaments. Thus pigeon don't have a huge fear of man and will graze near us and our livestock. Just like their Rock Dove progenitors who nested in rock cliffs, pigeon are cavity nesters: so they tend to roost under cover, in old buildings with horizontal ledges. They will hatch and raise young all year round provided there is sufficient feed. Being feral, most states don't regulate pigeon harvest, set limits, nor establish seasons. As feral species compete with native species for resources, most states encourage harvesting them as much as possible, year round. Check your local regulations to be sure. Here in Michigan a base (small game) hunting license is required to hunt pigeon, but there are not any seasons nor bag limits. This makes them excellent off-season fun. To the untrained eye, pigeon and dove look a lot alike. The fact that in Spanish the two birds are called by the same name ("Paloma") says a lot about the two. Not to mention the lecture on taxonomy you could get from an ornithologist that would be mixed with the words dove and pigeon referring to closely related birds. However, it is not hard to learn to quickly distinguish one from the other. Its always important to be able to accurately ID your target. Especially because mourning dove are a North American native migratory species, regulated federally, and also by each individual state. Here in Michigan, it is prohibited to hunt mourning dove (which I call 'dove' frequently in this post). In most other states mourning dove may be hunted in season, with a bag limit, and migratory bird license. Also many parts of the US have additional types of protected doves. A hunter must be able to distinguish between them and pigeons. Pigeon are larger and more plump. Mourning dove tend to hang out on power lines, small tree branches, and will nest without a roof. You will find pigeon sitting on ledges, roof peaks, etc. If you see a pigeon in a tree, it most likely will be closer to the trunk on the fatter part of the branch. The two have drastically different calls. When flying mourning doves tend to sound squeaky, while pigeons have a flapping 'rapid clap' sound, especially when they light or land. I find pigeon wing beats to be erratic and 'floppy' while dove are more rhythmic and snappy. When lighting or landing, its easy to see a pigeon's 'squared off' tail compared to a mourning dove's spearhead shape. There isn't much variety to the dove's dull brown speckled plumage. A pigeon may look like the examples here, or have various white, auburn, and other color variations.Pigeon, just like dove, taste great (I was fortunate enough to live in states where I could shoot dove). The meat is called "squab." Notably squab can also refer to their young... aka pigeon/dove 'chicks'. Their meat is frequently referred to as 'filet mignon of the sky' by us rednecks, as they have dark breasts that when removed look and taste like little slices of back strap. Like waterfowl, pigeon tend to have daily routines. I've found hunting pigeon to be much more like hunting the feed for waterfowl than any upland bird. First, they start their day at the roost, hungry. Unlike freshwater waterfowl, they probably thirst along with their hunger. Having worked their way through the contents of their crop all evening (the expandable pouch in their neck where they store food), they are hungry in the mornings. If they have young, they need to find food then return to the roost to feed them (both the male and the female tend to the young). Somewhat unique to pigeon, siblings will also participate in feeding their younger kin. So once daylight has arrived, they fly off the roost in search of food, and sometimes water. They may return quickly or stay out for the day. With pigeon, hunting the roost is fun and can be very successful, especially after they have fed and desire to return to the roost. But most roosts are close to man, and/or man's livestock. So hunting the roost may not be an option. That typically leaves us hunting the feed. Like many waterfowl, their preferred feed is cut crops. Modern mechanical harvesting has been a blessing to these seed feeders: A portion of the crop is lost and spread over the harvested field. You will tend to find pigeon there. In late summer look for cut wheat, in Fall add harvested corn and soy beans to the list. Also, pigeon will go to roads and other areas with small gravel to get grit for their gizzard. But I've not seen them stay there for long. I've also seen pigeon feed off of spread cow manure. It seems they find the undigested seed in the manure and are happy to pick through it. In my area the Amish plant and harvest organic wheat. Their old-school process of cutting, binding, stacking, drying, and then bringing the wheat in hardly loses a seed. I rarely see pigeon on their cut wheat fields, but I've found them in their silos, and livestock watering holes. One Amish family really likes it when I bring them walleye... you will almost certainly have to talk with the eldest male to get permission. If you are a man, don't expect the women/girls to say much to you. How to Hunt Pigeon A successful pigeon hunt will probably involve: -1. Scouting where they roost: look for buildings, silos, grain bins, with cover and access holes in the sides. If you see pigeon on the edge of a roof or opening, chances are there are more inside. -2. Finding the available feeds, watering holes, and grit. You will probably find the same feed used by dove, ducks, and geese. You do want to observe pigeons on the feed to know what field they are in using. I've seen plenty of fields filled with dove that pigeon pass right by. Sometimes finding pigeon is easy, other times you have to sit a while to determine their movement. -3. Getting access: Once you see their patterns, and understand their daily life, try to get access to those places, set up a hide with decoys, and be ready for fancy flying! Bringing a kid along has improved the number of landowners I've gotten "YES" from. Pigeon are very social birds. I've watched pigeon bypass a very good feed to join a flock on another field with poor feed. The only reason I could come up with for the behavior was a socially driven need to congregate. Thus hunting the feed or waterhole is all about setting up visible decoys in the right spot and getting a little bit of cover. More Specifics on our DecoysI've found our decoy shells just plain work. They are a great balance of effective, light weight, portable, and quick setup/breakdown. Each shell comes with a stake that make them a bit higher than a standing pigeon. This is good: it increases visibility. You want your decoys above any stubble or vegetation that could block them from view. When the shell is sitting on the stake they also have a little bit of a bobbing motion. This is pronounced when facing into or directly out of the wind. The decoy shell has two rectangular holes for the stake. Using the forward hole pivots the shell upwards: like a standing erect pigeon. Using the back hole pivots it downward like its feeding. You can set your spread as you like. I like to set mostly feeders with one erect. Also, when hunting really tall stubble, you can omit the stake and set the shell right on top of the stubble! Pigeon aren't all that smart: they don't need 100% perfect reproductions to be decoyed by them. Moreover, due to domestication, there are so many variations to their plumage there is no such thing as 100% accurate decoys. But again decoys are sold to hunters, not birds! While there are other much more expensive, less portable, finely painted decoys out there: they are not any more effective. I'd argue they are probably less effective because they are smaller, shorter, and don't bob in the wind like our shells. The flat card silhouettes featuring pictures of pigeon are also inferior to our shells. Remember: Effective decoys must 'look like' pigeons from all angles and not be covered up by stubble so they can be seen. I've played with patterns while hunting and I've settled on two simple ones: Light and Dark. Most pigeon plumage are a variation of our dark theme. The lighter plumages are recessive traits, thus you only want a few of the light theme in your decoy spread. Hence, our 6 pack of shells comes with 5 dark theme, and 1 light theme. I am confident that you will find our shells work. They are bigger than a normal pigeon. Waterfowlers will quickly recognize that is a good thing. The better decoys in waterfowl hunting are also bigger. Size matters: bigger means that the decoys can be seen from further away. Birds are fine with giants: So long as the giants look like pigeons, pigeons will decoy to them. How I hunt with our Pigeon Decoy ShellsI set my decoy shells about 20 paces out from a bush, fence row, high stubble, or other cover. If I can find shade in the summer I'll sit there! Sitting in the shade while the birds fly in the sun helps hide the hunter. While pigeons aren't as wary as many other game birds, you will have more success wearing camo, hiding, and blending in. Blinds aren't required, but you can use one if you want. A blind certainly won't hurt. For me, it is better to be mobile than to have a fancy blind. A Great Youth Hunting OpportunityAs a parting thought, I'd also like to encourage bringing a junior hunter along (preferably once you have your set-up figured out and can provide them with a good hunt). Pigeons are pretty forgiving of rookie mistakes, and you can bring them in close to kids just by setting the decoys closer. Let 'em land in the decoys if they will. It doesn't get any better for a youngster with a 410. I give my son first shot... then I bat clean up. Don't be surprised when they keep circling the decoys after being shot at. They are pigeon after all.
Got suggestions? Lessons learned? Think I'm full of it? Did our products help you? Post a comment below to let us know! We've been selling and installing our great 209 conversions for years now. And I've noticed my questions and sales following trends influenced by the various hunting seasons and their associated rules. This time of year many folks are getting ready for Colorado's muzzle loader season, typically focusing on harvesting an elk. So annually, I edit and re-post this one. The commentary here was also added the to the FAQ (Frequently Asked Questions). The FAQ entry: Q: I hunt in Colorado, sabots are not allowed for hunting during muzzle loader season. I want to use your awesome 209 conversion, but you say you recommend sabots with jacketed handgun bullets. What are my options?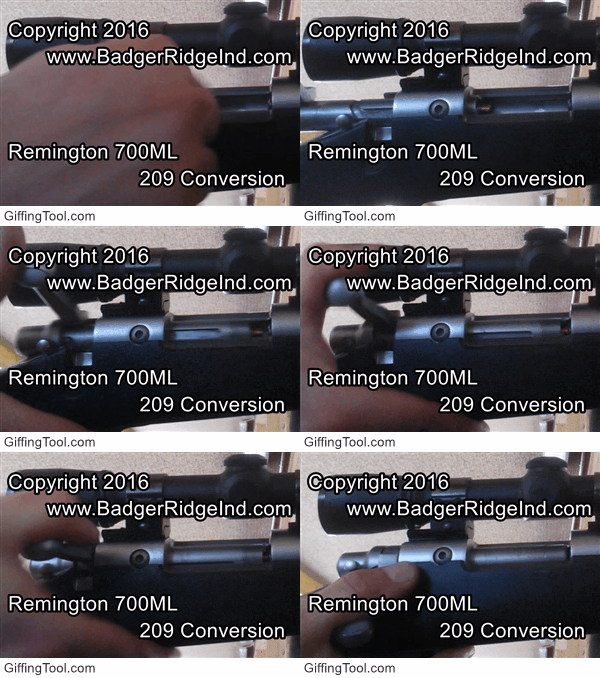 A: Short answer is our kit will work great with any projectile. I've found Pyrodex, Triple Se7en, and black powder work best with non sabot projectiles. So I suggest that you use our kit and any muzzle loader safe powder (besides BlackHorn209) for your Colorado hunts with Colorado legal projectiles. Long answer: I realize not all 50 state have the same rules. And some state’s rules are just plain silly. I wrote a blog post about that. The main thing to remember here: the powder you chose must be compatible with the projectiles you use. Our kit will seal the breech, which keeps the crud out of the bolt and action no matter what muzzle loader safe propellant you chose. Our kit is compatible with all muzzle loader safe propellants: pellets, loose powder, etc. Also using 209’s will give you more ignition heat and thus more reliable ignition over caps. And seeing our system keeps the crud sealed into the breech plug, the 209 is ignited reliably too. But the powder and projectile choice is up to the shooter. Read the manuals/instructions and follow them when developing loads. Blackhorn209 powder is different from Pyrodex & Triple7even: To be reliable BlackHorn209 needs to be fully sealed; i.e. sealed at the breech (which our kit does), and sealed at the projectile. Minnie balls, minet, power belts, B.O.R. Lock MZ and other easy loading projectiles that are legal for Colorado muzzle loading, don’t usually seal until the powder combusts and forces them into the grooves. This deformation sealing the bore after combustion is called obturation. The problem is BlackHorn209 doesn’t burn well until it’s sealed and can build pressure. So it’s likely to have bloopers, miss fires, and hang fires with obturating projectiles. Sabots seal well to start, thus if you are using BlackHorn209, it’s recommended to use sabots. Though the new Hornady Bore Driver bullets are reported to seal well and work with BlackHorn209, I haven't tried them myself. Never use smokeless powder in your Remington/Ruger! It says it right on the barrel! Because Colorado doesn’t allow sabots during the muzzle loader seasons I would stay away from Blackhorn209. (or with a lot of trial, I may try the Hornady Bore Drivers) Otherwise, If I was hunting in Colorado, I’d use our kit, choose a heavy projectile (250gr or more) that seals on ignition: Hornady BoreDriver, Thor, minie ball, lead conical, etc. But without a lot of testing, I wouldn’t use BlackHorn209; I’d try Triple7even, or Pyrodex. Although they are not as easy to clean, and will foul the barrel, they are very easy to ignite even when not sealed, and will obturate the projectile. Black powder will work just fine with these sorts of projectiles too. I do have a few clients that report success with Blackhorn209 and magnum primers (CCI 209M or Federal 209A) using Hornady FPB’s or its aformentioned replacement Bore Driver... and also with Thor bullets. I also had one that said tthe Thors worked well at the range, but didn’t fire when he had a nice bull in his sights. He said it was extremely chilly that morning, his rifle was cold soaked, and the Blackhorn209 wouldn’t go bang. He was very frustrated. I suspect it was because the projectile shrunk with the cold, and the copper jacket wasn't quite as malleable. Also cold powder is just a bit harder to get burning, and thus that setup was unable to obturate the looser projectile and keep the BlackHorn209 burning. Thus without a lot of testing (like putting a loaded rifle in a freezer, pulling it out and shooting the combo... repeatedly). I would stick with Pyrodex or TripleSeven for Colorado muzzle loader hunting: they will go bang with an obturating bore riding projectile when you need it, even when it is very cold. Just about everywhere else, I recommend sabots because they have been accurate, easy to load, and jacketed hand gun bullets have always been very effective for me. Whatever powder you chose, the velocities your muzzle loader will produce are essentially the same that good jacketed hand gun bullets are designed for. They tend to kill quickly and bring home game. Sabots are allowed in most states, so that's what I usually recommend. Long-term: If I voted in Colorado, I’d pressure my legislature to change the muzzle loader rules. Removing the most effective projectiles (jacketed hand gun bullets are great in muzzle loaders), and the most modern muzzle loading propellant (Black Horn 209) from use is bad for the game receiving the projectile. I believe the no sabots rule promotes wounded/lost animals. Many folks find their way to this blog from a simple internet search. Frequently because they are having muzzleloader trouble like misfires, failure-to-fire, are tired of blow back, etc. Some just want to use Blackhorn 209 powder (which will misfire or blooper if not sealed up).
Other's have a friend that fixed his woes with our system, or saw a modified rifle at the range using our awesome 209 conversion for Remington 700 ML's and Ruger 77/50 rifles. Some just know that there has to be a better way, and there is: you found it in our kits. However you got here, and whatever shape your rifle is in, welcome to the best, last conversion you'll ever want on your rifle, and a great source for other hard to find Remington 700 ML parts. We have many products, but we do focus on the The Remington 700 ML/MLS & Ruger 77/50 muzzle loaders (both have been out of production for years now). These rifles now vary in condition. Some have hardly been used. Others used, but well cared for. Some have been neglected. So their condition truly runs the full gambit. This is further complicated due to the original design and other 209 modifications sending fouling corrosive gasses throughout the bolt and the receiver. New owners can be further confused by the various kits that may have been fitted over the years. Our kits fix blow back issues, don't rely on most of the parts people tinker with, and base line the rifle to a solid known good state. Yes, we are still in business, supporting your old muzzle loader and making it what it should have been. If an internet search sent you here, please keep clicking around until you find the solution you are looking for. But in this installment, I need to discuss our business in general. We are a small, family run, veteran owned, home based business. We do many things in house, and have some things mass produced by others. Really, it just boils down to trying to do things as efficiently and best as possible. We are still in the process of building/finishing a large workshop to grow into. This project has taken more time, energy, and resources than planned. Some of that is due to COVID/supply chain restrictions/inflation, and some of that is just my optimistic predictions on my own abilities and talents. We’re about to take delivery of much needed equipment that should allow me to begin retrofitting vent liners into breech plugs in house again. (This was being subbed out for a while, then we lost that sub/friend to cancer, and then suffered delays). Also its tax season (I’ll hold back from venting about our taxation system, and the time suck its been to our business), and many folks (more than usual this time of year) are asking for other things to get done (like bolt conversions). As I age, it seems I’m able to work a little less, and am spending more time tending to aches. So it just seems there isn’t enough of me to go around. I also like to hunt/fish, and we are a ‘family’ owned business. God & family comes first. Then my hunting/fishing. Always good to get the family hunting/fishing with me. All of this is slowing our production rates and increasing turnaround times. Your patience is appreciated. I guess I just want you to know, that we know, that some things are taking longer than they usually do, and we may not be living up to prior expectations. We know this, and are working as best we can to grow efficiently, while meeting demand. Please accept our apologies, and hope you can relate to our position. Also, prices of materials, and everything else is going up for us. So you will observe our prices move up as well. Inflation seems to be the sign of the times. All the above have slowed our development of new products and services (like the Austin & Halleck sealed breech 209 system, and some 3D printed items that have been suggested by our customers or are just rolling around in my head). Its also slowed revival of some of our stalwart products like Remington 700 MLS bolt bodies and complete new bolts. I won’t rush these. Quality is key to these sorts of products, and I don't have the time to do it all and get them all right... at least not right this minute. Anyways, thanks for your patience and understanding. We are glad that you are swinging by to read my excuses and rambling. Your patronage is appreciated. Your prayers for our efficient continued growth in these trying times are appreciated as well. As always, If you have questions or concerns you can call us (the number is at the bottom of every page of this website), or use the Contact Form to initiate an email conversation. 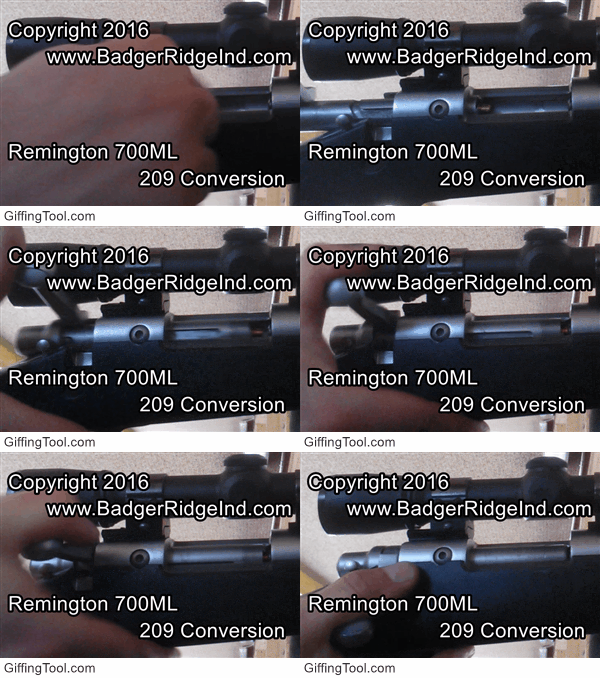 The Remington 700 ML/MLS & Ruger 77/50 muzzle loaders have been out of production for years now. These rifles now vary in condition. Some have hardly been used. Others used, but well cared for. Some have been neglected. So their condition truly runs the full gambit. This is further complicated due to the original design and other 209 modifications sending fouling corrosive gasses throughout the bolt and the receiver. New owners can be further confused by the various kits that may have been fitted over the years. Our kits fix blow back issues, don't rely on most of the parts people tinker with, and base line the rifle to a solid known good state. Many folks find their way to this blog from a simple internet search. Frequently because they are having trouble like misfires, failure-to-fire, are tired of blow back, etc. Some just want to use Blackhorn 209 powder (which will misfire or blooper if not sealed up). Other's have a friend that fixed his woes with our system, or saw a modified rifle at the range using our awesome 209 conversion for Remington 700 ML's and Ruger 77/50 rifles. Some just know that there has to be a better way, and there is: you found it in our kits. However you got here, and whatever shape your rifle is in, welcome to the best, last conversion you'll ever want on your rifle, and a great source for other hard to find Remington 700 ML parts. Seeing the guns are so old, most folks first question is: Does this guy really still sell kits & fix these old rifles? YES WE DO! (Click here to purchase one) You may wonder how it works. You can think of having three basic options: Option 1: Buy a Remington kit and Do It Yourself (DIY). The is your least expensive option. To decide if you want to pay us to convert the bolt, have your gunsmith do it, or try it yourself, I recommend you study the online installation instructions and see the tools and skills needed. The most common thing people mess up up during the conversion process and need to replace is the firing pin, and a new one costs more than our install service. So I always recommend you purchase our install service and send me the bolt (I'm getting ahead of myself as that is option two below). Note, there is not an "Option 1" for a Ruger (the Ruger's conversion is too complicated). Option 2: Send us the bolt and pay us to convert it You can purchase the kit for a Remington and add installation, or purchase an installed kit for the Ruger. Then ship us the bolt. Let's call this option 2. It's in the middle of cost, but very simple as you just have to ship us the bolt, we convert it and send it back. While the costs differ, this option is basically the same between the Remington 700 ML and the Ruger 77/50. When it comes to option 2: you send us the bolt, it's converted, then shipped back with the new breech plug/vent liner and other small tools. Again, with the Ruger 77/50, there is no option one. Option 3: Buy a new bolt we build from scratch Option 3 is the most expensive option: buy an already converted bolt with a breech plug. I only recommend option 3 when people hunt in Idaho, or Oregon (for some hunts in those states they have to use exposed caps, but have other hunts where they can seal the breech and use 209's). This option is also viable for folks who have rifles that are missing bolts. We used to build bolts for both rifles, but right now we only offer this for the Ruger 77/50. If you have a bolt for your rifle, even if its frozen or broken, our recommendation is for you to purchase a kit with our conversion service (Option 2) and send it to me. I'll look it over and let you know what, if anything, is needed to convert it. I have a pretty good track record on salvaging frozen/broken bolts and keeping it cheaper than buying an entire new bolt. If you still have questions, you probably can find an answer in our FAQ, or within the archives along the right side of these Badger's Den posts. Please take a look at the FAQ (Frequently Asked Questions) before you call or use the contact form: the answers you want are probably there (and you will probably get them quicker via the FAQ. If you aren't finding what you need, you can call us (our number is on the bottom of every web page: 989 795 2526) or use the Contact page by clicking here (or under "More" in the banner above) to initiate a conversation. We'll call you back or reply with an email. Remember you can always add what you want to your chart, and complete an online check out. Hope this helps! Welcome to the Badger's Den. This is where we discuss Badger Ridge's solutions to problems, aka Our Products.
We built up this website through many years of trying different things out. Solving problems one at a time in my hobbies (hunting, shooting, HAM radio, flying, etc), I frequently had to develop something unique, or buy something obscure. So we've made it our mission to simplify those things and bring them forward to the masses. Some folks are amazed when they find out we have unique tools and products to solve their issues with their old muzzle loaders, or with the solvent trap they are trying to build.... or with that STACK-ON cabinet that needs more scope stand-offs, just won't hold that SBR or youth model right, and wastes so much space in the door. If an internet search brought you here, but you don't immediately see what you were looking for, please use the menus on the top and sides to continue your search. We update this blog often (so what the search engine sent you here for is probably only one click away). But for this installment, I think I need to rant a little about something I did myself. I had to raise our shipping fees. Well really, I raised the minimum purchase to get free shipping to over $100... which effectively raises the fee's our customers pay to ship stuff. It seems like rising costs of everything are the sign of the times. When I was in college I took a class called "Economics." In that class they called this phenomenon "Inflation", but now-a-days the news and the President seem to call it "COVID". Not sure where my education got off course. Let me get a little more personal: I had COVID, that was a rough week (not only for me, but for my dear wife who was fulfilling orders and caring for me and our daughter... also sick with COVID). But then about 4 months later I got a series of shots to prevent COVID. My mother-in-law and the news assured me that this shot would fix everything. But now I guess it's only a shot that reduces the risk of hospitalization from getting COVID. Oh and 1st class mail seems to randomly run slower due to COVID. Personally, I have family & friends that died due to COVID. And I mean real COVID, not the died in a car crash and tested positive post mortem stuff. I sadly lost a beloved aunt and uncle after stays in the ICU after getting COVID. So I'm not making light of this; I'm concerned the true crisis is being exploited for political control. I'm seeing costs and prices rise and that's called COVID too? And isn't Inflation like I learned in school? I also learned that inflation was caused by an "increase in the money supply," but I'm told that creating more $ out of thin air is safe & good for us too (by the Federal Reserve, the news, and others in DC). So, I'm confused and feel that if I continue that this post might ramble a bit or hurt someone's feelings. And all of those are bad for business. Anyways: We are a small, veteran owned, family run business. You and your purchase mean a lot to us. I've been writing this blog for many years now; trying to help folks and promote Our Products. If you are interested in our solutions, or have an idea for us, please register (so we can send you emails when we release new products), and contact us (either by phone or writing a contact form). We are always developing something, and looking for new ideas and products. If an internet search engine brought you here offering a solution to a problem, please keep clicking around our site until you find it. Just understand that we've reviewed our numbers and unfortunately have to raise the bar for getting free shipping. Though we are confident our flat rate policy still keeps costs down and predictable. Edited and updated Dec 2021. 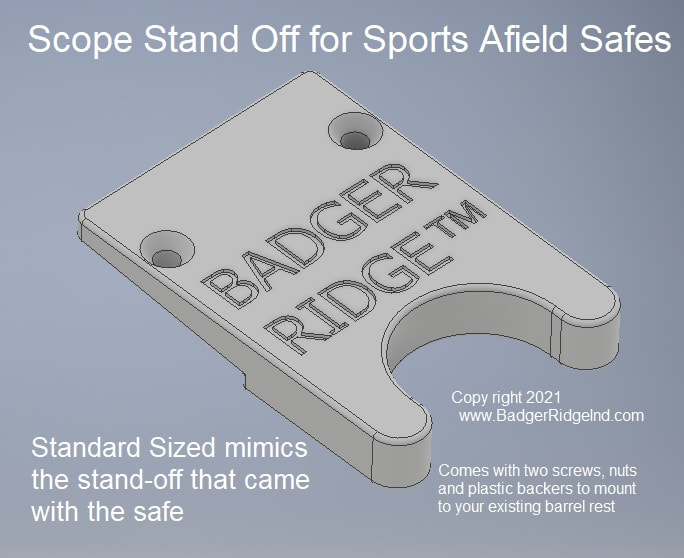 Badger Ridge's Scope Stand-off for Sports Afield Safes (available in 3 lengths) Badger Ridge's Scope Stand-off for Sports Afield Safes (available in 3 lengths) Welcome to the Badger's Den. This is where we discuss Badger Ridge's solutions to problems, aka Our Products. We built up this website through many years of trying different things out. Solving problems one at a time in my hobbies (hunting, shooting, HAM radio, flying, etc), I frequently had to develop something unique, or buy something obscure. So we've made it our mission to simplify those things and bring them forward to the masses. Some folks are amazed when they find out we have unique tools and products to solve their issues with their old muzzle loaders, or with the solvent trap they are trying to build.... or with that STACK-ON cabinet that needs more scope stand-offs, just won't hold that SBR or youth model right, and wastes so much space in the door. If an internet search brought you here, but you don't immediately see what you were looking for, please use the menus on the top and sides to continue your search. We update this blog often (so what the search engine sent you here for is probably only one click away). We are a small, veteran owned, family run business. You and your purchase mean a lot to us. I've been writing this blog for many years now; trying to help folks and promote our products. If you are interested in our solutions, or have an idea for us, please register (so we can send emails out when we release new products), and contact us (either by phone or writing a contact form). We are always developing something, and looking for new ideas and products. After being contacted by Justin H of Nebraska, we'd developed and launched a new product line: Scope Stand-offs & Barrel Rests for Sports Afield safes: After working with Justin via texts and emails for a few weeks, he said I could share his messages and texts with you to help you see how things went. I of course, have edited these for clarity, to keep it pertinent, and protect his privacy. FROM OUR CONTACT PAGE: You've just received a new submission to your Contact Form. Name: Justin H, Nebraska USA Question or Comment I am looking for stand offs for Sports Afield safes (or ones that will work for my safe). I have pictures of the barrel rests and the extensions for scoped rifles, but your system will not let me paste them here. Any help would be greatly appreciated. Please, let me know how to send you the pictures, or if the stand-offs you make for other safe systems will fit. I’ve called Sports Afield: they don’t sell accessories, nor can they tell me where to get more. My safe only came with 2 scope stand-offs. I want more, and it seems the stand-off fairy just puts them in the safe: they have no clue how to direct me to getting more. I'm confused as to how a company has parts made for their safes and is not be able to direct a consumer where to get more accessories. Hoping maybe you can help me out. Thanks! Justin H My reply (via email... if you want our email address fill out a Contact form and we'll email you back... typically within 24-48 hours... but we don't post our email address openly in order to combat spam) --------- Justin, Thanks for your interest in our services and products! You can send pictures here to this email address (or text them to my cell phone below). I'll take a look at what you have if you get them to me. Yours, Tom Main/Voice: 989 795 2526 Cell: (removed... again use the Contact form and I'll gladly provide it to those who need it) To: BadgerRidgeIndustries From: Justin H Tom, Here's some pics of what came with the safe: Let me know if these pics will work. Also, on top of needing more stand-offs, these Scope Stand off's seem a little to short for my rifles with bigger scopes on them. Can you make some of them longer for those rifles? Yours, Justin
From: BadgerRidge To: Justin H Justin, Got the Pics. I think I can help you. Though what you sent looks like it is over-molded in soft rubber: anything I make will be all hard plastic. If you want to move this forward: I will need you to send me a barrel rest (that is screwed to the wall of the safe) and one of the scope stand offs. Once I get them in my hands I can probably mimic them, and make some stand-offs that are longer for your rifles scoped with bigger objective lenses. Our address (for US Mail) is: PO Box 223 Fostoria, MI 48435 Yours, Tom Voice: 989 795 2526 From: Justin To: Tom (Badger Ridge) Tom, I appreciate your patience helping me out. They are in the mail. Justin From: Tom (Badger Ridge) To: Justin Justin, I appreciate the opportunity to make a new product that helps folks. I'll let you know when they get here and when I have a solution to show you. I'll summarize the rest for you... once I got them in-hand, it was pretty apparent I could mimic them (sans the soft rubber over molding). Also it was apparent quickly that the small tits that held the scope stand off to the barrel rest was a weak point. Even weaker when made via 3D printing. After consulting with Justin, we decided the way forward was to utilize screws to hold them to the barrel rest. This requires the installer to chase the existing 3/16" holes on the factory barrel rest with a 3/16 drill (to put the hole all the way through). The pictures below should help: As the barrel rest is tapered, these Nut Holders are also tapered, and require installers to position them so that the nuts are parallel to the top of the scope stand-off (and the screw is therefore parallel to the wall of the safe). On top of developing the 3 different size Scope Stand-offs, we also developed and offer for sale entire barrel rests that mimic the original's dimensions. Our barrel rest is not over-molded with soft rubber, and the holes for the scope stand off are made fully through so that its compatible with both the original Sports Afield Stand-off along with the 3 lengths made by Badger Ridge. We hope to be able to help/serve you with our products. If you have an idea or need please call us or use the Contact form to reach out to us and initiate a conversation. We'll quickly reply via email and give out my cell number if needed! We like to help! I'll let Justin have the last word (cause it does make my head swell): Hey Tom this is Justin. Wanted to personally take the time to thank you for all your help getting me standoffs for my Sports Afield safe. From start to finish the whole interaction has been nothing short of awesome. If only all businesses were as easy to deal with as yours is! With all the commercial and retail chains you don’t get the service you would expect: you only get that from people just like you and your business. I’m so happy I took a chance and messaged you! (on a whim I had nothing to loose..) I’m so happy I did: you went above and beyond! Thanks for the great service the patience and willingness to help a guy like me out. I will be sure and send links to anyone I know share your business with everyone I know looking similar products they can’t find anywhere else. You’re not limited to just what I was looking for! I cannot thank you enough Tom! Sincerely, Justin Welcome to the Badger's Den. This is where we discuss Badger Ridge's solutions to problems, aka Our Products. Some folks are amazed when they find out we have unique tools and products to solve their issues with their old muzzle loaders, or with the solvent trap they are trying to build.... or with that STACK-ON cabinet that needs more scope stand offs, just won't hold that SBR or youth model right, and wastes so much space in the door. We built up this website through many years of trying different things out. Solving problems one at a time in my hobbies (hunting, shooting, flying, etc), I frequently had to develop something unique, or buy something obscure. So we've made it our mission to simplify those things and bring them forward to the masses. We are a small, veteran owned, family run business. You and your purchases mean a lot to us. I've been writing this blog for many years now; trying to help folks and promote our products. If you are interested in our solutions, or have an idea for us, please register (so we can send emails out when we release new products), and contact us (either by phone or writing a contact form). We are always developing something, and looking for new ideas and products. While we are always growing and changing, you could organize what we offer in a few groups: Muzzle loading items & services: We focus on supporting/improving some older out of production muzzle loaders like the Remington 700 ML/MLS, the Ruger 77/50, the Savage 10 ML-II... and getting multiple others to shoot like they were new, or just be reliable with BlackHorn209 via our vent liner retrofit service. We also have primer pocket shims for those break open guns that leak blow by (which can promote trouble with BlackHorn209... it likes to be fully sealed up). 3D printed custom solutions: Organizers for the Doors of STACK-ON gun cabinets. Scope Stand Off's and barrel rests for STACK-ON gun cabinets. While 2019 was full of good, challenging, growth (We moved from Hampton Roads VA, to the Thumb of Michigan... sorta back home for me), in 2020 we developed 3D printed solutions, and have been working on a new prototype for a sealed breech solution on the Austin & Halleck Inline muzzle loaders, along with launching the Breech plug wrench and E-Z tool system for the Savage 10 ML-II, and we are now expanding our business via a new building. We look forward to helping you in 2021. With the new year we are instituting some small changes:US Orders under $50 will no longer receive free shipping. All items are treated alike. So there really isn't any 'add on items' any longer; that category is now "Helpful Extras". Add or subtract them as you like. If you buy more than $50, you will be offered free shipping (to the US/AK/PR/HI per our Terms of Use). We have adjusted prices accordingly on the items under $50 that used to ship free. This is both an adjustment to counter the ever increasing costs of shipping, and to simplify the back end that used to calculate what was an add on item and what shipped for free. Our Canadian customers will notice we removed the flat rate shipping to Canada. Canadians still have to pay to ship their orders, but the system should be able to calculate the exact cost, and offer you options. Some will save, but most will pay more. With the old flat rate to Canada system we ate a lot of shipping fees sending stuff to Canada, especially as the postage rates were changed. We cannot afford to pay any longer, and this seems like the fairest solution (and it simplifies the back end of our webstore as well). The details are in the Terms of Use New Products are coming!Please register and accept emails as we will send out announcements when new items are ready... but here's what we are planning: We hope to be offering our own version of the VS-794 spring, except it will be made in stainless steel and have a slightly lower spring rate. More to follow later on that one. Check our gun cleaning products often if you are interested (besides registering for our emails). Once we get the new workshop finished and up and running we hope to be able to insource more things and produce many more widgets we have up our sleeves. Stand by for more announcements there. Thank you for your patronage! You mean a lot us! 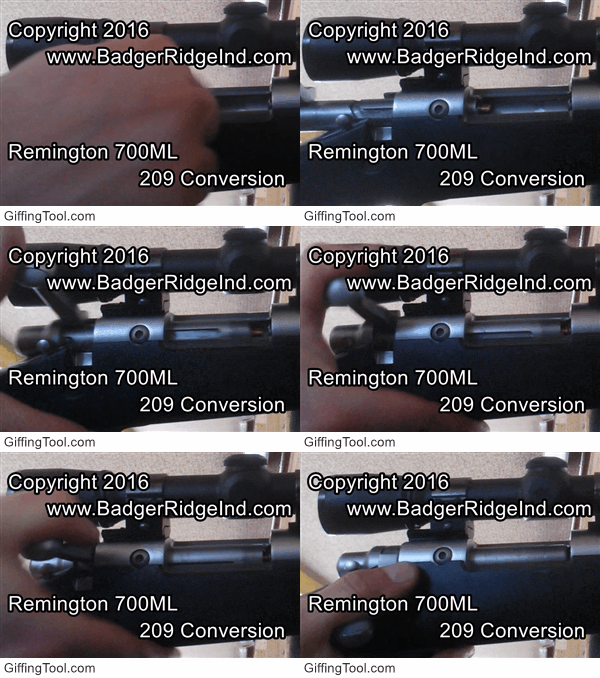 Welcome to the Badger's Den! If an internet search brought you here searching for Savage, Remington or Ruger muzzle loader solutions, don't worry you found the right place! Stay with us! Keep scrolling, Click here, or Look at the banners at the of the page or the right side etc for what you are looking for! Yes we still sell items for these old muzzle loaders! For this installment I'd like to discuss the different types of 209 primers you can use in your muzzle loader and how we got to the point where you have to understand what is compatible with what in order to have a reliable shooter. I'll also be adding this to our FAQ (Frequently Asked Questions). Q: Why do you recommend I don't use muzzle loader primers in my muzzle loader? Why did the "muzzle loader 209 primer" I tried with Blackhorn209 fail but the standard or magnum 209 primer worked? Why does Western Powders (makers of Blackhorn209) say to use magnum primers, but you say I can use standard primers or magnum primers, but not "inline muzzle loading" 209 primers? Why does the primer say it's non corrosive, but you say I need to clean my muzzle loader soon after shooting because it will corrode? I've got a stainless muzzle loader, do I really need to clean it after shooting? A: These are all Good questions with seemingly contradictory information. If you want the short answer, and you have a Remington 700 ML/MLS or a Ruger 77/50, the short answer is: buy our conversion kit, use full powered standard or magnum 209 shotgun primers and pair them with Sabots and Blackhorn209. Clean your muzzle loader thoroughly after shooting. The short answer also can be summarized as: not all muzzle loader and gun cleaning stuff is compatible with all other muzzle loader and gun cleaning stuff. Read and follow each item's directions. Our kits seal the breech, so our kits are compatible with any muzzle loader powder. Using our kit helps simplify much of the compatibility issues. If you want the long answer, please keep reading: The long answer is, well... long: First lets talk about primers in general and then some history of modern muzzle loader and black powder substitute development. Then BlackHorn209 muzzle loader powder. Yes: modern primers (and percussion caps) have been non-corrosive for years. Corrosive primers formerly used fulminates, like mercury fulminate: their residues are corrosive, but for quite some time most western countries have used other non corrosive stuff (like lead styphnate). The Eastern Block countries were slower to adopt non-corrosive primers, which is why you are likely to run into old ammo from them that has corrosive primers. So today primers are still labeled corrosive or non-corrosive... FYI corrosive primers that use Mercury Fulminate attack brass and make it brittle. You want to avoid trying to reload any brass fired with corrosive primers... especially if it has had the residue on it for a while. Regardless of the primer/cap, Black Powder and most substitutes produce corrosive residue (aka fouling). In the unique case of Blackhorn209 it's fouling is not corrosive, but it is hygroscopic (which coats the bore with water that promotes corrosion). So you need to clean any muzzle loader using Black Powder or a substitute soon after firing. Some manufacturers responded to this by offering coatings, like cerakote, nickle, etc... others use stainless steel to protect the gun from the corrosive fouling. Regardless of steel or treatments that may slow the corrosion, cleaning after shooting is still required to protect the metal from the effects of these residues. Also breech plugs and their components (along with bolts in leaky breech setups) can be fused into the rifle by the fouling and its resulting corrosion if not properly protected before firing and properly cleaned after firing. Further complicating things is that Black Powder and most of its substitutes' fouling builds with each shot, and tend to be sticky. This fouling will bind and cement stuff together, like breech plugs into barrels. Blackhorn209 is the exception here. It has no more fouling on the 500th shot than after the first, and its fouling is not sticky nor does it tend to lock stuff together. See the breech plug above... it corroded but didn't get stuck in the rifle after being neglected. But I'll get into Blackhorn later. Crud rings became a problem when the venerable standard 209 primer's with so much more priming compound than percussion caps were introduced to muzzle loading. The crud ring forms near the breech (with Black Powder and all its substitutes... except Blackhorn209). It's caused by the organic residue of Black Powder (and its first substitutes) mixing with the inorganic residue of the priming compound. The reduced powered inline muzzle loader 209's (Remington "Kleanbore", Winchester "777", CCI Inline muzzleloader, etc) were created to combat the "crud ring." The standard shotgun shell is loaded with smokeless powder and smokeless needs a bunch of priming compound to get it burning reliably. So standard 209's are pretty darn hot. With "muzzleloader" 209's, the basic idea is to introduce less inorganic priming compounds because Black Powder and most of its substitutes are reliably ignited by lower charges than a typical shotgun 209 produced. Reducing the inorganic contaminates makes less of a crud ring and makes it easier to clean the crud ring (when cleaning between shots). So that makes these "muzzle loader" primers hotter than a percussion/musket cap, but cooler than a standard 209 primer. However, the logic runs a bit circular when looked at retroactively... guns were designed to use 209s in order to leverage their hotter ignition and hence become more reliable (and of course they were marketed as such and the industry made money). Then more black powder substitutes that were easily ignited, but had organic chemistry were introduced (777 etc, they were marketed as better than Black Powder and the market made money). But the guns became harder to reload/clean because of the crud ring... so the manufactures created "Inline Muzzle loader 209" primer's that aren't as hot but works well enough to ignite most powders and reduce the crud ring (and are marketed as cleaner, but not as less powerful... and the industry makes money). This frequently confuses folks new to the sport... intuition says use the primers labeled 'muzzle loader' in your muzzle loader. Also a general desire to always have the most powerful stuff would mean folks wouldn't buy the "muzzle loader" primer if they knew it was less powerful: So who would label their primers as less powerful? Folk would want to get the more powerful standard or magnum primer and use that wouldn't they? So thats starts some confusion and varying advice on what to use in your muzzle loader. We hope to make it clear what to use and why... so keep reading to find out the rest of the story! Some folks stuck with the more powerful standard primers,,, and occasionally found that if they were shooting easy loading projectiles (aka obturating projectiles that don't seal well or lodge tightly in the barrel until deformed by powder combustion: power belts, bore lock MZ, minie balls, etc), that they lost accuracy with the magnum or standard 209 primers, but when they tried the muzzleloader primers the same loose bullets and powders grouped well. They reasoned they were un-compacting the powder charge before it got fully burning with the more powerful primers. There's so many factors, who knows what the cause is, but the remedy seemed to be using the low powered primer when that rare case arose where full powered primers would not shoot accurately. This also reduced the crud ring. Still, I always suggest folks try standard or magnum primers first. If they can't get a good group, --and they are not using BlackHorn209--, then try the primer with the name of the powder they are using or another muzzleloader specific primer (ie try full powered primers first; if you are shooting 777 and it won't group, try the Winchester 777 primer... or any other low powered muzzleloader 209 primer). Getting a difficult to clean/load situation from a crud ring? Switch to reduced powered primers. Why do I suggest that you try magnum or standard 209's before "muzzleloader" 209s? First, the muzzle loader specific 209's have always been about double the price of standard 209's. I assume that is because they just don't make as many. Second, if you can get it to work with more heat, then that seems better to me as more heat will compensate for other issues when you are in less than ideal situations... like its raining or snowing on a hunt and a big buck appears in front of you. Of course if they are using our kit to seal the breech, I always suggest they stay away from obturating projectiles and use sabots with Blackhorn209 and full powered or magnum primers.. Our kits work with all 209's, and all black powder/substitutes. The real question is whether the propellent you chose is compatible with the projectile you choose. Blackhorn is not compatible with obturating projectiles and is not compatible with weaker "muzzle loader" primers. After reduced power "Muzzle loader 209's" came out Western Powders introduced BlackHorn209 (which is nitrocellulose based) and needs at least a standard 209. Nitrocellulose is inorganic and cleans up with solvents that also dissolve priming compound residue... so no more soap and water/Windex, no more crud ring, no more fouling in the barrel that builds up with each shot (though you can still get priming compound built up and blocking a breach plug's flash channel... you may need to pull and clean the priming compound residue from your breech plug every 10 or 20 shots or so). So now-a-days we have "muzzle loader" primers that are not hot enough to set off nitrocellulose powders (like typical shotgun shells use). And now we have a great powder called BlackHorn209 that has a good bit of nitro cellulose in it and needs standard or magnum 209's to go "bang". However the intuition of some folks is to use the stuff labeled the same as the purpose... got a muzzleloader, so you use "muzzleloader" 209's... right? Definitely wrong when using BlackHorn209. Why bother with BlackHorn 209? Its just a better solution! First, it makes a lot less smoke... you shoot an animal, you have a ton less smoke to look through and watch it run off/fall over dead. Also, because it doesn't build sticky fouling: It doesn't require cleaning until the end of a day, and it cleans with standard gun cleaning stuff like Hoppies etc. Standard gun cleaning stuff was made to clean up priming compound residue and nitrocellulose fouling, copper fouling, lead fouling, plastic fouling etc, but these modern cleaners do not work as well with Black Powder fouling (along with most of its substitutes). BlackHorn209 performs better. It tends to be more temperature stable than BP and its substitutes... ie it doesn't swing as high or low as they do with large temperature swings... (not saying it isn't affected by temperature... just saying it doesn't swing as much). And is generally regarded safer as its harder to detonate than black powder. Just look at its MSDS if you want the specifics. If you were to chrony 300gr projectiles with equal volumes of BlackHorn209 against any other Black Powder or substitute, you'll find BlackHorn209 has an edge in velocity. All of this is why I use and recommend BlackHorn209 with sabots. But you have to use standard or magnum primers with BlackHorn209. This further gets hard for the novice as most stores typically stock muzzleloader only things in the muzzleloader section, but if they have a reloading section that is where they put the standard or magnum 209 primers. Then guys who just want to shoot, hear that BH209 is better, or see a new thing on the shelf, and buy some along with the 'Muzzleloader" primers in the same muzzleloader section. Then try to shoot it in a leaky breech or with a projectile that isn't sealed setup... (remember nitrocellulose needs to be sealed/fully contained to burn properly, the simple answer is sabots... and yes there are other more experimental ways to seal a projectile that I won't address). Because the gun is leaky... and/or they didn't clean the flash channel and burnt primer compound is clogging the breech plug, and/or the breech plug wasn't made to shoot blackhorn209, and/or the weaker muzzle loader primer is used... and/or the projectile isn't sealed (like Bore lock MZ's or powerbelts in some rifles)... Blackhorn209 bloopers, misfires, or hang fires, and folks get upset and blame the powder... when they should be blaming themselves for not reading/following the instructions on the bottle of BH209, and/or walking over to the reloading section and grabbing full powered primers. Or googling it and finding a thread here where I explain how to get it to work in an old muzzle loader built before BlackHorn209 was on the scene (like having us retrofit a vent liner into your old breech plug)... or... Then you get to today: where some of us make a living helping folks through the mess and getting them to simple effective sealed breech solutions. As most of the mistakes have been made, and most of the answers are in the product's instructions, or posted/explained/sold here. If you have a Remington 700 ML/MLS or Ruger 77/50 and you want to seal the breech, or shoot BlackHorn209 we have your solution. As for Western Powders (now owned by Hodgon Powder Company) recommending magnum primers for use with BlackHorn209... all I can do is wager a guess. (I don't work there nor can I speak for them). I --think-- its a combination of: that is what they tested, and tested, and tested. Factored against: if you want it to reliably go off for the best customer experience, have them get the primer with the most priming compound that may correct for a user error (like not fully sealing the breech or projectile, not fully removing oils and contaminates, not cleaning well, etc). Also if hunting in extreme cold, I do recommend magnums myself. Though I must admit, I've never myself seen an issue setting off Blackhorn209 with standard primers that were sealed into our kits when using sabots, but I don't get a lot of negative temperatures to test in. I hope this has helped you. We specialize in sealing up the Remington 700ML (produced from 1995-2005) and the Ruger 77/50. We also sell many items for the Savage 10 ML muzzle loaders, and modify breech plugs from other guns to get them working more reliably with BlackHorn209. Feel free to call and ask questions; we are here to help. Perhaps on another installment we'll discuss how all the 209 primers vary in dimension depending on the company producing them! (important for sealing up 209's into the breech!) Also don't forget that all breech designs are not equal. Leaky breeches not only cover the shooter, the gun's internals, and any optics in that same nasty fouling, but are hard to maintain and not as reliable as sealed breech systems. Keep reading through the Badger's Den for answers and explanations on leaky breeches, why and how we seal them up. 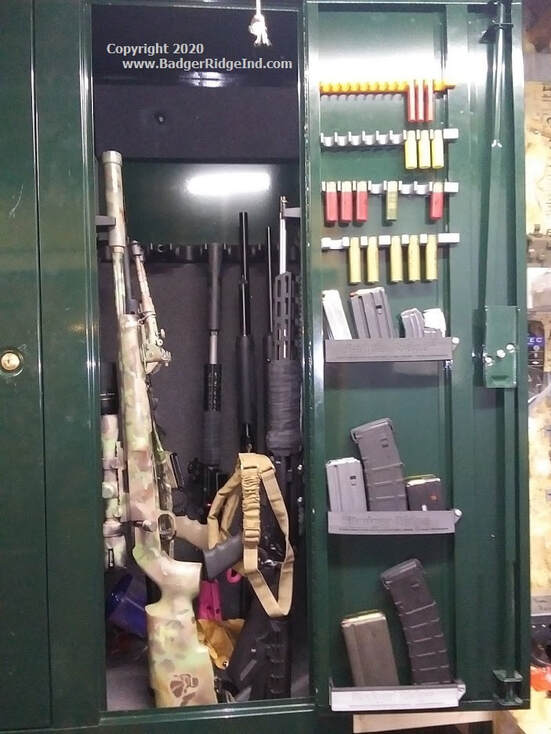 My first cabinet above with three door trays (full of magazines) and 4 shell holders. These were my first prints and installs, please be kind! The design and my attention to detail improved as I progressed! My first cabinet above with three door trays (full of magazines) and 4 shell holders. These were my first prints and installs, please be kind! The design and my attention to detail improved as I progressed! Not sure what to do during this 'stay home' order period? I know what I did. I created a solution to my gun cabinet disorder and I'd like to offer it up to you! Thank you for visiting the Badger's Den. If an internet search brought you here looking for 209 solutions or hard to find parts for your inline muzzle loader, you are in the correct place. Please understand that we continually post new articles here; You may need to use the menus at the top or right of the page, or keep scrolling down to find what the search engine sent you here for! Or just click here to be taken to our muzzle loader product page and start looking a the solutions we sell for older inline muzzle loaders. 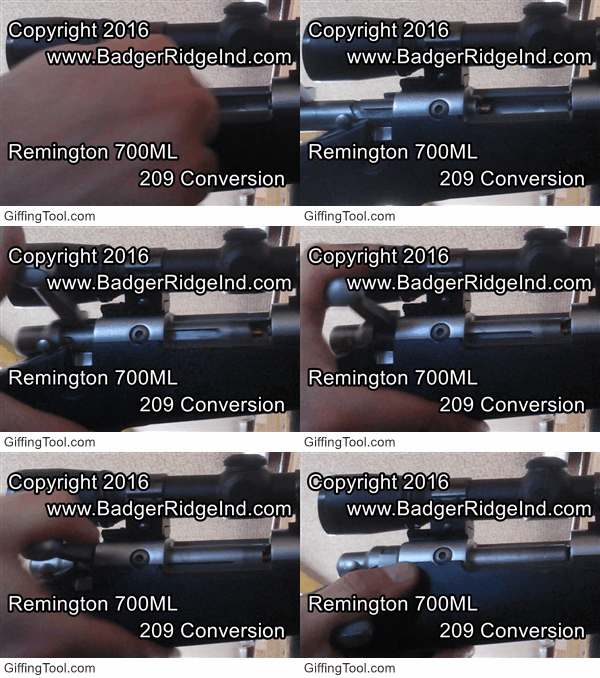 Yes we are open! YES WE STILL SERVICE AND SELL THINGS FOR OLDER INLINE MUZZLE LOADERS However, in this post I'd like to discuss our newest product/service. Gun cabinet organizers If you are curious to what I did and how it can benefit you, keep reading! If you have a 3D printer, you can purchase a license to download and print our designs (for personal use only, and not to distribute and share.. see the EULA for the details). Or you can shop our website for the various organizers we offer. Once you purchase a organization item, we'll 3D print it in tough PETG and mail them to you with instructions and fasteners to install them. My efforts thus far are on the many STACK-ON cabinets I bought to secure my firearms. Yes, I know there are much better, fireproof gun safes, but I find these to be cost effective solutions for securing firearms from children, and meeting legal requirements for secure stowage. Now I can also say I have an organized easy to use system. My dad has Homak cabinets, so I'll adapt what you see here to Homak as time and inspiration allow. If you have another brand, or an idea for an organizer item, click that contact form or call me and we can discuss. 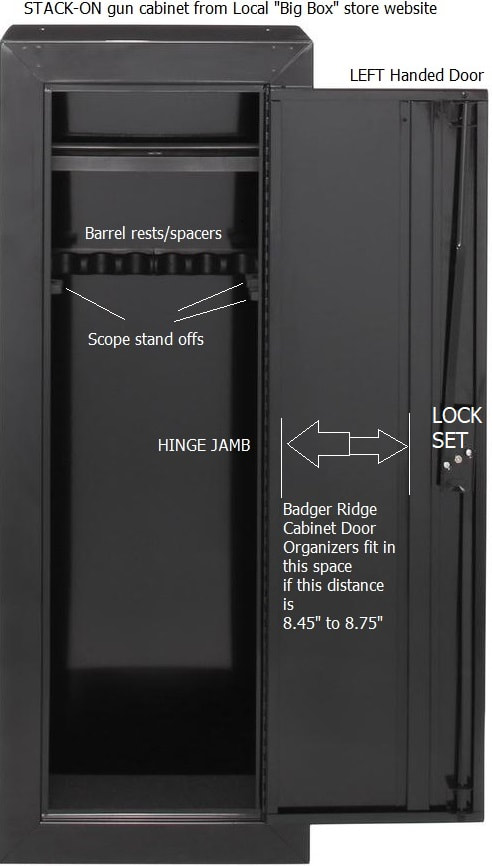 But what exactly are you looking at? What do we offer? Well I'm glad you asked! The most basic things are additional Barrel Spacers and Scope Standoffs. I found I needed them because many of my long guns had scopes, carry handles, or raised sights. And STACK-ON just didn't include enough with their cabinets. So I made my own scope standoffs (seen in orange in the adjacent pictures) But these are just the tip of the Ice berg. 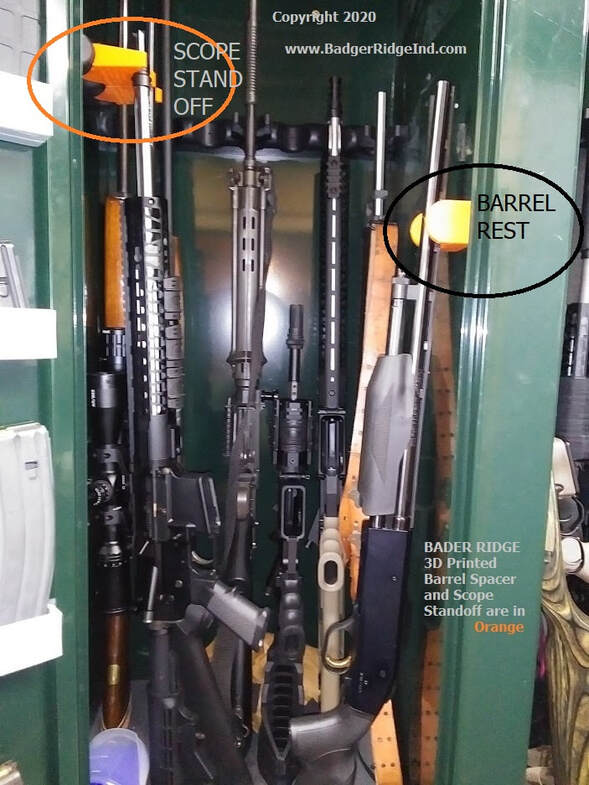 Orange items above are Badger Ridge printed organizers, this is a right handed door Orange items above are Badger Ridge printed organizers, this is a right handed door Once i got my scoped rifles in place, then I need to set up my SBR's and youth guns. They needed barrel rests in places STACK-ON didn't have them... so I made them. I mounted my short guns how I wanted. Then I decided to add storage of all the stuff floating around inside the cabinet, decided to leverage the inside of the door. Just seemed like there was a ton of easily accessible, but wasted space there. So I put it to use. I made shelves for the doors, shell holders for the shells I like to keep handy... mounts for my hand guns... and their magazines. I love the pistol holders! Plus the standard door trays work great for nearly all my fire arm related accessories: - AR-15 magazines - M-1 Enbloc clips - M-14, FN-FAL, CETME/G3 magazines, AR-308/AR-10 Magazines However I needed a deeper wider door tray to take my SDN-6 and D cell form-1 suppressor. In the picture below you can see the deep tray (most of the others in the pictures are standard door trays) Please understand that the pictured B cell cans would have fit a standard door tray, but I wanted to keep them together. The standard Door Tray is 30mm deep (that's about 1 3/16 inches), but the Deep Door tray is 40mm deep (just over 1 9/16). At first I thought I'd put the bigger deeper trays everywhere. Turns out not to be that smart of an idea: trouble with the deep trays is that they project farther into the cabinet and can engage more guns inside. Also tall items that aren't as wide as the tray (like magazines) can tip in the deep tray. Because they don't engage the vertical wall (and none of my mags were wide enough. Not sure, but maybe a Barrett 50 Cal mag would be a good fit for a deep tray? The lesson learned is: to use standard trays for nearly everything and just the deep trays for very wide items that won't fit the standard tray. For me that is my larger suppressors. Though I did design rails to mount and hold things in place that want to tip (available for both the deep tray and the standard door tray). Like these CETME/G3 mags I put in a deep tray (should have used a standard tray... wouldn't need the rail). So where is the catch? During ordering and installation it is essential to ensure the items fit the door, and only buy the deep tray if you really need to hold something that wide! I bought my STACK-ON cabinets over many years as my gun collection grew. So I'd assume there are many more cabinets out there made to these dimensions. These door mounted organizers were designed for doors with 8.45 to 8.75 inches of space between the jamb and the door's stiffener. See illustration of a typical STACK-ON cabinet door. 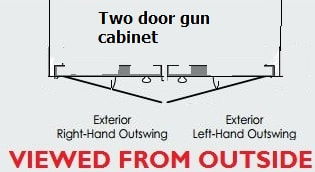 Two door gun cabinet Two door gun cabinet In my cabinets the Left Hand (LH) and Right Hand (RH) doors are mirror images of each other. So one must ensure they choose the correct items for the door they wish to mount them too. But if the customer does this, I think I got the rest of the details as simplified as possible. Please consult the illustration showing a two door gun cabinet. One door is Left Handed (LH) while the other is Right Handed (RH). What is not obvious to persons unfamiliar with door nomenclature, is that the door on the right side of a person standing in front of the cabinet is the Left Handed (LH) door. One way to understand door swing nomenclature (on out swing doors) is to imagine standing outside of the room/box/cabinet that the doors enclose, then to place one hand on the hinge, and the other on the lock set. The door is named for the hand that rests on the lock set. Another way is to imagine your spine pressed up against the jamb where the hinge is mounted. One arm would be able to reach into the cabinet, the other would have its shoulder on the hinge and be able to swing the door... the one that swings the door is what the door is named for. Or... you can just look at the pictures, look at your cabinets and write down what hand doors you have. 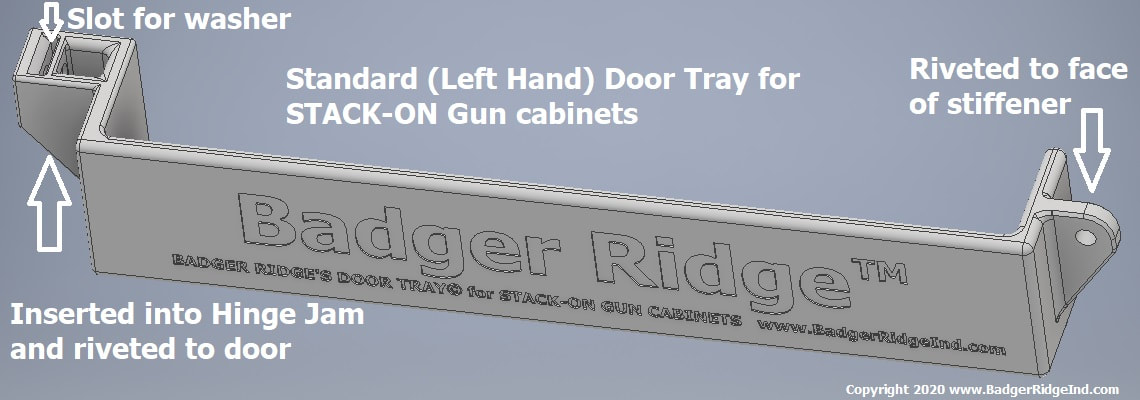 Assuming just about every STACK-ON single door cabinet is like mine (and the picture I pulled off of a big box store website) they should have a LH door. Thus double door cabinets will be the only ones to have a RH door. So I developed our organizers for LH Doors, and flipped a few of them for RH doors. Currently we only offer basic items for RH doors: Door Tray, Deep Door Tray, and 12 GA shell holders are available for both LH and RH doors, while pistol holders, 410/45LC, 44 REM Mag and 20Ga shell holders are only available in LH. Though, as the doors are symmetrical, some things (like shell holders) can be printed for the LH door and used on the RH, though they may have some features oriented down that would typically be up: such as recesses for shell rims, and the recess for the washer that engages the rivet... that can make them harder to install in RH doors, but it is possible. 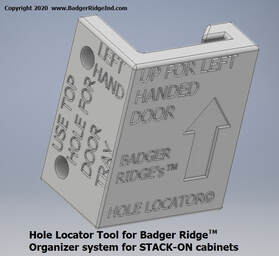 Hole Locator tool makes drilling aligned holes easier Hole Locator tool makes drilling aligned holes easier When someone purchases one of our door organizers, a hole locator is part of what is shipped, along with the needed rivets/screws/washers to install the organizer. This locator is useful in determining where to drill holes in the door hinge-jamb and is designed to snap onto the hinge side of the door. Note: When placing door trays all the way to the bottom of the door they have a small slot that should nest on the door's up turned sheet metal. This greatly increases their strength. To ensure this happens, the hole locator tool must be set on the bottom edge and the top hole used (just as the tool is labeled). Also its important to avoid holes where the hinge is spot welded to the jamb or where the organizer could interfere with the lock set. Don't worry, all this is in the written instructions too! So I've spent a lot of time and resources working on this, mostly for myself, but also I hope it will be well received and help others. The more ambitious and well equipped person may chose to purchase the EULA and print their own organizers. However feel free to chose to have us print them for you. I've made many refinements along the way, and will continue to develop and improve this product with customer feed back. We will print in PETG (one of the toughest FDM 3D printer filaments) and have multiple colors to choose from beyond what you've seen here in these pictures, though through it all, I've become fond of light grey. If you are interested, please take a look at these in our store, contact us via the contact form, or give us a call... especially if you have different brand of cabinet or an idea for a fire arm or cartridge I don't have. We look forward to helping you! Welcome to the Badger's Den! If an internet search brought you here searching for Remington or Ruger muzzle loader solutions, don't worry you found the right place! Stay with us! Keep scrolling, Click here, or Look at the banners at the of the page or the right side etc for what you are looking for! Yes we still sell items for these old muzzle loaders! For this installment I'd like to discuss the Savage 10ML-II (aka 10ML2) muzzle loader (and a little about the short lived Savage 10ML). We have had items that the Savage 10 ML2 uses for quite a while (vent liners & sabots), and have converted a bunch of the original 10ML breech plugs to take ML2 sytle vent liners. We have had a bunch of folks recently calling who needed breech plug wrenches for the original style breech plugs. So I made some. (I believe our wrench may work on the old, short lived 10ML as well, but I never took measurements of its slot to confirm it when I was converting 10ML breech plugs to take ML2 vent liners... so I can't be sure). 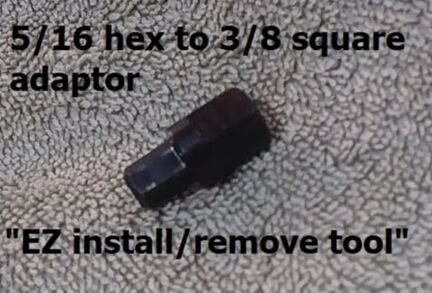 Badger Ridge's EZ adapter/tool Badger Ridge's EZ adapter/tool If you need to remove a original style (slotted) breech plug, our breech plug wrench is for you! Please note that later in the 10ML2's life, savage switched to a 3/8 hex drive breech plug and that just uses a standard 3/8 hex socket. Our wrench is for the original style breech plug with four slots. It is made in the USA! Want to make it EZ? No removing of the trigger guard screw to bolt to get the bolt out, just to take the breech plug out? We got you covered with our EZ tool! Coupled with our breech plug wrench and a 5/16 or 8mm box end: taking the breech plug out with the bolt installed is a breeze! If you have a scope mounted, we really encourage the use of a ratcheting box end! One of the things that set the Savage 10 Muzzle loader apart was its use of a vent liner. Every shot of a muzzle loader forces hot gasses to flow through those little holes in the breech and enlarge them. With expansion chamber style breech plugs, an opened flash hole will reduce accuracy as back pressure that flows through it will vary from shot to shot. To make the system serviceable the Savage 10 ML had a replaceable vent liner (aka flash hole) that looked a lot like a set screw. For the 10 ML-II they used a vent liner that had the same thread but used a standard screw head. Both the 4 slot and hex drive 10ML2 breech plugs use the same vent liner. And the vent liner we sell is a direct replacement in all 10ML-2 breech plugs. I'm convinced what we sell is an improvement over the original. Ours is made out of 17-4 stainless and is heat treated! We also sell gage pins so that you know when its time to replace your vent liner. The vent liner design as seen in the 10ML2 was so successful it was adapted to many other muzzle loaders and is the most common form. Even our Ruger and Remington conversions utilize this basic form. But again, the 17-4 stainless steel Lehigh (Savage type) vent liners we sell are a big improvement over the original black oxide flat head vent liners that came with the rifle originally. The only concern one may have is the Lehigh is driven with 7/64 hex, where the original used a 1/8 hex. If you need a 7/64 hex wrench we sell them. 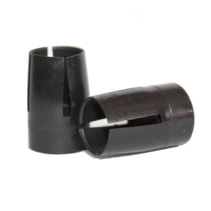 We also sell the same sabots that came with the rifle, and were recommended by Savage: Black MMP sabots. Savage sent 5 black sabots with 5- 250gr Hornady .452 XTP bullets. Its a recipe that has worked well for me in all my 50 caliber muzzle loaders, so you can use them in any .50 caliber muzzle loader... not just the Savage. Save $ by buying your sabots in bulk from us, and getting jacketed hand gun bullets from your local reloading supply store. Hope this post has helped you. You can always use the Contact form to initiate a written conversation, or call us at the number at the bottom of every one of our web pages: (989) 795 2526 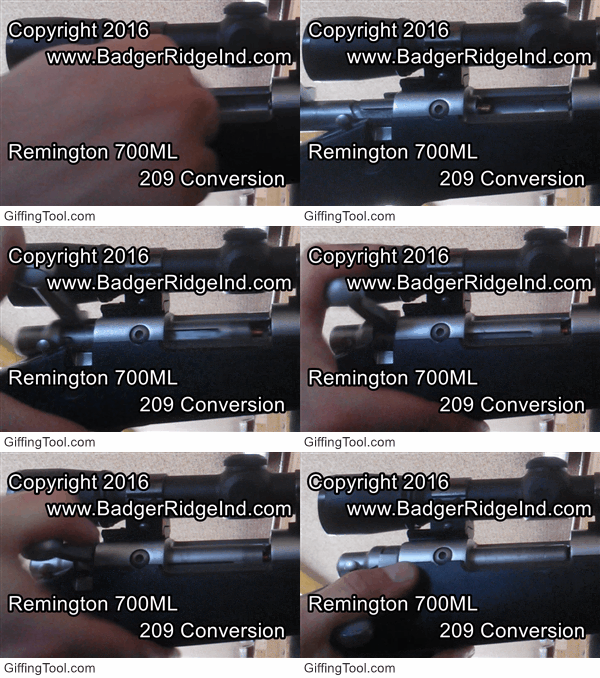 Thanks for visiting the The Badger's Den (the blog for Badger Ridge). If an internet search brought you here, please stick with us: we have the solution to your Remington 700 ML/MLS and Ruger 77/50 woes. I update this blog frequently and what you are looking for is probably one or two clicks away. This blog is sorted categorically and chronologically. So you can find what you want by looking in the appropriate category, or if you know when it was published, you can use the time line. Or just keep scrolling down! If you are new to our site: YES WE STILL SERVICE AND CONVERT THESE OLD MUZZLE LOADERS! Our kits fix blow back issues, does not rely on most of the parts people tinker with, and can base line the rifle to a solid known good state. However you got here, and whatever shape your rifle is in, welcome to the best, last conversion you'll ever want on your rifle, and a great source for other hard to find Remington 700 ML parts. In this post I'd like to share an email conversation I've had: You've just received a new submission to your Contact Form Submitted Information Name: Rodney A Address: North Carolina Question or Comment: Badger Ridge Industries claims on their Remington 700 ML 209 conversion are 100% ACCURATE! My quest for a no nonsense accurate muzzle loader is now over: I’m so happy that I found this product. There’s 5 other muzzle loaders in my gun safe that I’m now considering selling, they just didn’t satisfy my accuracy or ease of use demands. With Badger Ridge's system: No trying to pick a primer out of a nipple In a tiny space, no converted piece of brass to keep up with and re-prime, no weak or fussy ignition system. This system simply works and is very convenient to use in the field. If I were to run across another Remington 700ML, I’d put a Badger Ridge conversion in it with no second thoughts. This system truly makes the Remington 700ML the ULTIMATE MUZZLELOADER hands down. Mr. Rodney, Thanks for the kind words. We aim to please and fix folks woes! To our prospective clients:
Feel free to browse the site. It is full of resources and answers to your questions. Call us, or use the contact form to email us. We care and take pride in our products and services! Read the reviews! Buy with confidence! I'm consistently getting asked the same question: Q: "What primer should I use with your Remington 700 ML 209 conversion kit? I usually give the same answer: A: "I'm my Remington's I use the old copper colored standard CCI 209 primers. The new CCI's you can buy now are silver and have slightly different dimension. The old copper colored ones have never given me any trouble, but I don't have enough experience to recommend the new ones (they are probably fine, I just don't have much experience with them). If I didn't have the old copper colored ones, I'd probably start with a standard Federal, their 209A, or the Remington STS 209's. I'd stay away from Winchester. The Winchesters burn hot and ignite BH209 fine, but they tend to balloon and stick in the nose, so I avoid them. If all you have is Winchester, you may have to dryfire on the spent primer to remove it when it sticks." "In my Ruger 77/50 I use whatever crushes without having to use shims. Just a simpler solution." Then the next question either goes: Q: "But the Blackhorn 209 site recommends, CCI magnum 209 primers?" A: "That is true, however I've had the magnums stick in the bolt nose at lower powder charges and require a dry fire to remove, so I personally stay away from them. If you don't mind dry firing in-order to get the spent primer out of the nose, or you work up to higher charges, you can use them (or any other 209 primer). I've personally had great accuracy and performance with the standard old copper colored CCI and Blackhorn 209 so that is what i use. Federals and Remington STS primers work good too. With our Remington kit, you can really use whatever primer you tune your breech plug to. For the Ruger you can use what gives you a proper crush seal." Or the next question is: Q: "I'm using Pyrodex/TripleSeven/Black powder, I've heard full power primers are too powerful, and will drive the powder down the bore, un-compacting it, and gives inconsistent performance, and poor ignition." A: "That can happen. I believe its most probable with loose fitting projectiles (like minie balls, power belts, Bore locks etc). I stuck with tight fitting Sabots and standard CCI's and was OK back when I shot TripleSeven. Feel free to follow proper load development practices and experiment with other 209 primers. I myself have always been pleased with standard CCI's." "If standard 209's are not giving you the accuracy you want (with black powder substitutes other than Blackhorn209) you may want to try the low power "black powder" only primers. I'd try the ones with the same name as the powder you are using. However, understand, that they may stick in the bolt nose and require a dry firing to remove. ie Winchester 777 primers." If sealed breech and 209 primers are legal for hunting in your state (only Idaho and Oregon restrict sealed breeches and 209's), I suggest you give our kit with Blackhorn 209 a try (and only with regular full power shot shell primers). Blackhorn 209 has given me better performance in every way imaginable. But remember Blackhorn 209 will not work with the low powered "black powder" primers; they don't have enough heat to consistently and fully ignite Blackhorn 209. Check out the video below for real world examples of our Remington 209 kit using old copper standard CCI's functioning just fine with BlackHorn 209 In the video below I shoot a rifle I just converted to sealed breach 209 primers. I used Blackhorn 209 and CCI magnums at 80 grains by volume (a minimum charge), and I got a few sticking primers that required a dry-fire to remove. 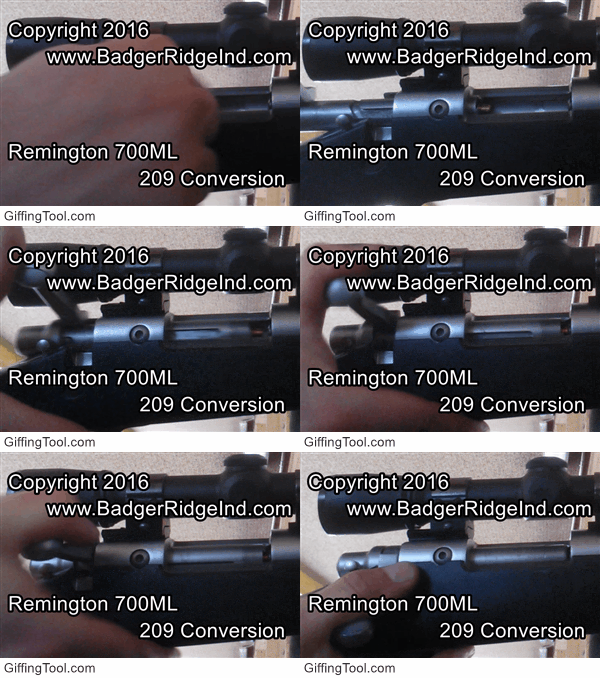 I've been writing this blog for years now. And "yes" if you just found us, we still service and convert Remington 700 ML/MLS & Ruger 77/50 rifles to our sealed breech 209 system. We also weld broken handles back on Remington rifles (Model 7, Model 700 [all variants]) and retrofit old breech plugs with Savage style Vent Liners too. We just moved to Michigan (back home for me), and are still catching up on a few things, and still don't have the work shop set up how I want! Too bad for me as hunting season is rapidly approaching (and hunting is my main hobby)! So for those of you who have been very observant, yes, our address and phone number has changed. But don't worry or concern yourself. We are the same folks, delivering the same great service, and products. And to those of you who are new to us: Welcome! Too find out more about us, our products and services, or to contact us, click on the links on the top menu bar, or you can just scroll down to read more of this blog "The Badger's Den". The blog is organized by date of the entry and by subject. It has many more pages of posts (I've been writing for years now). Chances are if you have a question, the answer is in our FAQ (Frequently Asked Questions), in the Badger's Den, or on the product's page itself. Good hunting! If you are successful in your hunt we'd love to hear about it and see pictures! You can see the successes of our clients here too! 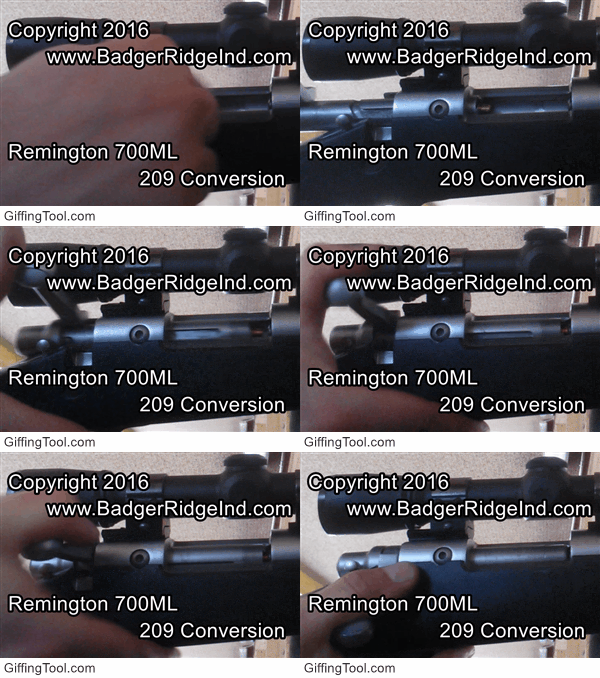 Thanks for visiting the The Badger's Den (the blog for Badger Ridge). If an internet search brought you here, please stick with us: we have the solution to your Remington 700 ML/MLS and Ruger 77/50 woes. I update this blog frequently and what you are looking for is probably one or two clicks away. This blog is sorted categorically and chronologically. So you can find what you want by looking in the appropriate category, or if you know when it was published, you can use the time line. Or just keep scrolling down! If you are new to our site: YES WE STILL SERVICE AND CONVERT THESE OLD MUZZLE LOADERS! Our kits fix blow back issues, don't rely on most of the parts people tinker with, and base line the rifle to a solid known good state. However you got here, and whatever shape your rifle is in, welcome to the best, last conversion you'll ever want on your rifle, and a great source for other hard to find Remington 700 ML parts. In this post I'd like to share a text, email, & phone conversation I've had with a customer recently (I asked and he said it was OK to share it). Mike had a Remington 700 ML and had us convert it a year or so ago. He liked using it (with our conversion) so much he just bought another rifle (his new rifle is a bit of a "basket case", needing serious repair and missing stuff). Here's how our conversation went (First from our Contact form, then edited and summarized from texts, emails, etc... I've taken the liberty to edit and summarize some of this): NEW CONTACT FORM SUBMISSION: Name: Mike L Question or Comment: I have an Remington ML700 stainless bolt body that is missing the handle, I bought this rifle this way. If I shipped the body, would you be able to weld a new handle on for me, and what would the cost be? Mr. L, Its probably best to start by sending me pictures of the bolt that you have. Typically we can do the work, but some folks really torque on stuff then expect us to work a miracle. Send me pics and we'll take it from there. You can text them to my cell or email them to me. Yours, Tom Tom, Here is the bolt with the missing handle. This is the way I bought it. I think it is very usable, but I will leave that to you, the expert. By the way, I purchased one of you 209 conversions and had you perform the conversion. Man is it cool! I made a long range muzzle loader kill with it last year: a nice ram. Mr. L, From what I see: we can weld a handle on that. Seeing there is little silver solder to remove before we reweld, and you are a repeat customer, we'll extend you the less expensive "no solder to remove, virgin weld price." (we usually charge more to remove the silver solder). You will need to purchase a handle (stainless steel) and our welding service. You can buy the handle from us, or purchase one from someone else and ship it with the bolt body. You can chose whatever you want through the drop down menu's on our web site page for bolt handle welding: https://www.badgerridgeind.com/store/p27/700BoltHandleWeld.html Click on the link above and then select the option you want (ie You provide a bolt body & we provide the handle.) PS I would love to see pics of the Ram and hear the story! Tom, Here's the Ram. It was an 175 yard shot. That 209 Conversion is Badass! I have shot 300 rounds with it, wore out one vent liner from shooting it so much! My load: 100 Grains by volume of BlackHorn209, CCI Primers (older copper colored ones), 300 gr Harvester PT Gold bullets. It has been an awesome combination for me! Oh and I Got the bolt back with the new handle! It works great! Mike, Thanks for your continued patronage and sharing your experience with everyone! Yours, Tom 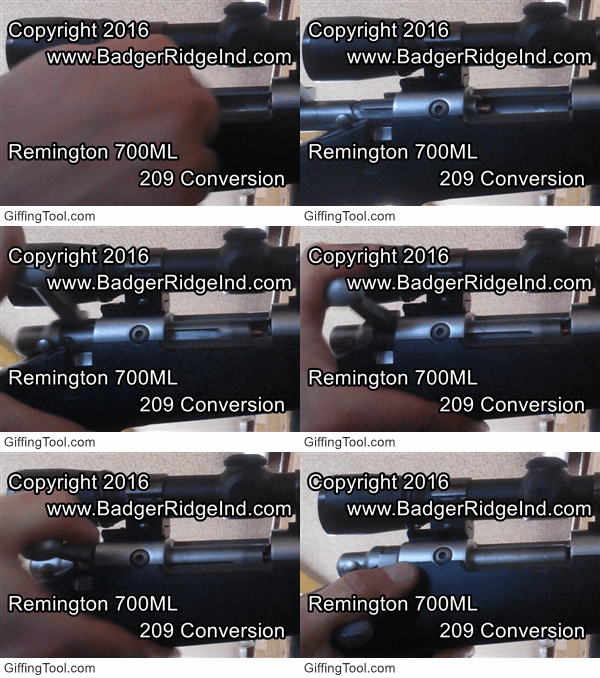 The Remington 700 ML/MLS & Ruger 77/50 muzzle loaders have been out of production for years now. These rifles now vary in condition. Some have hardly been used. Others used, but well cared for. Some have been neglected. So their condition truly runs the full gambit. This is further complicated due to the original design and other 209 modifications sending fouling corrosive gasses throughout the bolt and the receiver. New owners can be further confused by the various kits that may have been fitted over the years. Our kits fix blow back issues, don't rely on most of the parts people tinker with, and base line the rifle to a solid known good state. Many folks find their way to this blog from a simple internet search. Frequently because they are having trouble like misfires, failure-to-fire, are tired of blow back, etc. Some just want to use Blackhorn 209 powder (which will misfire or blooper if not sealed up). Other's have a friend that fixed his woes with our system, or saw a modified rifle at the range using our awesome 209 conversion for Remington 700 ML's and Ruger 77/50 rifles. Some just know that there has to be a better way, and there is: you found it in our kits. However you got here, and whatever shape your rifle is in, welcome to the best, last conversion you'll ever want on your rifle, and a great source for other hard to find Remington 700 ML parts. If you are new to our conversions, you may want to skip this blog post and read some of the others, then come back to this one, as it assumes you already know our conversions are awesome and fix your troubles. However some folks are determined to do some even "heavier meddling" and make these rifles something different. I've looked at this and on a personal level, I'm not interested and won't be doing anything more on my rifles than using our kits to seal the breech, and shoot Blackhorn209 powder. We do have products that will aid those who still want to do that barrel swap and burn smokeless, but I myself won't be going down that path. In this post I want to discuss this 'heavy meddling' and explain why I won't do it myself. The number one question I get concerning meddling and trying to do 'more' is converting to 209's with our kit and shooting smokeless powder in the factory barrel: DON'T DO IT! It says it right on your rifle's barrel. No kit will change the fact that the barrel is not safe for smokeless. I don't care what you read on some forum, or what some guy on the range told you. DON'T DO IT! There are not any magical fairy smokeless powders for your rifle, and there isn't any need to take that risk! The problem here is that muzzle loader safe propellants (like Black Powder, Pyrodex, Triple Se7en, and BlackHorn209) have different burning properties than the wide spectrum that makes up modern smokeless powder. And that difference is what saves folks from blowing up guns (so long as they follow the manufacture's rules, don't double charge, double load, etc). I cannot emphasize enough how using only a muzzle loader safe propellant (and using a witness mark on the ram rod to know the rifle is loaded and avoid a double charge) is the key to enjoying this sport safely. That said, some rifles, with special barrels are made to use certain types of smokeless powder. However, your Remington nor Ruger is not one of them. Yes, some folks swap barrels to make a smokeless gun. They of course are 100% on their own, and liable for their own technical problems and safety issues. If it is possible to do a barrel swap, and may be legal in some states to hunt on some hunts with a smokeless muzzle loader... why do it? What really are you going to get and at what cost? Typically those pursuing smokeless want faster, flatter shooting, harder hitting rifles, and think that they need to go smokeless to get better performance. But how much increase in range or velocity will you get versus the $$$$$ spent? How much heavier or more awkward of a rifle will you make? Will it group any better than what you started with? Doesn't the original leaky rifle, with black powder, already have what it takes to kill anything in North America?!?! Our kits seals up those breach leaks and makes it reliable. Many modern muzzle loading propellants already out perform black powder. These rifles with their factory barrels have a reputation of being very accurate. Do you really need more than that? Looking at these rifles as they came from the factory, folks 'just know' that they could be so much better. I agree: our kits take them to their full potential. I believe the factory rifle (with our 209 kit) is good enough: my rifles shoot reliably, accurately, and harvest deer (the largest game I can kill around here is Black Bear, but Black Bear isn't my thing... but I'm sure my rifles could easily handle Black Bear). I'm confident my rifles, with our kit and factory barrels, will kill any North American game to 200 yds. I'm convinced that anyone with a Remington 700 ML/MLS or Ruger 77/50 in good shape and wants to have a top performing muzzle loader, only needs to use our kit, standard 209 primers, Blackhorn209, sabots, and jacketed hand gun bullets or muzzle loader specific bullets. 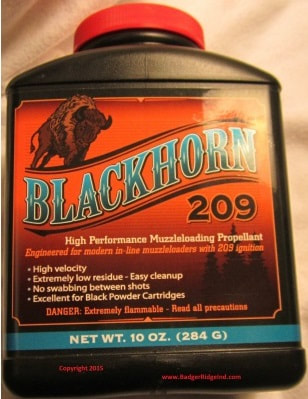 BlackHorn209 gives nearly smokeless performance without the cost, complexity, nor danger. It's sitting on the shelf in my local Walmart. BlackHorn209 gives nearly smokeless performance without the cost, complexity, nor danger. It's sitting on the shelf in my local Walmart. But to continue the comparison: rifles re-barreled for smokeless almost always have much longer, heavier barrels. It must be emphasized that the longer barrel itself gives an increase in velocity... all things being the same: longer barrels increase velocity. Or in other-words, shooting the same powder charge and projectile combination in a longer barrel will generate more velocity. This is because the projectile is in the barrel longer, getting pushed by expanding gasses for longer, so more energy (AKA velocity) is transferred to the projectile. But with BlackHorn209, and your factory barrel, you don't have to go smokeless to get more velocity. At heavier bullet weights, (like 275gr and up) I think you will find BlackHorn209 out performs all other muzzle loader safe propellants. And if you were to chronograph a safe smokeless load in a barrel made for smokeless, and of the same length as the factory barrel, against a BlackHorn 209 charge (both using the same 300gr projectile), the BlackHorn209 load wouldn't be too far behind the smokeless. By too far behind, I'm talking a couple/three hundred feet per second. And lets be honest, 200 to 300 FPS is not much of an increase in range or killing power. In general barrel swaps cost around $1200.00... Frequently more, occasionally less if you do a lot of the work yourself. To consider what our kit does to a standard rifle vs doing a barrel swap, you have to consider the cost against the potential performance increases. And I don't think that $1200 is worth it. Especially because BlackHorn209 is readily available, and safe! You must realize that if you get something wrong with the smokeless gun, you are more probable to have a KABOOM! Remember, a longer barrel is essentially what the newer Remington 700 Ultimate Muzzle Loader (UML) has over the older Remington 700 ML/MLS. The Ultimate is a longer, heavier rifle. It is not as handy, and costs so much more than a good used MLS. Plus I understand Remington no longer will warranty the rifle if its been shot with Blackhorn, so in that case, you are restricted in the powders you can use. I've had plenty of customers tell me they sold their Ultimate and got a used 700 MLS rifle and our kit because it does the job, is more handy, easier to carry, and actually saved them $ because its cheaper over all. I have a Savage 10ML2, new in the box. I've never shot it! Why? Because its super long and super heavy: my Remington 700 ML's and Ruger 77/50's (with their original barrels) get the job done and are so much lighter and handier. And I don't go deer hunting from a bench... I'm walking out to the fields and woods, climbing trees, up ladder stands, etc. My Remington and Ruger rifles with their factory barrels win hands down overall when it comes to hunting. 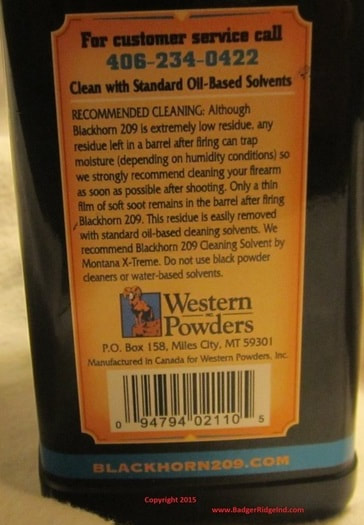 BlackHorn209 cleans up with standard gun cleaning products. BlackHorn209 cleans up with standard gun cleaning products. So for me, I wouldn't entertain a barrel swap unless the barrel was not serviceable. And even then its probably cheaper (and definitely easier) to just buy another rifle with a factory barrel!... or find a take off barrel on Ebay from someone's smokeless build. I get nearly the same performance from my factory barreled rifles, and without all the cost, weight, awkward handling, and added trouble of doing the work to swap a barrel. Dollars & work in vs performance out: I'm tickled pink with our kit and my factory barrels. If you are tired of the clean up of Black Powder substitutes, and wanting to get away from them for that reason, BlackHorn209 comes out ahead there too. Blackhorn209 cleans up great with standard gun cleaning solvents, just like a smokeless gun. You can read more about that by clicking here. All that said: any muzzle loader safe propellant works great in the Remington and Ruger original barrels (with our kits installed on the bolt and sabot/projectile). It so much easier just to convert to our system and get great performance, I don't think I'll ever re-barrel a rifle and go smokeless. But if you are absolutely set on swapping barrels, we offer "half kits." Smokeless conversions usually use a custom breech plug that sits deeper into the breech. So, folks putting a new barrel on a Remington will probably want a longer nose. Our long nose protrudes farther forward and will not work with our standard breech plug, nor the original barrel. The cost is the same for a half kit with a long nose or a standard nose (just tell us in the "note to seller" portion of check out what nose you want). ONE LAST COMMENT ON BARREL SWAPS: IF YOU SWAP THE BARREL YOU OWE IT TO WHO EVER USES THE RIFLE AFTER YOU SELL IT (OR PASS IT ON TO) TO INSCRIBE ON IT SPECIFICATIONS: #1: its caliber, ie ".45 CAL" #2: what powder is safe in it: "Use ONLY BLACK POWDER/BLACK POWDER SUBSTITUTES" &/or "USE ONLY APPROVED SMOKELESS POWDERS AT APPROVED QUANTITIES" etc. 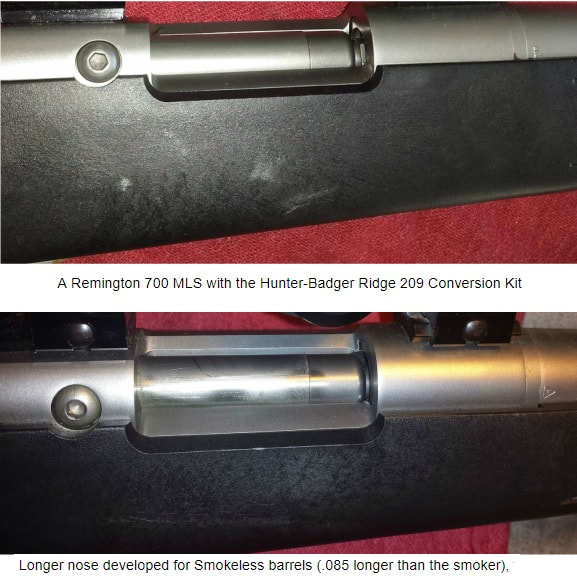 So there you have it. I got on my soap box, and told folks that I'll sell them what they want, but I won't necessarily agree with them that they 'need' it. So if you contact me asking about smokeless mods, I'll try and figure out what your priorities are, see if they could be met with a cheaper option: our kit, the rifle's original barrel, BlackHorn209, and Sabots. Those are deadly combinations. That's my advice, because that is what I use and resolved to myself. Alas, the customer is always right! 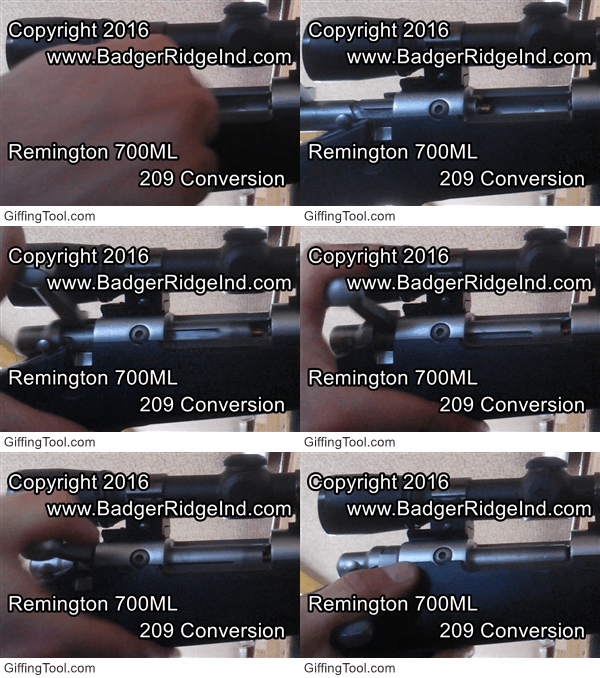 Our Remington 700 ML 209 kit in action Our Remington 700 ML 209 kit in action Welcome to the blog of the company that has the best fix for your Ruger 77/50 and Remington 700 ML/MLS. Our kits are the fix for blow-back, miss fires, etc. Our kits are Blackhorn209 compatible and seal up the breech with 209 primers. If an internet search brought you here, your search is over. This blog has lots of articles about those two rifles and our products for them. You can click on the links in them or in the banner at the top of the screen to find the items you may be interested in. The Remington 700 ML and Ruger 77/50 are our specialty. They both came from the factory with the same fatal flaw: blow-back coursing backwards through the bolt from each firing. The Remington and Canadian 209 mods didn't improve this. If anything they only made blow-back worse. If not quickly and properly cleaned after firing, the bolt will corrode and freeze up. Our kits correct this fatal flaw by sealing up the breech. But not everyone has our kit yet, and seeing these rifles are all 10 to 20 years old, it's all to common for some one to have shot and then put it away without a proper cleaning. Be thankful if the bolt was at least removed! Getting a frozen bolt out of a rifle is a nightmare! So beyond installing our 209 system on bolts that have been well to decently cared for, we frequently get challenged when folks send us neglected froze up bolts. Sometimes we get them before they get beat on, other times we get to see if we can pick up the pieces and make it work. You can read more about some of the crazier ones we get here in the "Badger's Den" by clicking the "Maintenance" subcategory on the menu bar. If you have a tough Remington or Ruger bolt, please reach out to us via our contact form. We'll get back to you with a cell phone number and email address so we can start the process! When the owner of the bolt seen here contacted me asking if I could help, once I replied to him, he was thoughtful enough to text me pics. After looking at his pictures, I was pretty sure I could fix it: But I wasn't certain what parts of his I could salvage and what parts I would need to replace. The bolt plug looked good, which was surprising... usually when folks try to take these apart and break them they mangle something. So I counseled him that I was confident I could fix it, but couldn't be sure of the price until I had it in my hands, tore it down, and scrubbed it all clean. I commonly have to sell new components in cases like this, or have to ask for some more money beyond the basic install fee for my time and tools/materials I put into fixing these. But I told him to start by buying our standard kit and installation, then send me the all the pieces he had from the bolt, and we'd take it from there. When the parts came, it was very clear that the striker/firing pin was fused to the body pretty solid. I tried my normal tricks to get it loose, and even tried to press it out with my jig and 12 ton press. It wouldn't budge. So I began flushing the gunk I could out of it from the back end of the bolt, and tried the jig and the press again. No luck. It actually kept breaking the sacrificial pin I built into the jig to keep from over stressing stuff: This bolt wouldn't break free. Frustrated: I filled the back end of it up with Kroil penetrating oil to sit over night. Worst case, I'd have to sell the customer a new bolt body (we make and sell them). I then turned my attention to the cocking piece. I chucked it up in my lathe and tried drilling it out left handed, that normally does the trick but it didn't budge. So I tried small holes with screw removers wedged in, and every other trick I knew, but it wouldn't budge. So I ended up just drilling it out and leaving the little spiral of the V from the thread in it and then picking that out. It was a bit tougher than removing a screw from a blind hole as it all kept fracturing where the cross pin was drilled through, and it's a deep hole proportionally to its diameter. But eventually I got the parts deep towards the bottome out with a bottoming tap and a small dental pick. I'm glad I could save the customer from having to buy a new one (but we do stock them). I left the bolt body to sit for the evening so that the penetrating oil could do its work. When I came back the next morning none of the Kroil had seeped through to the nose. That wasn't a good sign, as it meant that pin was wedged in there and sealed. I tried the jig and the press again. I sheared the breakaway pin (I was really frustrated having to fab more break away pins!). So I made a new jig that didn't have a shear pin. Either I was going to break the pin free of the bolt body, or I'd break the bolt in the press. At this point I had nothing to lose. Luckily for the customer the 12 ton press and the new jig (and probably the Kroil) did the trick, the pin busted free of the bolt body, but bent the old firing pin the the process, which made it super tricky to get out, but I managed to get creative and work that one out. I was amazed. Typically when I break these apart there are sections of mainspring that come out. In this case the mainspring had completely corroded. It must have been all that corroded mess that I had flushed out the first evening!
Anyways from here it was just cleaning up all the crud, and removing any pitting that would interfere with the new firing pin. Now that I had the parts all apart and cleaned up: it was just a normal installation. I asked the client for a little more money and sent his bolt back to him: Crisis corrected. If you have a tough Remington or Ruger bolt, please reach out to us via our contact form. We'll get back to you with a cell phone number and email address so we can start the process! 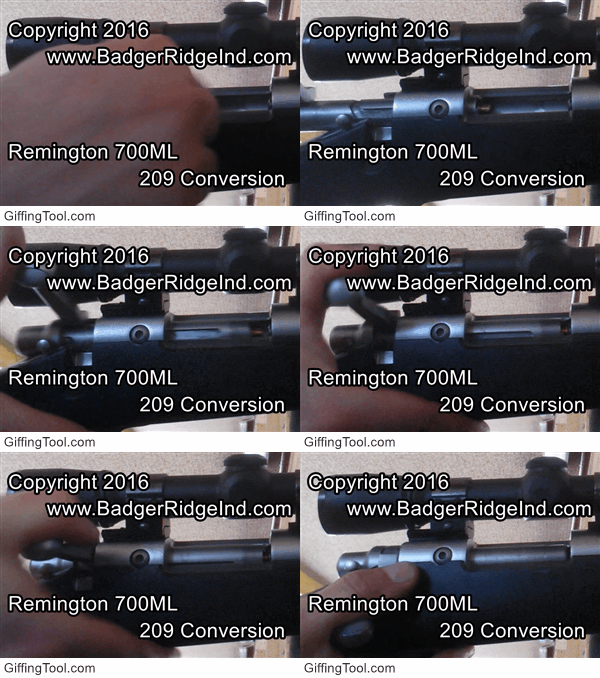 If an internet search brought you here looking for a solution to your woes with a Remington 700 ML or Ruger 77/50 muzzle loader: Don't worry, you are in the right spot and we have the fix you are looking for. Just keep scrolling down or click here for our wonderful 209 sealed breech fixes for those rifles. We are a dynamic business and constantly adding to this blog. In this installment, I figured it was time to discuss breech plugs: what works, why it is probably different than most think, and why I think it works. I'll also showcase our service of retrofitting vent liners into breech plugs (to help them work more reliably, accurately, and better with Blackhorn209 powder). Yes: we can help with more muzzle loaders than the Ruger 77/50 and Remington 700 ML. One of the first things most folks realize when they examine our kits, is that the Badger Ridge breech plug, is unique and different from the rifle's original. Our kits won't work with the original breech plug! Our system just plain works. Because our design works, folks frustrated with igniting BH209 in other rifles send us their breech plug for modification. BOTTOM LINE UP FRONT: A good breech plug is a compromise of many different features. Our design works with any muzzle loader safe powder (we can make other rifles' breech plugs work with any muzzle loader safe powder... like Blackhorn209). I'll try not to delve too deeply into chemistry, physics, and thermodynamics both because most won't care about the details, but also I'd probably rapidly reveal the limits of my understanding. But some basic understanding is required. First, heat flows from hot to cold. There is truly no such thing as cold... cold is a relative lack of heat. Heat can be thought of as a form of energy... thus a hot piece of metal just has more energy than a cold piece of the same metal. So heat from discharging a primer will flow into the metal around it, and into the powder charge we want to start burning. 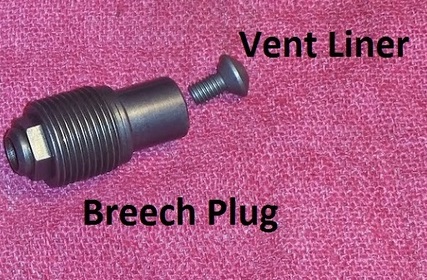 Badger Ridge breech plug with vent liner Badger Ridge breech plug with vent liner So you might be thinking "What does that have to do with muzzle loading and breech plugs?" Well every time we discharge a primer we convert the chemical energy of the primer into heat and expanding gasses. Seeing our real goal is to get the powder burning, the primer's flash needs to be directed into the powder charge, and it has to stay hot to get the powder charge burning. It is the powder charge that turns into more heat and more expanding gasses that push the projectile down the barrel. 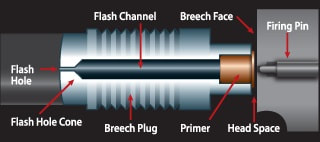 Generic breech plug from BH209.com Generic breech plug from BH209.com So at first it seems to get reliable ignition, you just need to get the primer close to the powder, and minimize the metal in between. And many of the first generation of inline muzzle loaders followed that design idea. But if you have seen any of the more modern breech plugs, especially those that use 209 primers, and are reliable with Blackhorn209: there is a large expansion chamber in front of the primer, creating a big air gap, and has a small hole at the end that abuts the powder charge. Just thinking about heat flow, all the metal that makes up the wall of that expansion chamber, and that super cold winter hunt you might take your muzzle loader on, it seems stupid to lose some primer heat to it. So why does a good breech plug have that chamber? And why would it have a metal constriction on the end of it (ie a vent liner or small flash hole)? Before I answer that, let's consider another reason the flash chamber doesn't make sense at first glance... as the primer's burning gasses expand they would cool just through the act of expanding into the flash channel. Fact: pressure, volume, and energy are all connected. For a steady state, ideal reaction I learned in High-School Chemistry: PV = nRT (or Pressure * Volume = number of molecules * their constant value * Temperature) Or in simpler terms if you don't change the temperature but you increase the volume the pressure will decrease to keep it all in balance. But in real life you get both: as the hot gas expands into the chamber it loses heat just from the expansion, even before we take into account the heat that flows into the cold walls of the breech plug! "OMG" you exclaim, "I knew that primer should be right up against that powder to be 100% reliable!" But, I'd say practice has proven that to be wrong, our breech plugs have expansion chambers for good reason: to keep the powder charge from blowing up the primer and venting gas all over the shooter and dropping accuracy! Remember, after we get that powder ignited and burning, it produces a whole lot more pressure and heat than that tiny, thin walled primer could ever contain. We want all that heat and energy to push that projectile down the barrel, but because there is that small flash hole right next to it, the gas shoots backwards into the expansion chamber that is being sealed by the primer. The trick here is that the flash hole is so small it greatly restricts the rearward flow, and what flow makes it through, finds itself rapidly expanding, dropping pressure, and cooling as it flows into the primer's flash chamber. And that is why the flash hole and flash channel (chamber) are there. They work together to keep the pressure from burning powder from blowing up the sealed primer. Keeping that primer sealed and intact keeps the mess in the breech plug, and tends to increase accuracy as the pressure seen at the back of the projectile is consistent shot to shot. 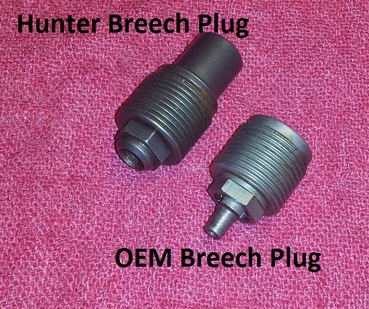 Badger Ridge's Hunter Breech plug versus OEM Badger Ridge's Hunter Breech plug versus OEM Our sealed breech systems have the expansion chamber with a 209 primer sealing one end of it, and a removable vent liner so that we avoid the bad things that happened without an expansion chamber (and I say happened because many of the first 209 designs lacked the expansion chamber and vent liner design, but beware: they are still out there!) Lets over simplify and say that there are four basic ideas on how to make a breech plug. Two are bad ideas, and two work well with the back pressure burning powder generates: 1. Don't even try to seal the primer and vent the back pressure (ie Blow-Back) into the action; let it leak out. This makes a horrible mess, and tends to shorten the life of the system as sticky corrosive goo covers everything. This also tends to send flying fragment primers and percussion caps into things, like the shooter. Also these systems won't work with Blackhorn209 as it has to be sealed up. (BAD IDEA) 2. Seal up the 209 without an expansion chamber and vent liner: Direct all the heat into the powder charge but blow up the primer/cap due to blow back, and then have blow back escape where ever it goes. This tends to drop accuracy as you don't control the time nor pressure when the rupture occurs. Plus just like #1 above, it makes a mess and sends pieces of primer all over the place. And just like #1 above, Blackhorn209 does't like this will yield unreliable performance at best. Again: Flying primer fragments are dangerous! (BAD IDEA) 3. Seal the 209 up with an expansion chamber that has a small orifice at the end to deal with the back pressure the powder charge generates. 4. Use large primer holders/brass cartridge cases that are strong enough to hold the pressure in. 209 primers in and of themselves are not strong enough for #4. Most systems that use #4 use primer carriers and magnum rifle primers, also break actions enclose the 209 primer in steel. -The original #11 percussion cap systems on the Remington 700 and Ruger 77/50 followed 2 mostly. -The Remington 209 modification followed #1 (note the big slits on the side). -The Canadian 209 mods for both rifles did a bit of #1 and #2 in my book (sealed until back pressure unseated the primer, also tended to blow up primers). -The Remington Ultimate Muzzle loader uses #4, but is very expensive and requires reloading gear to re-prime the cases. -Our 209 kits use #3. And we can modify other rifle's breech plugs to do the same. The down side is that the chamber must be sized right: it is "Goldilocks" work. Not too big (lose too much primer heat) not too small (blows up primers). The other down side is that the orifice/flash hole slowly erodes with each shot. 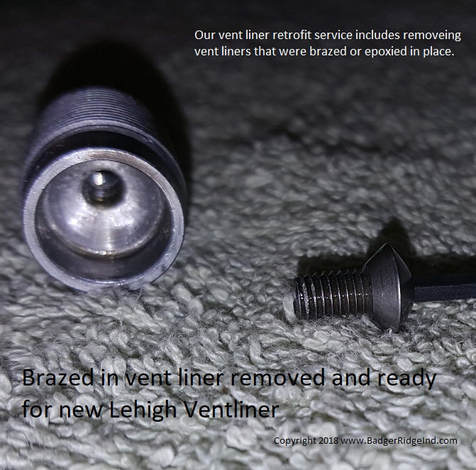 A knight BP that had its vent liner soldered in (removed and ready for a new vent liner) A knight BP that had its vent liner soldered in (removed and ready for a new vent liner) Remember that back and forth flow of hot burning gasses (primer residue and combustion gasses) erodes the flash hole with each shot. When breech plugs that don't have vent liners open up, they loose accuracy. Most folks don't realize this, and just know that their rifle doesn't shoot like it used to. They typically look for loose scope mounts, bad scopes, loose action screws, etc. I get calls from them and they are frustrated as they can't seem to figure out why the rifle isn't shooting well now. For some, the light bulb comes on when I start asking about the size of their breech plug's flash hole. And do they have a gage pin to measure it? I'm confident, that manufacturers know that flash holes have a limited life. Some just go with a cheaper breech plug, or even solder in vent liners! Seems they just want to sell entire new breech plugs. But we usually can offer a different solution: modifying the breech plug to take a vent liner. Most of the time we can convert those breech plugs to take inexpensive vent liners and also put an expansion chamber between them and the 209 primer to keep the primer from seeing excessive pressure. 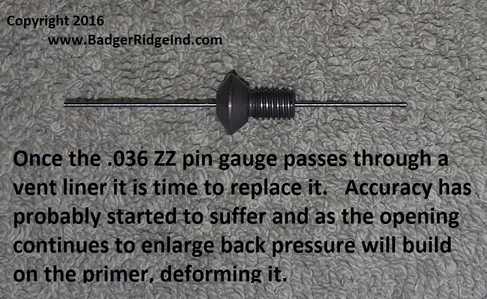 The vent liner is the removable flash hole our breech plugs use The vent liner is the removable flash hole our breech plugs use So there you have it, a good 209 breech plug is a compromise between directing the energy of the primer into the powder, and keeping the pressure from the burning powder from blowing up the primer. To use Blackhorn209 powder, it must be sealed up. To use 209 primers the breech plug needs an expansion chamber that is sized to allow expansion but not rob too much heat, and it needs a small orifice in the end that abuts the powder charge. At Badger Ridge, we go a step further by using inexpensive replaceable vent liners. Our breech plugs are designed for longevity: we use vent liners to cheaply replace the flash hole instead of forcing shooters to buy new breech plugs. And we sell pin gauges so that you know when to replace the vent liner: if it goes through its time to replace. 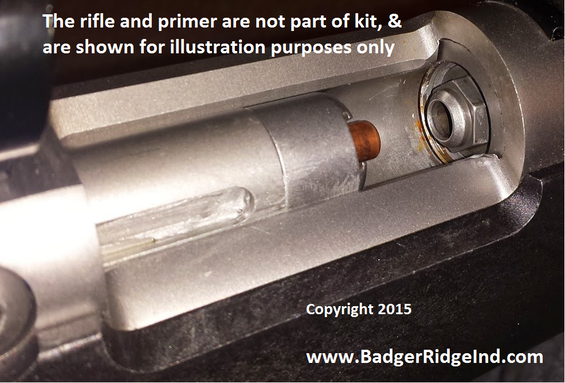 Our Remington 700 ML kit feeding a primer into our sealed breech 209 primer system Our Remington 700 ML kit feeding a primer into our sealed breech 209 primer system Welcome to the website with the only conversion kit you'll ever want on your Remington 700 ML or Ruger 77/50. I've been writing and updating this blog for years. If an internet search brought you here, you will find what you are looking for by reading through these articles or finding the topic you are interested in along the right hand side. A while back I got on my soap box about trying to figure out all 50 states muzzleloader rules.... and the major head ache that it gave me. You can read that blog post by clicking here if you desire. For those who hunt in Idaho and Oregon (The only two states where (I think) you still cannot use sealed breech 209s for all muzzleloader seasons) we offer complete bolts for the Remington 700ML or Ruger 77/50. A second, complete sealed 209 bolt helps folks who hunt in these states to swap between sealed breech system and the original unsealed system. This is useful when one season or area allows sealed breeches, but another does not. However, if you only hunt in places that allow sealed breeches (which is 48 out of 50 states now!), it's always cheaper to convert your bolt than to purchase an entire new bolt. It's always best to have a sealed breech: it stops blow back from getting into nooks and crannies and protects the shooter! Welcome to the website with the only conversion kit you'll ever want on your Remington 700 ML or Ruger 77/50. I've been writing and updating this blog for years. If an internet search brought you here on a quest for solutions to your muzzle-loading woes, you will find what you are looking for by scrolling down, reading through these articles, or finding the topic you are interested in along the right hand side. Many folks who have done business with us have asked us to start offering T-shirts, hats, stickers, etc. We are starting to take that plunge now, and have plans for more! You will want to check back by going to our "Apparel/Clothing" section. Our first T-shirt is a simple black on white with a somewhat provocative statement: "My rights don't end where your feelings begin." These shirts are very comfortable as they are a high performance 50/50 cotton/polyester blend that should last a good while. We'll ship them free to the US, and will also ship to Canada for the extra Canadian shipping rate. Our newest shirt is below, and comes in Coyote Brown (US Army OCP T shirt color):  Welcome to the website with the only conversion kit you'll ever want on your Remington 700 ML or Ruger 77/50. I've been writing and updating this blog for years. If an internet search brought you here, you will find what you are looking for by reading through these articles or finding the topic you are interested in along the right hand side. The Remington 700 ML and Ruger 77/50 are our specialty. They both came from the factory with the same fatal flaw: blow-back coursing backwards through the bolt from each firing. The Remington and Canadian 209 mods didn't improve this. If anything they only made blow-back worse. If not quickly and properly cleaned after firing the bolt will corrode and freeze up. Our kits correct this fatal flaw by sealing up the breech. But not everyone has our kit yet, and seeing these rifles are all 10 to 20 years old, it's all to common for some one to have shot and then put it away without a proper cleaning. Be thankful if the bolt was at least removed! Getting a frozen bolt out of a rifle is a nightmare! I was contacted by a Remington 700 owner who admitted he shot his rifle a few years ago, removed the bolt but never cleaned. He had soaked the bolt in penetrating oil for a couple of days, but he couldn't get it to budge. I recommended he buy our 209 conversion with installation, send me the bolt, and if it wasn't too much additional work I wouldn't bother him. He was on a tight budget and couldn't afford our 209 conversion. So, I told him to purchase our legacy mainspring replacement service and ship me the bolt. We'd go up from there as my time and replacement parts required. We have new bolt bodies, mainsprings, and more! Once I got the bolt in my hands, it looked like any other Remington 700 bolt with the Canadian 209 mod, but indeed I couldn't compress the mainspring nor get it to move when I put it in a rifle. I proceeded to soak it a couple of days in penetrating oil as well. After the penetrating oil bath it still wouldn't budge, so I put it in the jig I made for these bolts and pushed on the firing pin with my 12 ton press. That worked! The firing pin finally gave way and "protested" a little as it protruded. From there I had to cut the firing pin off at point where it threads into the cocking piece. I removed the remnant threaded end from the cocking piece. Then I reversed the bolt in the jig and pressed out the pin from the back: Because it was corroded through in multiple places: most of the mainspring came out (in 3 pieces) with the firing pin, but not all of it. The bolt plug wouldn't unscrew, even after I cleaned it up. I realized the back end of the mainspring had fused itself to the bolt plug, so back into penetrating oil for another night. The next day I managed to get the bolt plug to break free of the body. Removed the mainspring that had fused itself to it, and cleaned up all the pitting. After a lot of cleaning, scrubbing, and gingerly re-freshening of threads: the cocking piece, bolt body, and bolt plug ended up being serviceable. As I had to sacrifice the original firing pin to get it apart, I pulled an old used Canadian firing pin out of my junk bin. All I needed was a new mainspring to put it all back together. The client made my additional trouble 'right' with a few more dollars and it all went back in the mail. While the customer is always right, and he is very happy... I have to admit it didn't sit right with me to do so much work just to leave the bolt with a leaky setup that will likely fail even if properly cared for... and if neglected it will totally lock up again. I really felt this rifle needed our sealed breech 209 conversion. But the customer is always right. Hope this has helped you. If we can help you in anyway (perhaps with a Ruger 77/50 or Remington 700 ML) please use the Contact page to reach out. We usually reply within 24 hrs. Be sure to mention what type of muzzle loader you have!  The Remington 700 ML/MLS has been out of production for years now. Those that are out there vary in condition. Some have hardly been used. Others used, but well cared for. Some have been neglected. The condition of these rifles truly runs the full gambit. This is further complicated due to the original design and other 209 modifications sending fouling corrosive gasses throughout the bolt and the receiver. Our kit fixes these blow back issues. Many folks find their way to this blog from a simple internet search. Frequently because they are having trouble like misfires, failure-to-fire, are tired of blow back, etc. Some just know that there has to be a better way, and there is: you found it in our kit. Other's have a friend that fixed his woes, or saw a modified rifle at the range using our awesome 209 conversion for Remington 700 ML's. However you got here, and whatever shape your rifle is in, welcome to the best, last conversion you'll ever want on your rifle, and a great source for other hard to find Remington 700 ML parts. YouTube video of our Remington 700 ML/MLS 209 kit in action (above) So while our sealed breech, any muzzle loader powder compatible, 209 ignition system may be new to you, its old hat in many other ways. So please let me guide you through figuring it all out: First and foremost, this website has a FAQ (Frequently Asked Questions). If you go to the FAQ and scroll down to the question and answer area for our muzzle loader products, you'll probably find the answer you are looking for. Also, I've been writing this blog for years. Along the right side are all the posts, sorted by date, then Category (subject). If you have a question, the answer is probably in those blog posts or the FAQ. If you want to get it from the beginning, I think some of my very first blog posts will be a good read: How to make a diamond in the rough shine Badger Ridge Industries offers: - The best 209 conversions for the Remington 700ML and the Ruger 77/50, seal the breech and are compatible with any muzzle loader safe powder - MMP sabots, they work great with Blackhorn209 powder and modern hand gun bullets - The best replacement bolt bodies for the Remington 700 ML/MLS - Replacement parts for Remington 700 ML's like bolt stop cam follower screws (similar to Remington #: F99286) and main springs - The best price anywhere on 17-4 Stainless Savage type vent liners - Pin gages to know when your vent liner should be replaced Remember: if you have questions, please read what you can, watch the videos, and then use our Contact form to reach out to us. We usually reply via email or phone call within 48 hrs. (A second YouTube video below)  Feeding a primer and swaging into breech plug to seal Feeding a primer and swaging into breech plug to seal We keep hearing great things from our customers! It makes this line of work very rewarding! We look forward to helping you! Here's an email conversation between us and Wes G from North Carolina! To purchase a conversion or learn more click here, or any of the pictures or links below. You've just received a new submission to your Contact Form. Submitted Information: Name Wes G: I just had you install a conversion kit on my 700 ML. Haven't had a chance to shoot it yet. Can't wait. Question: Groups before your conversion between 1.5 and 2"@ 100 with 105 gr BH 209 and Barnes 290 gr T-EZs. While that level of accuracy is fine for deer @ 100 yds, I am heading to NM for elk this fall and would like to improve my 5" groups @ 200. Thanks. Wes Wes, Try out the kit and see. Usually sealing up the breech improves accuracy as it makes pressures more consistent. What you are reporting is pretty good with any muzzleloader. Tom Tom, Thought I’d send you an update. Shot the conversion yesterday. My previous unmodified load was 110 gr (by volume) BH 209, CCI-M, 290 T-EZ in supplied sabots, averaging 5.25” @ 200 yds & 1919 fps (10’ instrumentation). Since you recommended standard CCIs, I switched to those. Two shots with previous loads were 6.625” apart averaging 1863 fps. Bumped charge to 115 Black Horn 209 (by volume) with standard CCIs and shot a 3 shot group of 3.125” @ 1923 fps [all groups at 200 yds]. Thinking the slower velocity with the 110 gr load was due to the primer switch. Upping the powder got my velocity back with the standard CCI primers. That velocity appears to be the most accurate node from this barrel (having tried 105, 110, 115, and 120 gr by volume). I’m out of both powder and bullets currently, but after I resupply, I will shoot some more to verify repeat-ability. I may also try 110 gr by volume with the CCI-Ms to see how it does. At any rate, I am thrilled with that group and that my glasses, nose, and thumb are no longer coated with soot and oil from the bolt. Thanks for your help and a great product. Wes Wes, That is great! Thanks for the kind words! Remember that you can try the CCI-M's... they may stick in the nose and require a dry fire to remove... but usually that goes away at the higher charges you are using. I always recommended standard CCI's as they have never stuck in the nose on me, but recently CCI changed from a copper colored primer to a Silver, and I don't have any experience with it yet. Regardless, you can use whatever primer you desire with our conversion, they just may require a dry fire to remove them. Thanks for the update... Tom Tom, Here’s a pic. Trying not to get too excited until I get more powder and bullets to make sure that group is repeatable. The 3 shot group with 115 gr by volume was cleaned between shots. Wes  You know you have a great product (like our sealed breech 209 conversions) when so many of your customers take the time to write such detailed, complete, messages. Below is what Al R from Indiana had to say about our Remington 700 ML 209 conversion that he installed himself. For purchasing information click here, or on the pictures of the kit. If you don't want to read his insightful feedback, feel free to click the topics along the right side to find what you want concerning our Ruger and Remington 209 conversions (or click any of these blue links). Good morning, Yesterday I converted the bolt on our family-owned Remington 700ML. My son, Matt, (who is much more computer savvy than I am) ordered it about 7 or 10 days ago. For the sake of you knowing how much mechanical background this (very satisfied) customer has, in 1966 I was an apprentice tool-and-die guy. Within a year or so in the apprentice program I changed career course and enrolled in engineering school, which has paid the bills for the last 50 years, until my retirement. Over the years I accumulated a small hobby garage machine shop (drill press, vertical mill, engine lathe, shaper, welders, etc.). I consider myself an upper-echelon, non-professional, hobbyist. With those credentials, I hereby give a grade of “A” to Badger Ridge for your VERY complete instructions (both electronic and hard copy) and the materials kit for making a Remington 700ML 209 Bolt Conversion. Certainly the key to doing the conversion yourself is “Tool 002”. I’ve attached a photo of my rendition of “Tool 002” that didn’t require welding. (It was only 10°F here yesterday in central Indiana, and I didn’t want to have the shop doors open to do the welding). The B/M for my “Tool 002” is: (1) short piece of angle or barstock (2) #10 ViseGrip pliers (2) ½-13 nuts (while square is best, heavy hex would be ok, and standard nuts would work) (1) ½-13 hex head cap screw, drilled to accept firing pin The other suggestion I have is to recommend that when tapping the cross pin (out and in) the instructions need to prescribe support, or it will bounce, (and eventually bend), I suppose. I used a machinist V-block, but anything could be shimmed up and made to work. As to tuning the breech plug, Fiocchi 209 primers will not fit in my rifle without tuning. I can’t wait to get the scope mounted and some Blackhorn powder and take the gun to the range, once it warms up. On a larger picture, projects like 209 Conversions make America stronger, as DIY people who do these types of projects are problem solvers that extends way beyond a single 209 Bolt Conversion. I’m a strong believer in “Made in America”. I’m glad to see that you’re doing your part. Best wishes to Badger Ridge for 2018, and keep up the good work!! Sincerely, Al Al, Thanks for the kind words, encouragement, and insight on an easy way to improvise a firing pin tool. As for the cross pin removal: I like to use the pipe nipple with the welded nut bolt tool on 700ML's... it holds it all very well, and holds best when clamped in my vice. Makes tapping the pin out a breeze. With this tool I've had little trouble removing all but the most stubborn cross pins. If the pin doesn't want to budge, usually trying from the other side is all it takes. However for the really stuck ones, I do place the cocking piece on the anvil of my vice, or in a V block and use hard strikes to remove the pin. When putting it all back together, using the roll pin we include with the kit (and de-burring the pin with a little light filing) usually requires little undue force. I tend to use the tool I welded up quick (two nuts welded to small angle... similar to the one you shared) when I work on un-threaded cocking piece firing pins that have to have solid dowel pins... and with solid dowl pins, I pre drill 3/32, then disassemble & chase each hole individually with a #41 drill bit. This way the solid dowel pin floats into place (so there is little friction on the pin requiring hard strikes).
As for primer recommendations: Yes, Fiocchi and other European 209 primers are typically fatter than US primers. (I used recommend standard CCI but now that CCI changed their dimensions and color [now they are silver] I cannot recommend them, and instead suggest Federal or Remington primers). With most of these you will probably have to tune. Remember if a primer sticks in the nose, a dry fire usually will loosen it. Thanks again for writing in and allowing me to share your message with everyone, Tom Always love to hear from our customers. Here is what Craig G from Massachusetts had to say about the Ruger 77/50 209 bolt & breech plug he bought from us: Hi, Tom, I just wanted to let you know that I’m very happy with the Ruger 77/50 bolt and breech plug that I bought recently. They arrived fast and the fit and finish is as good if not better then original. Thank you. Job well done. You should be proud of the product and service you provide. Thanks again, Craig Thank you for taking the time to write us! We appreciate the kind words and positive feed back. We are proud of our products and the services we render. We are also proud of our great customers! God has blessed us! Want more information on our Ruger 77/50 209 Conversion kit? Start here or use the categories listed on the right side of this blog.
|
Welcome to the Badger's Den!
|
|
|
Written by:Tom, purveyor of fine products. |
Archives
March 2024
August 2023
June 2023
March 2022
December 2021
September 2021
February 2021
January 2021
September 2020
April 2020
January 2020
October 2019
September 2019
May 2019
January 2019
November 2018
July 2018
May 2018
April 2018
February 2018
January 2018
November 2017
October 2017
August 2017
July 2017
April 2017
February 2017
January 2017
November 2016
October 2016
September 2016
August 2016
July 2016
June 2016
May 2016
December 2015
November 2015
October 2015
September 2015
August 2015
May 2015
April 2015
Categories
All
AR Stuff
Blackhorn 209
Customer Feedback
Hunting Gear & Accessories
Maintenance
Organization
Remington 700 ML/MLS
Ruger 77/50
Savage Muzzleloader
Troubleshooting


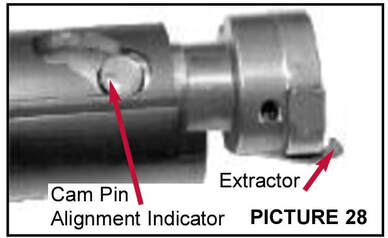
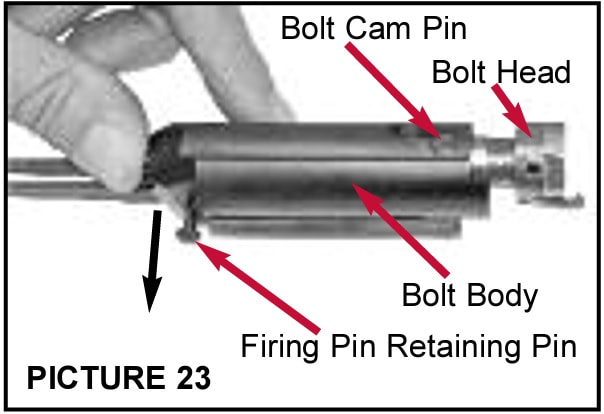
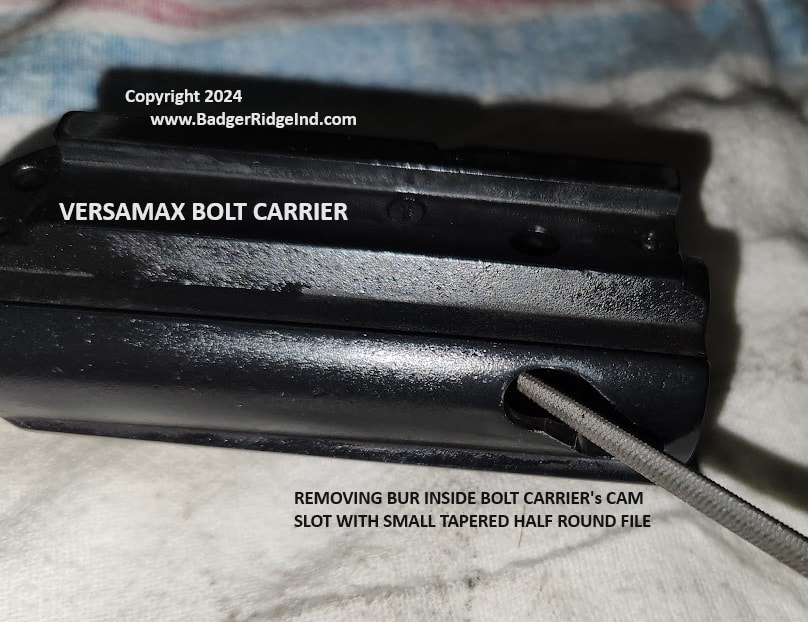
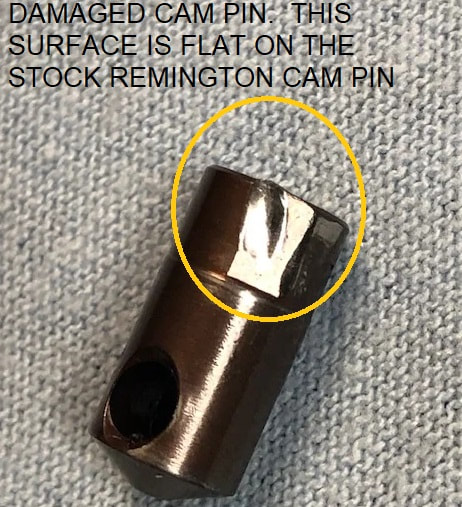
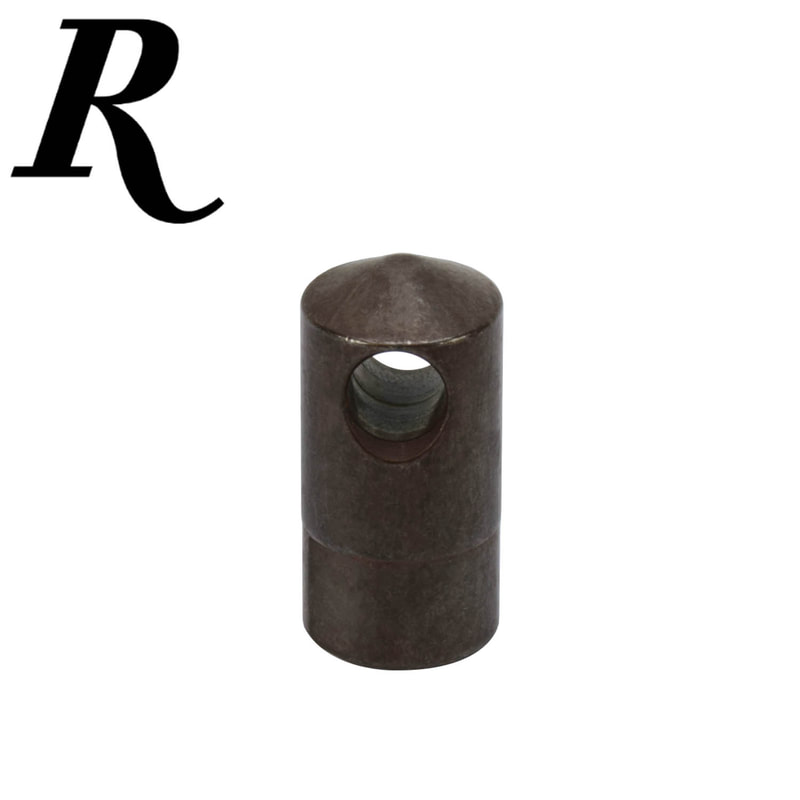
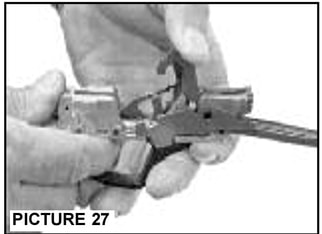
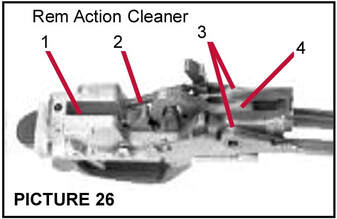
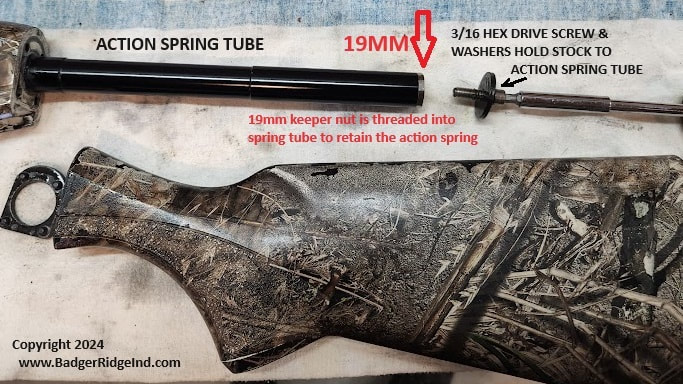

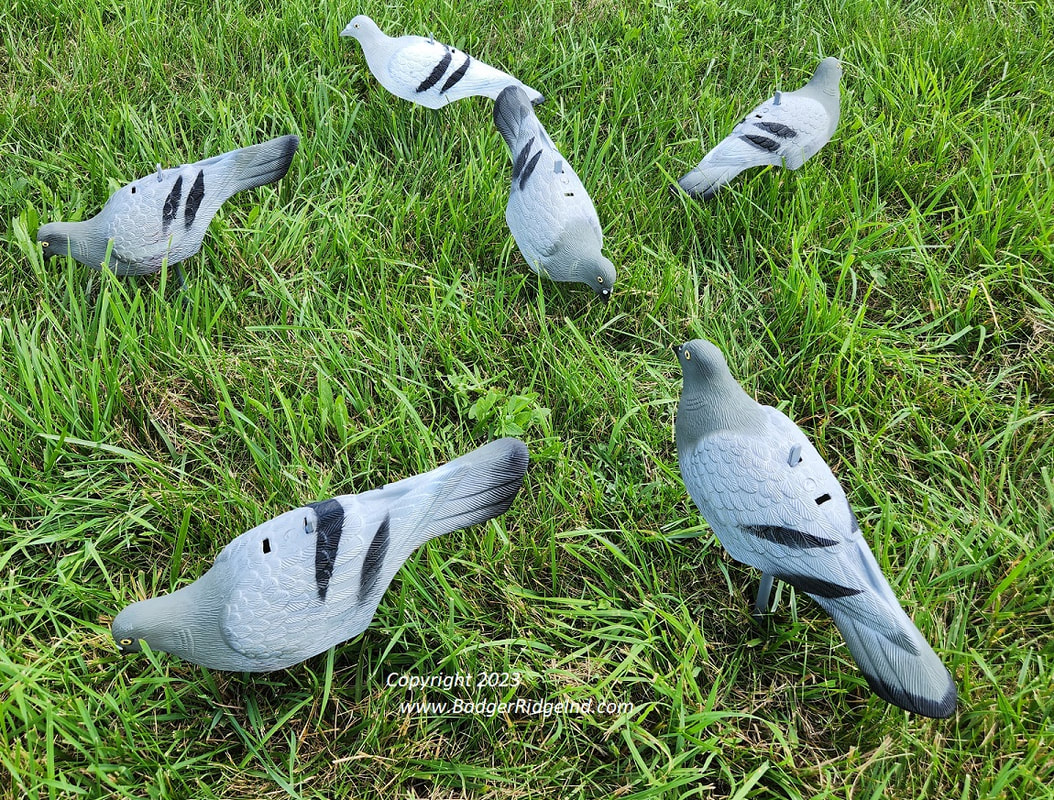


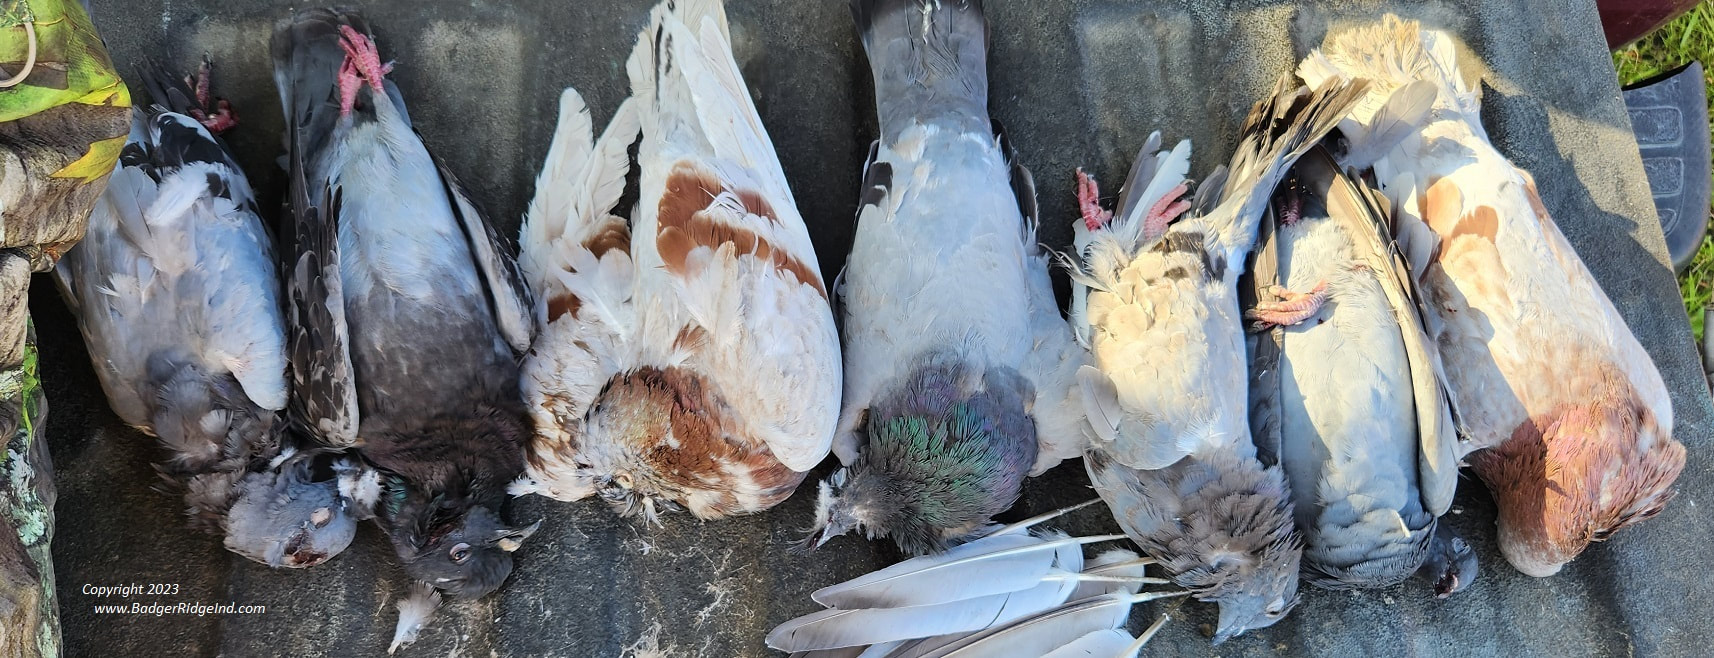
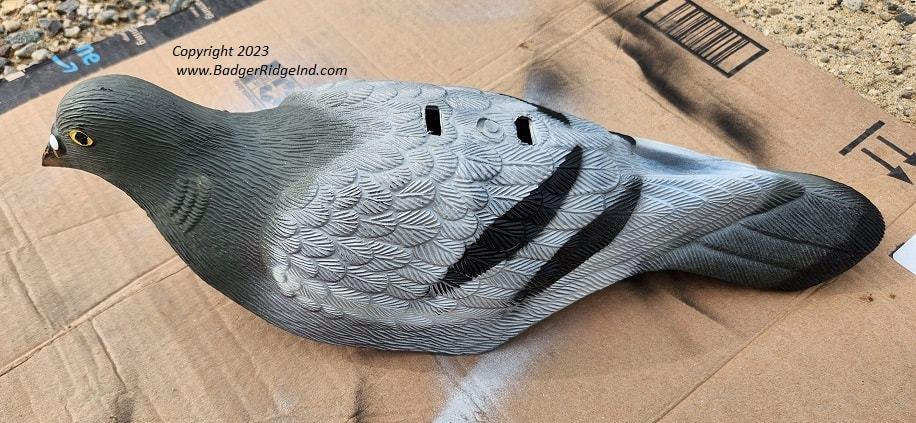
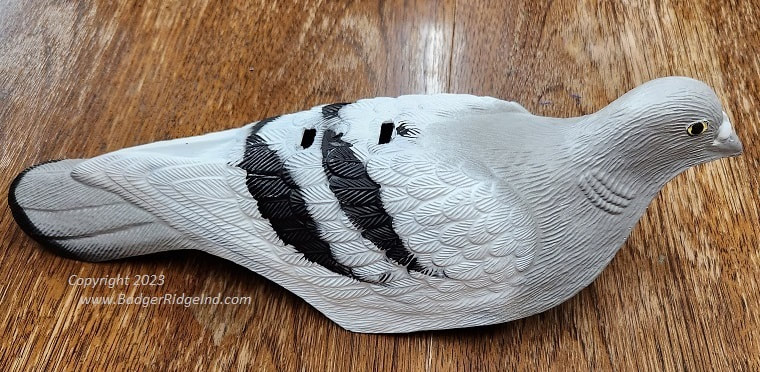

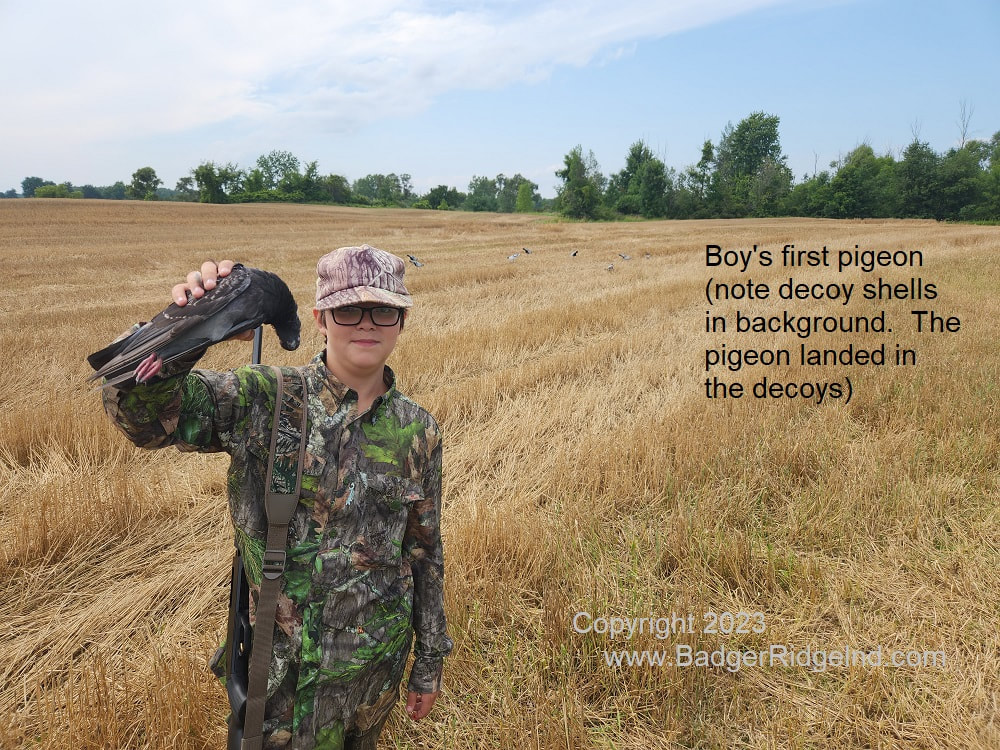
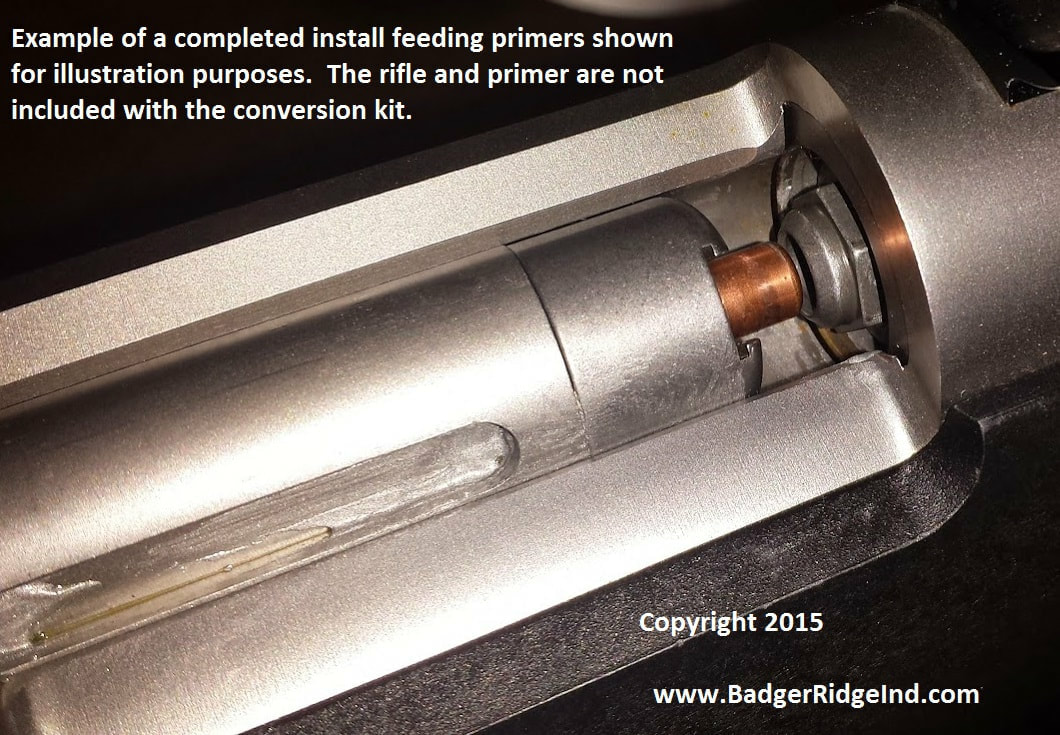
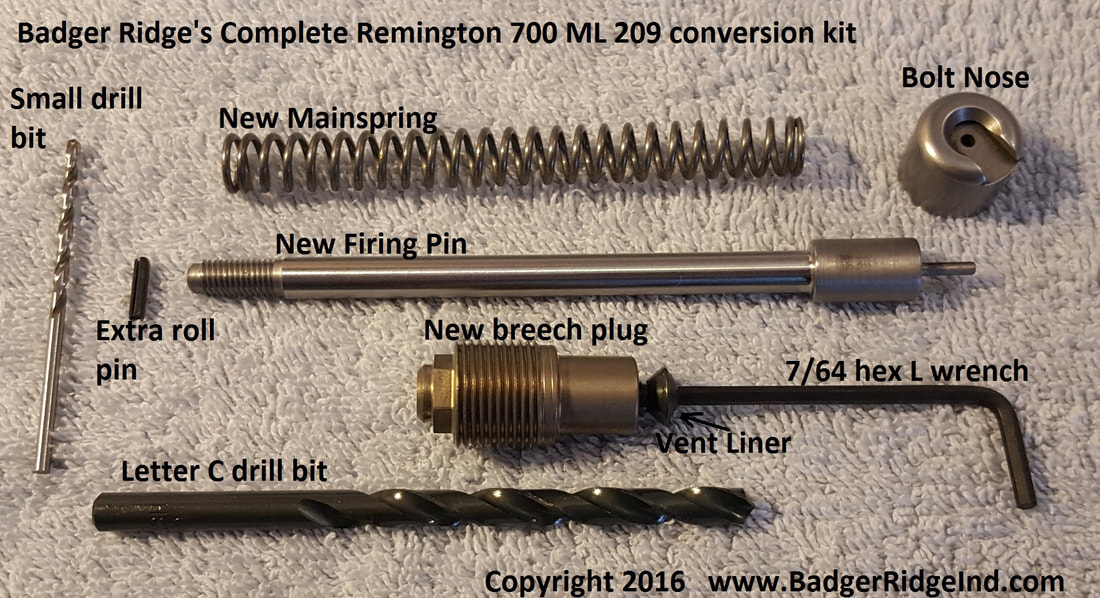
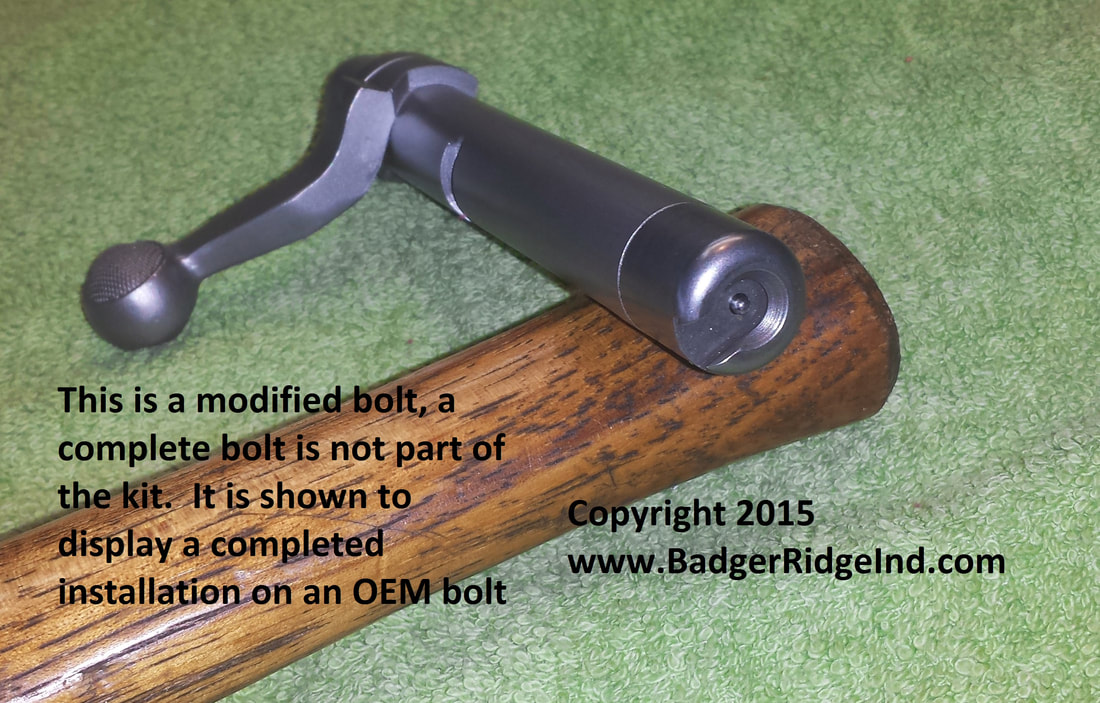
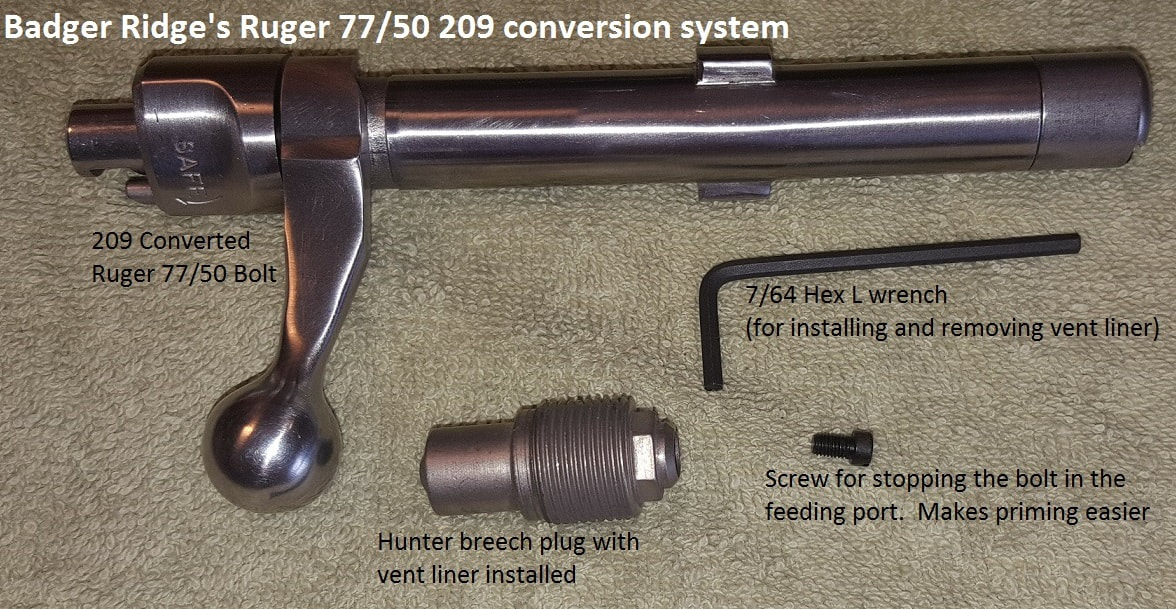
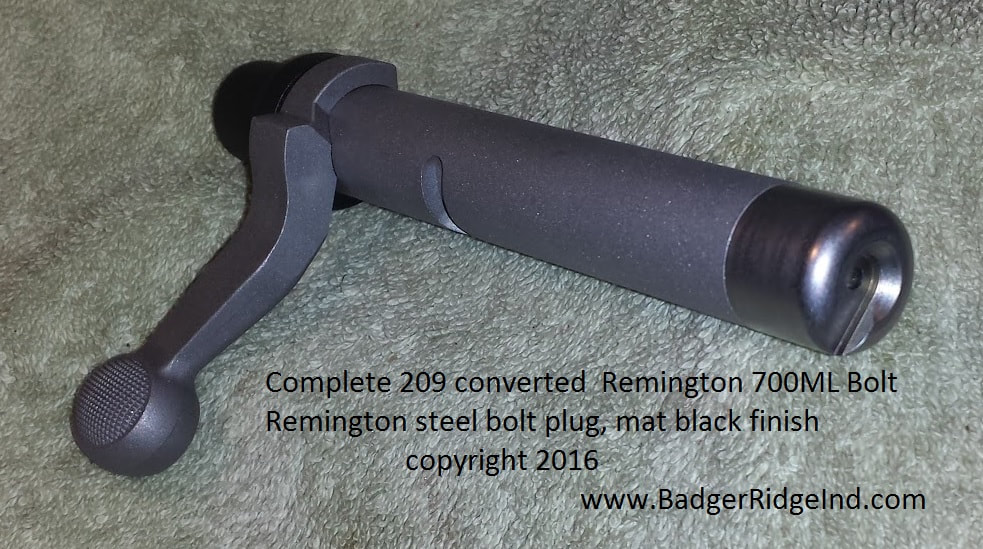
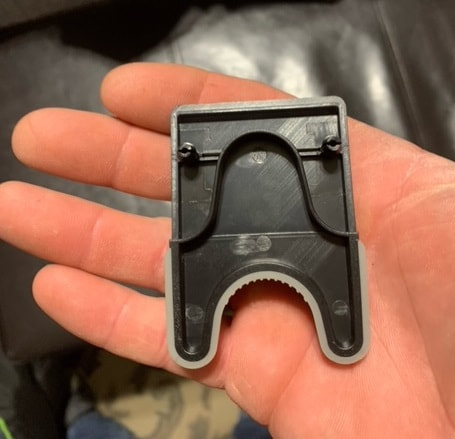
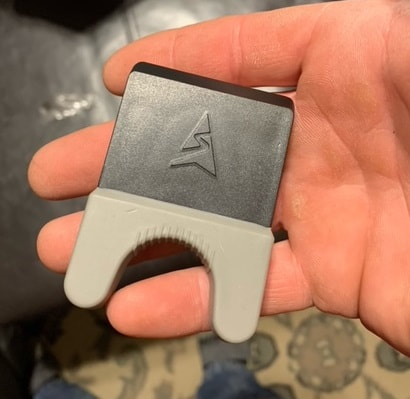
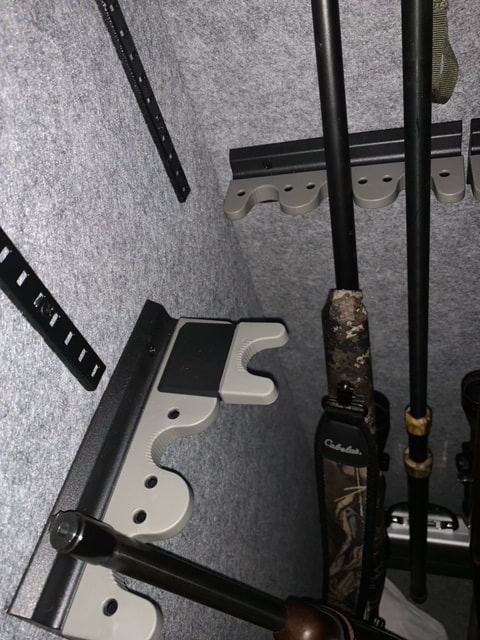
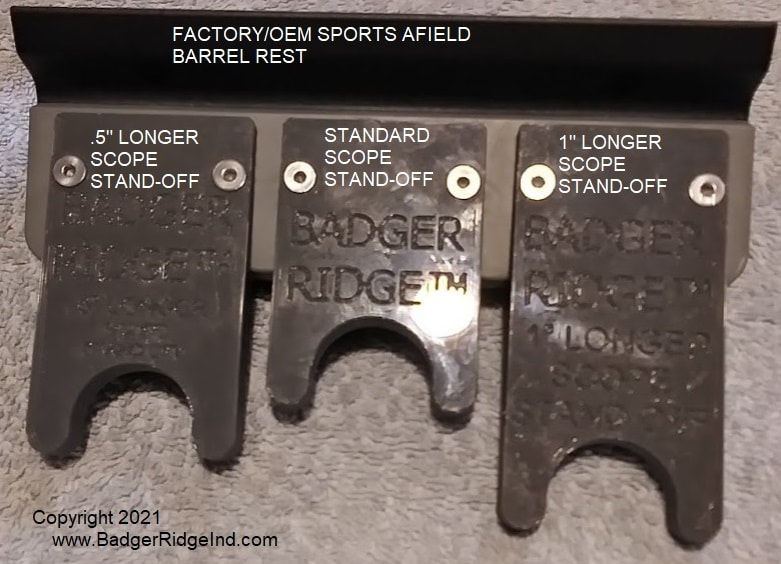
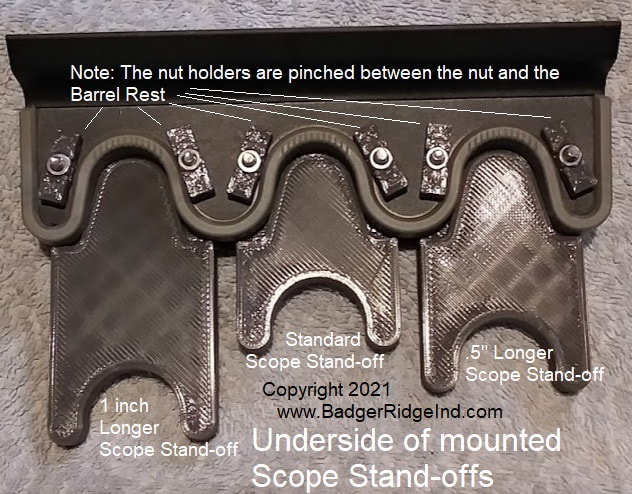
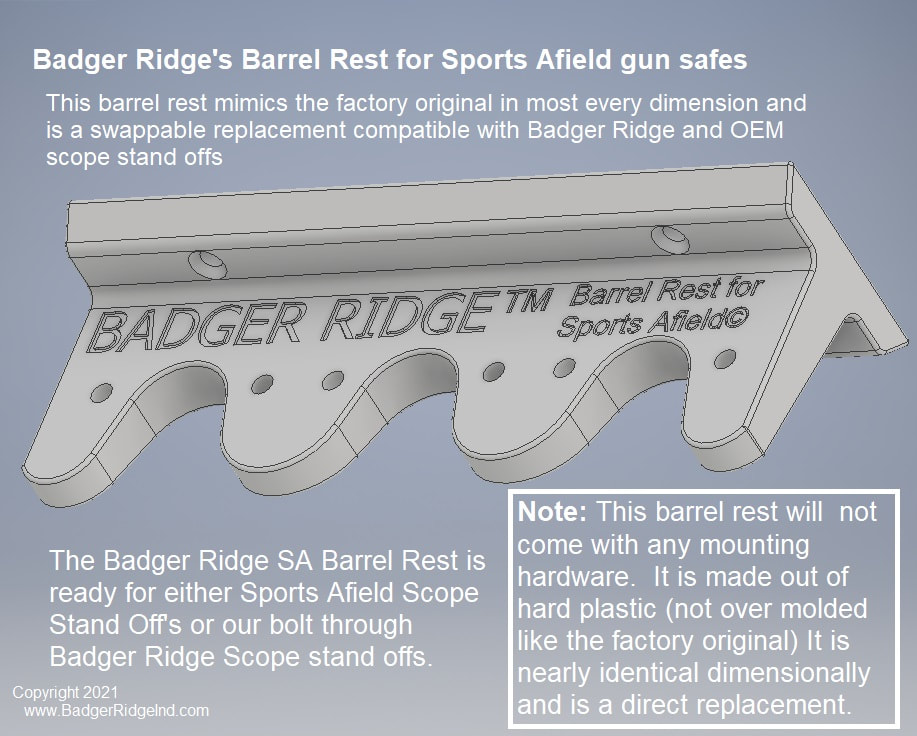
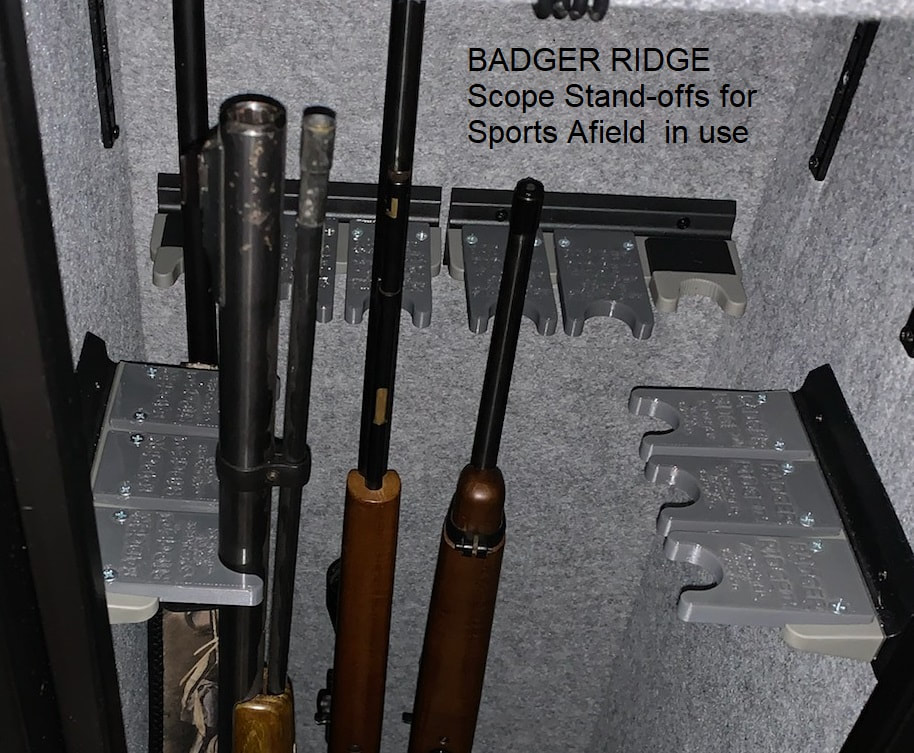
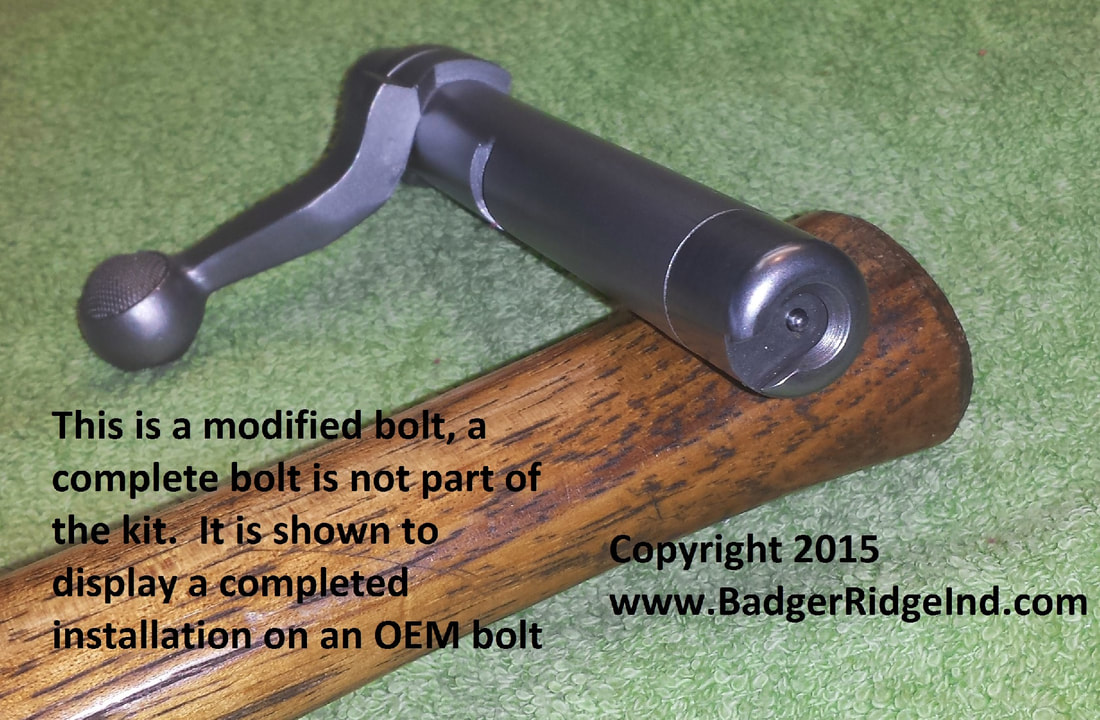
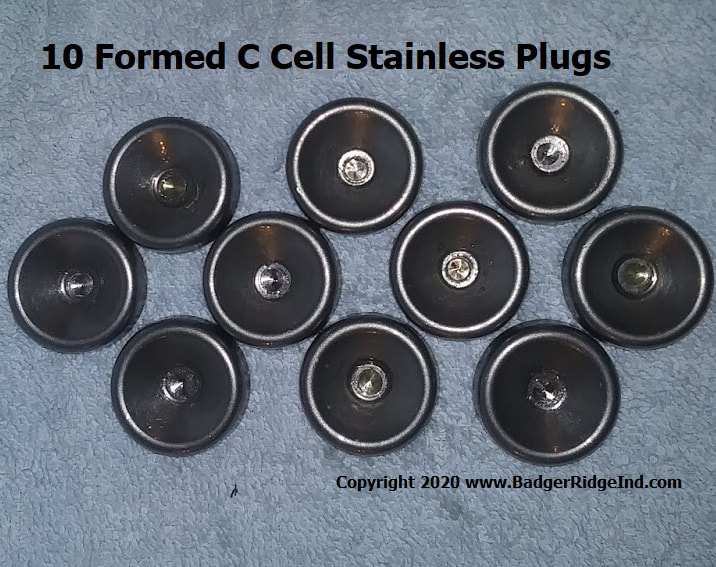
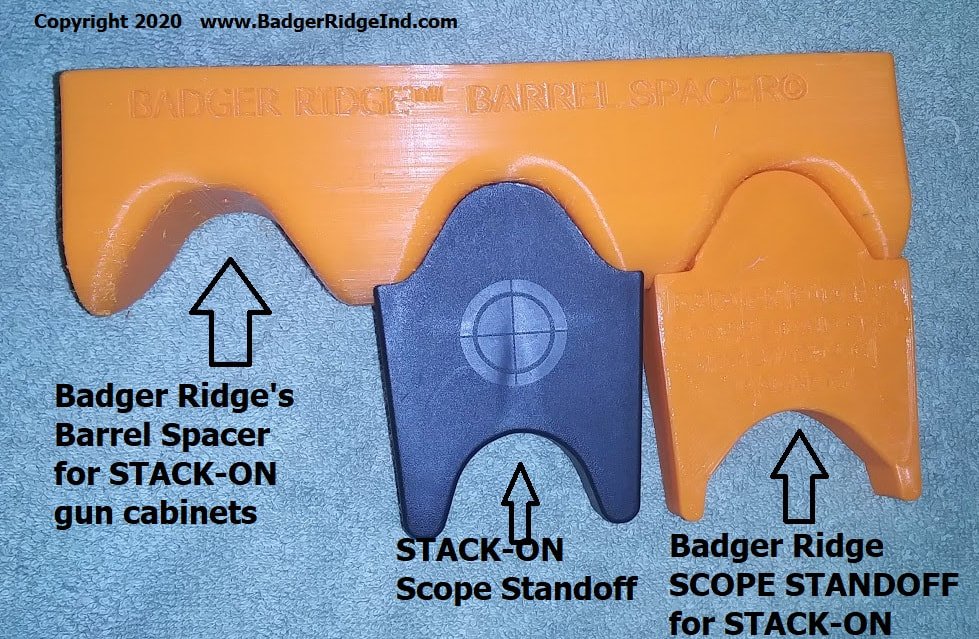
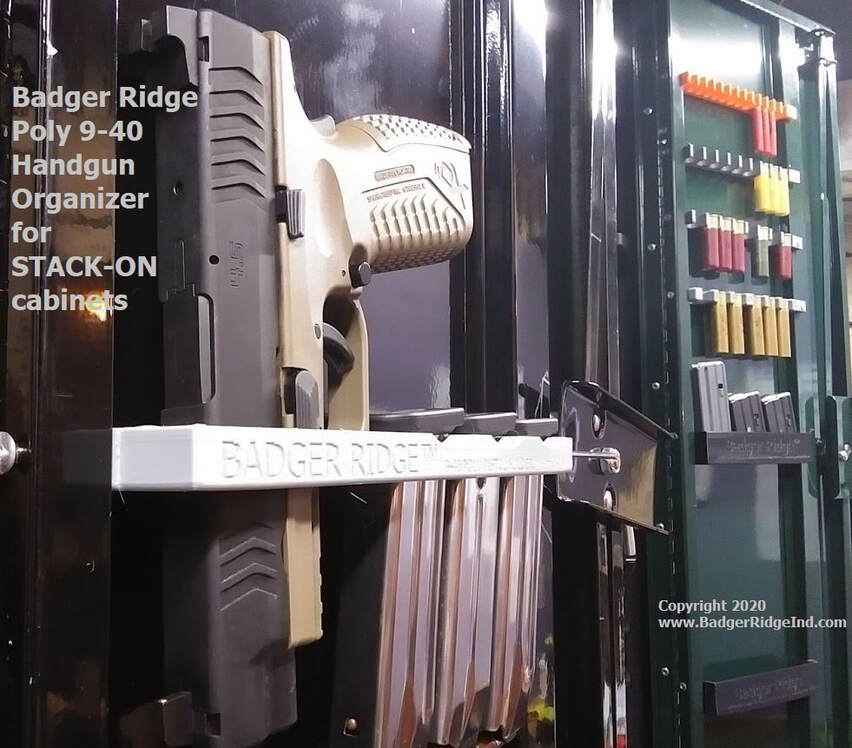
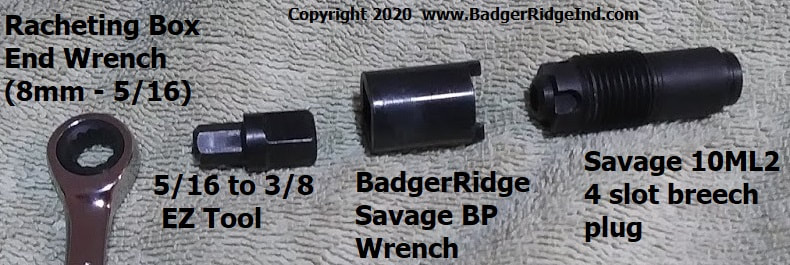
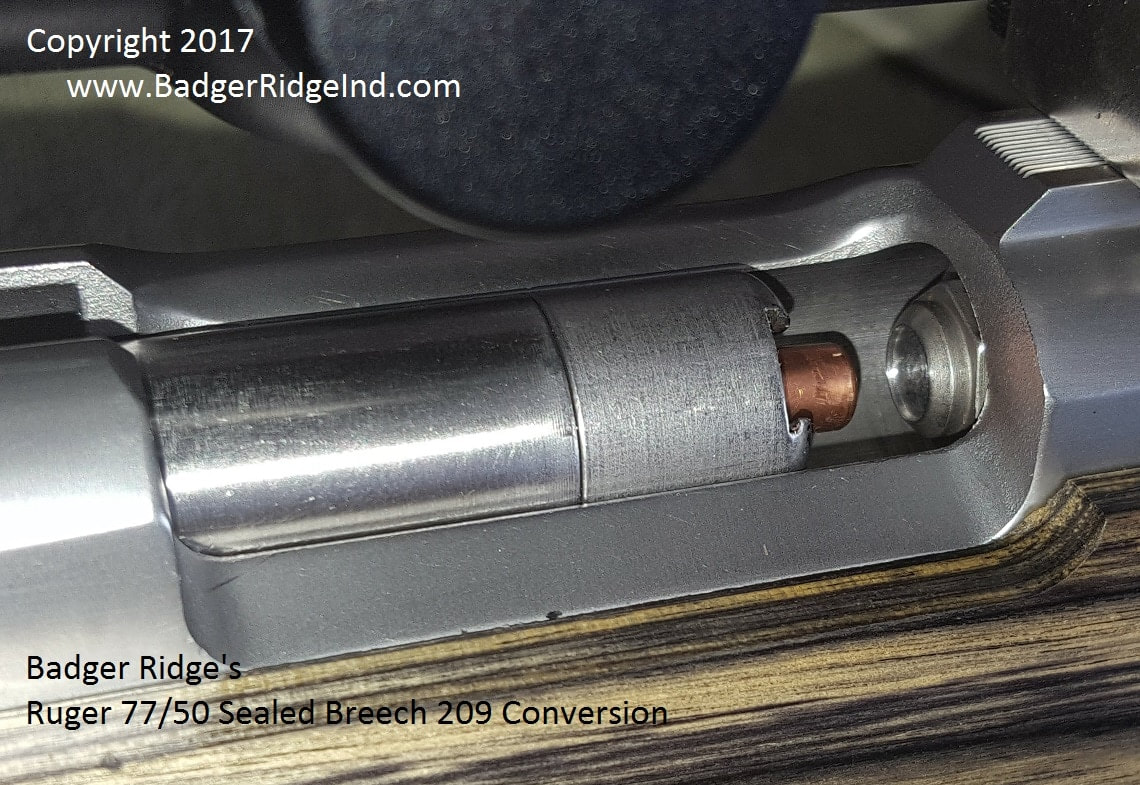
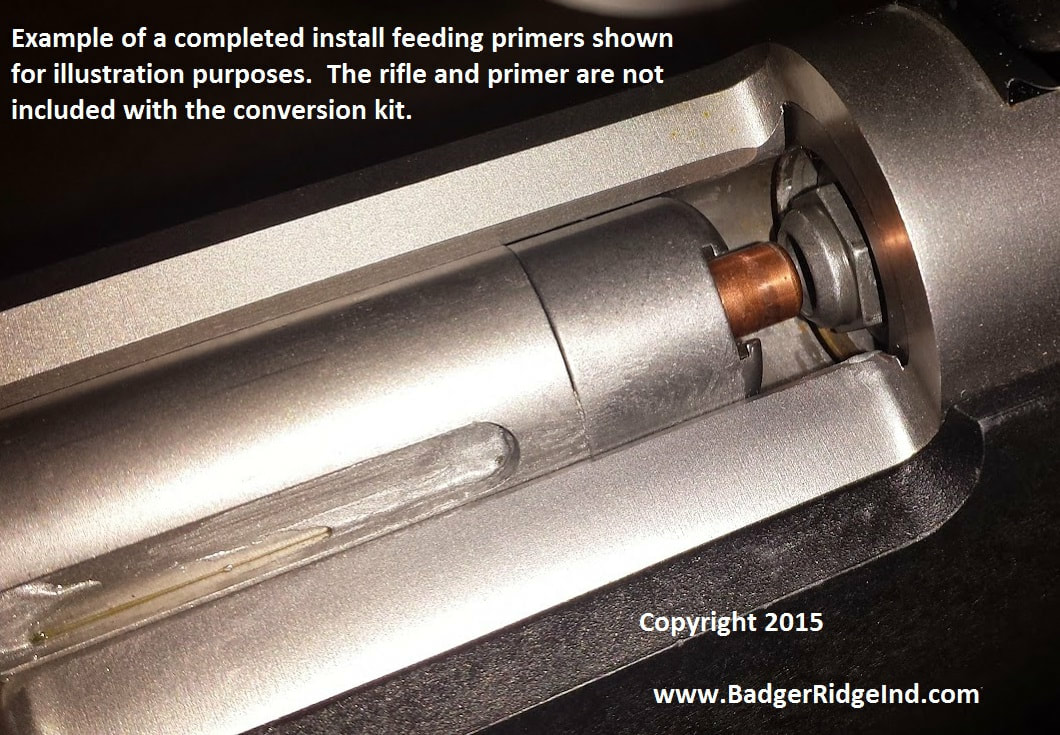
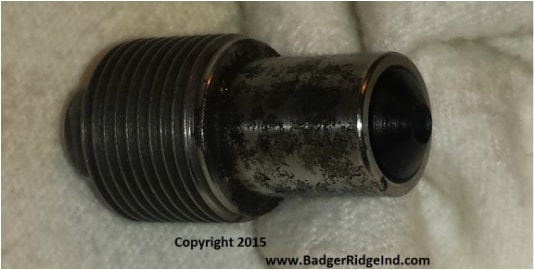
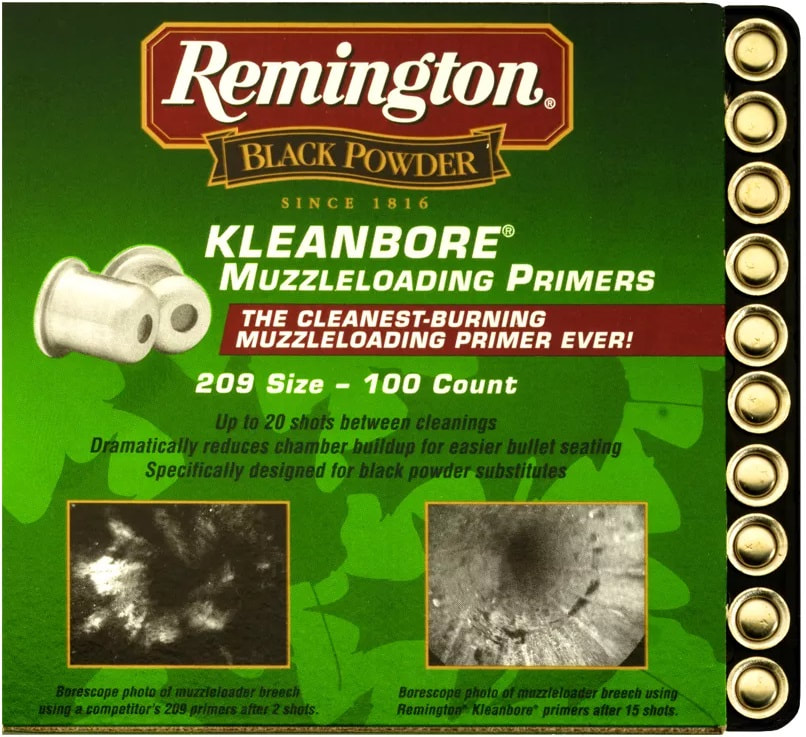
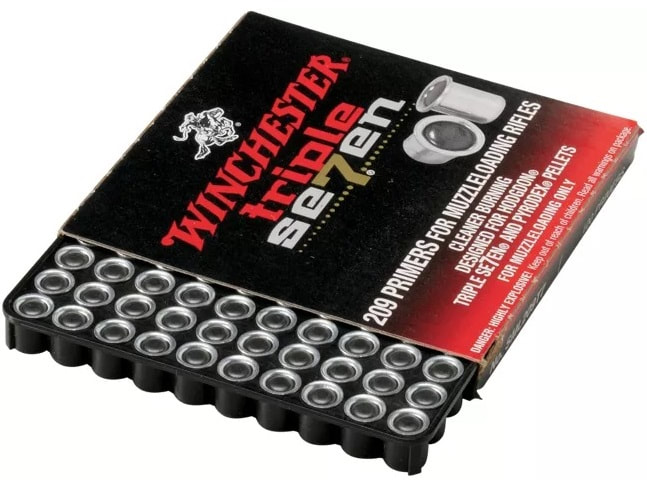

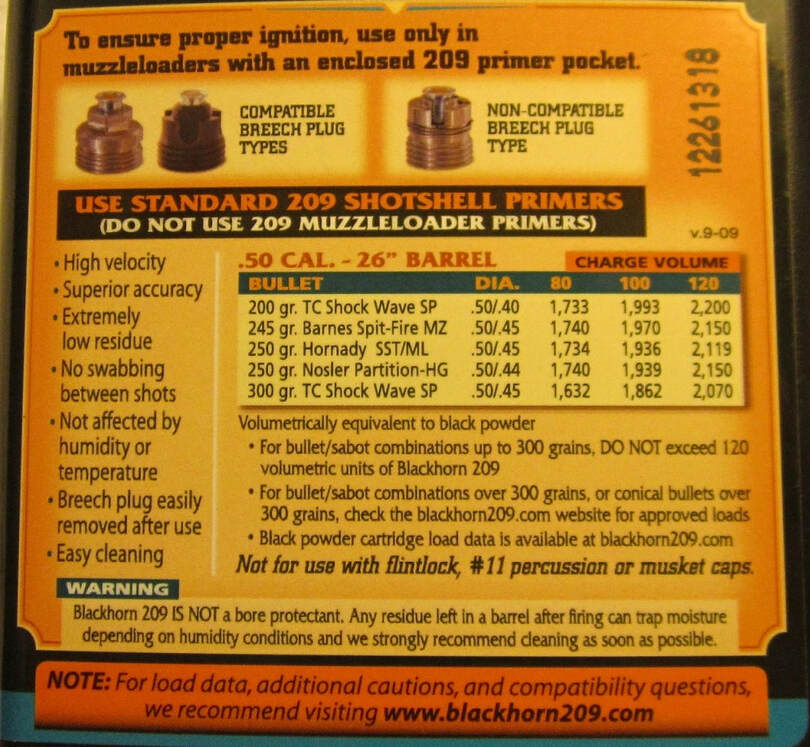
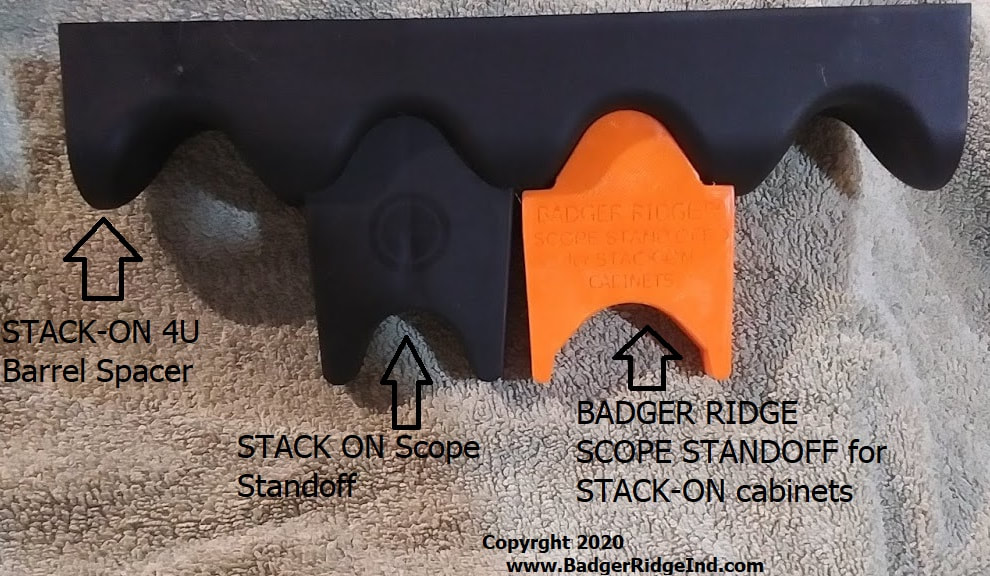
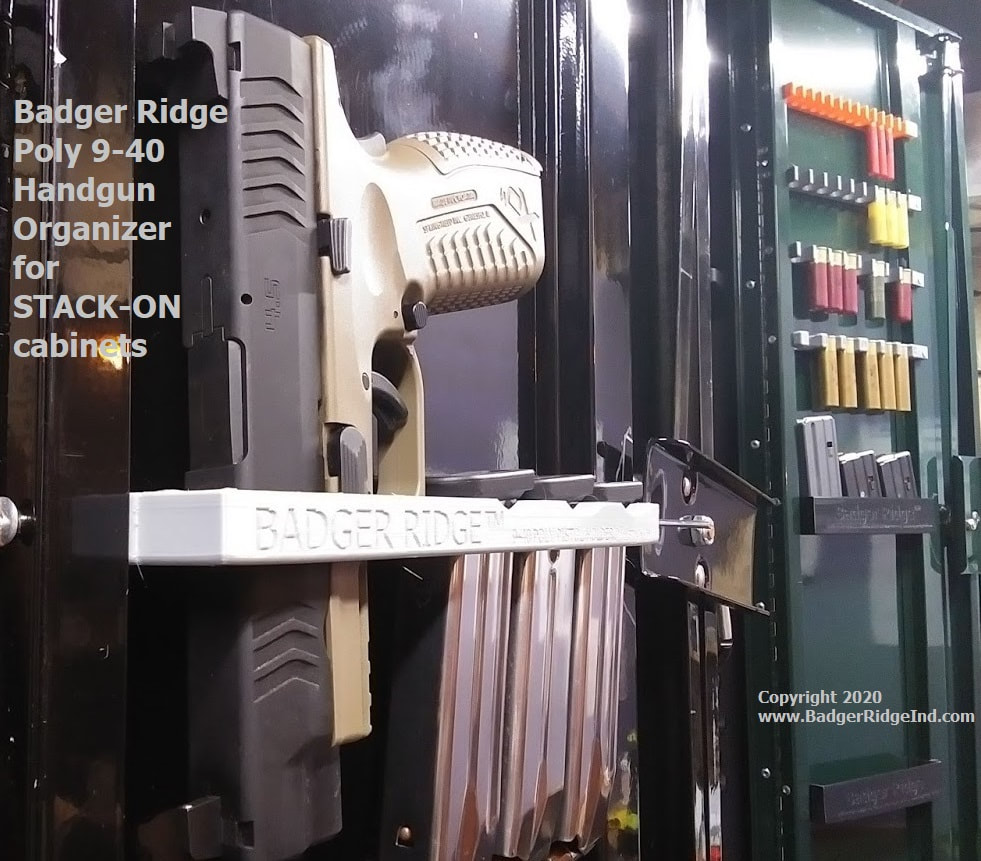
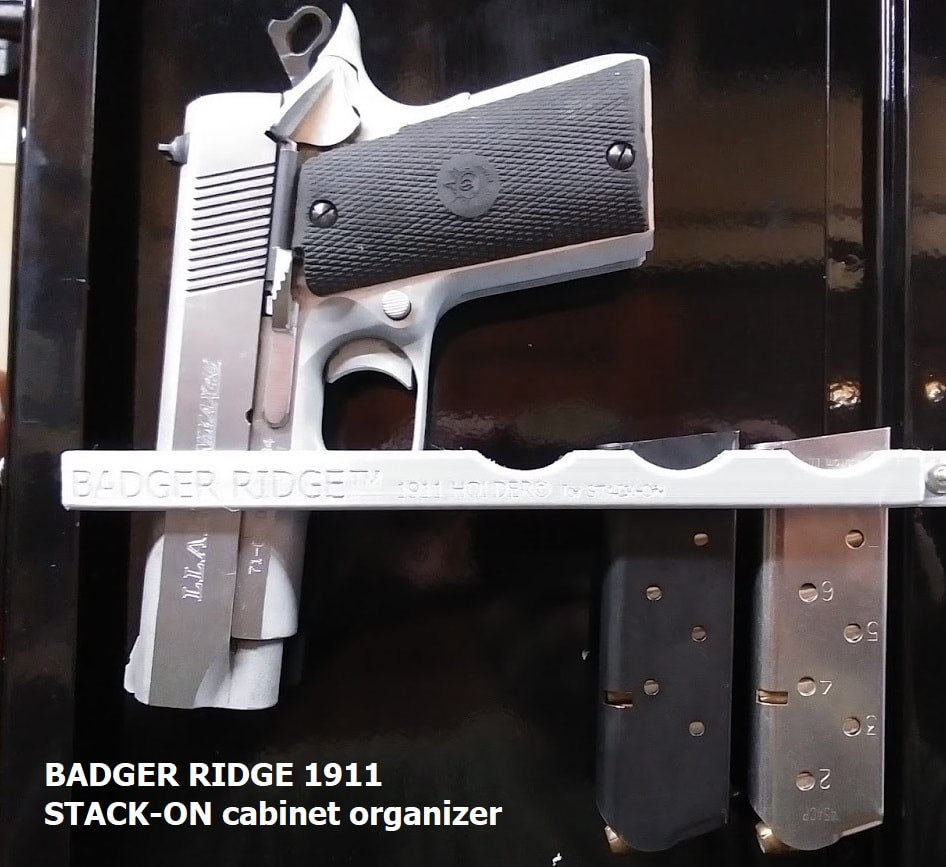
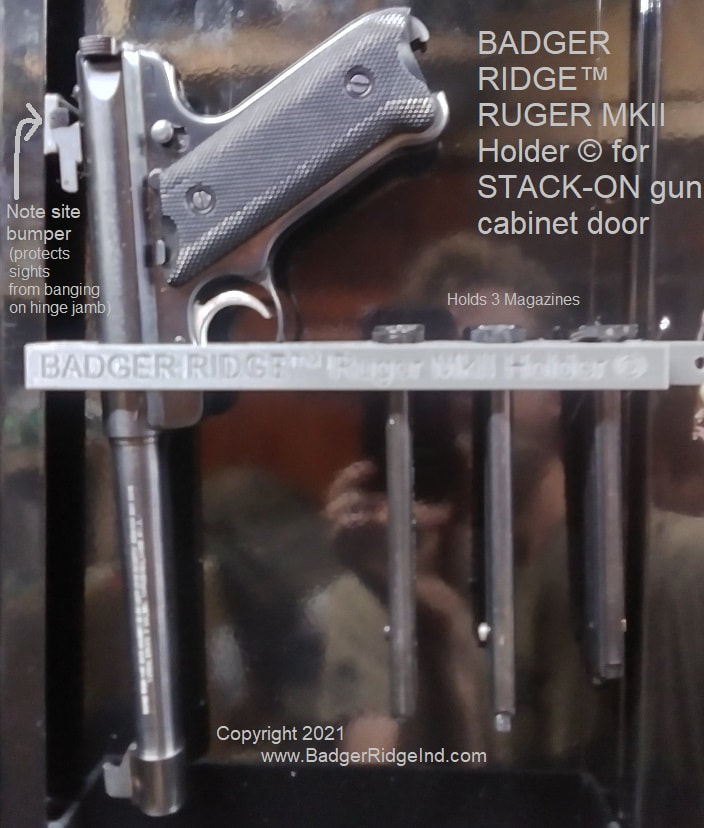
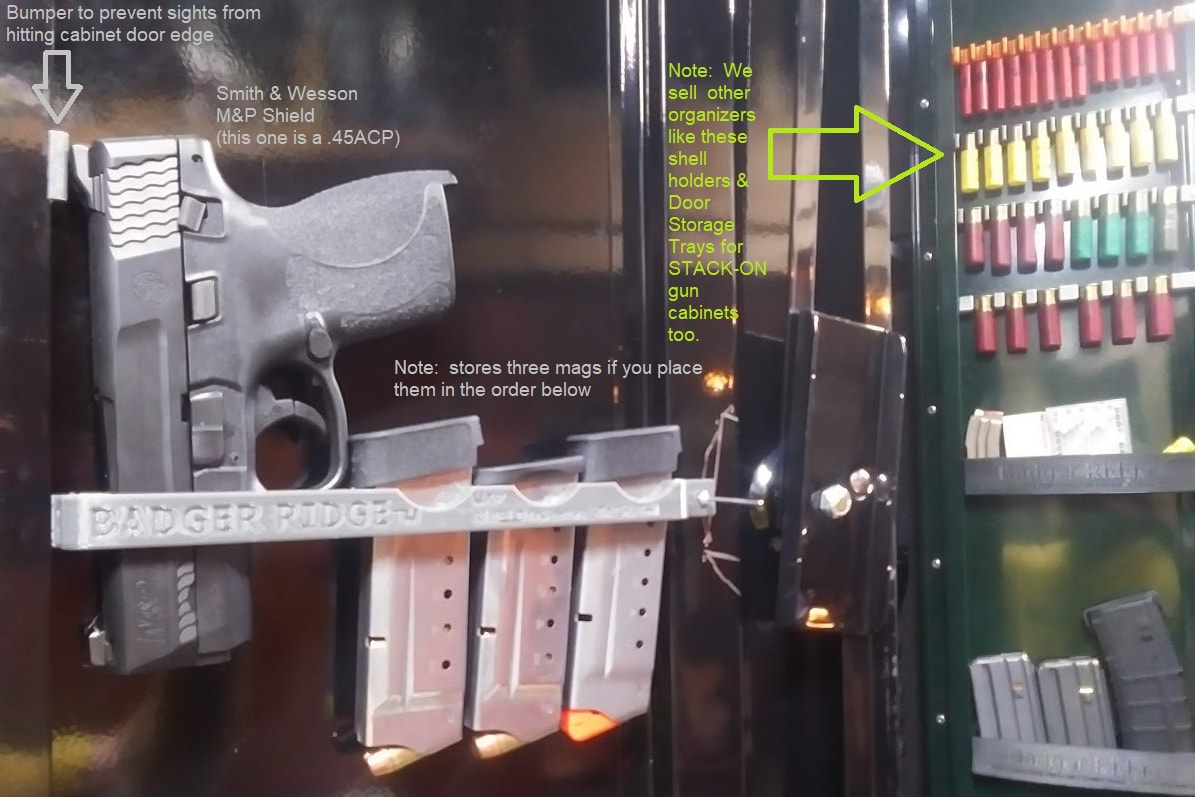
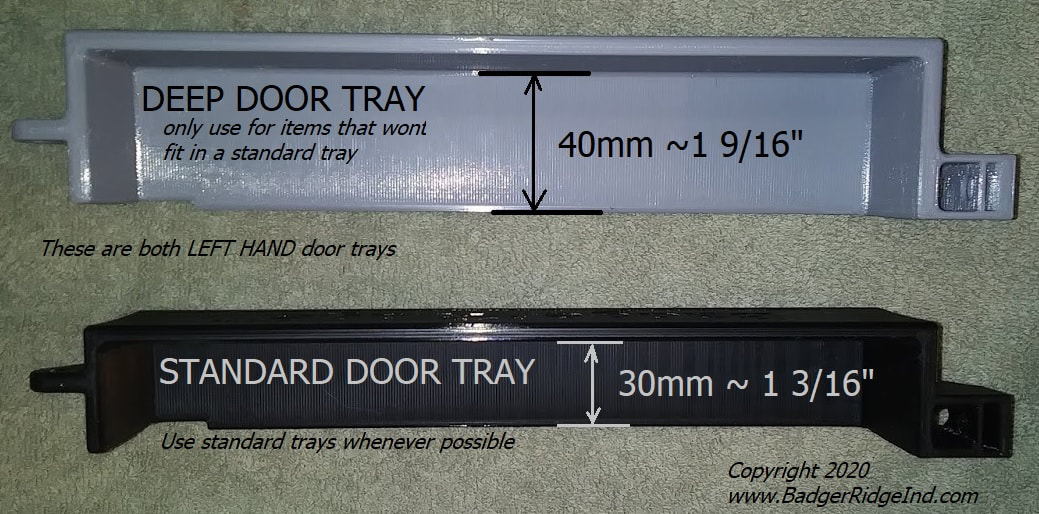
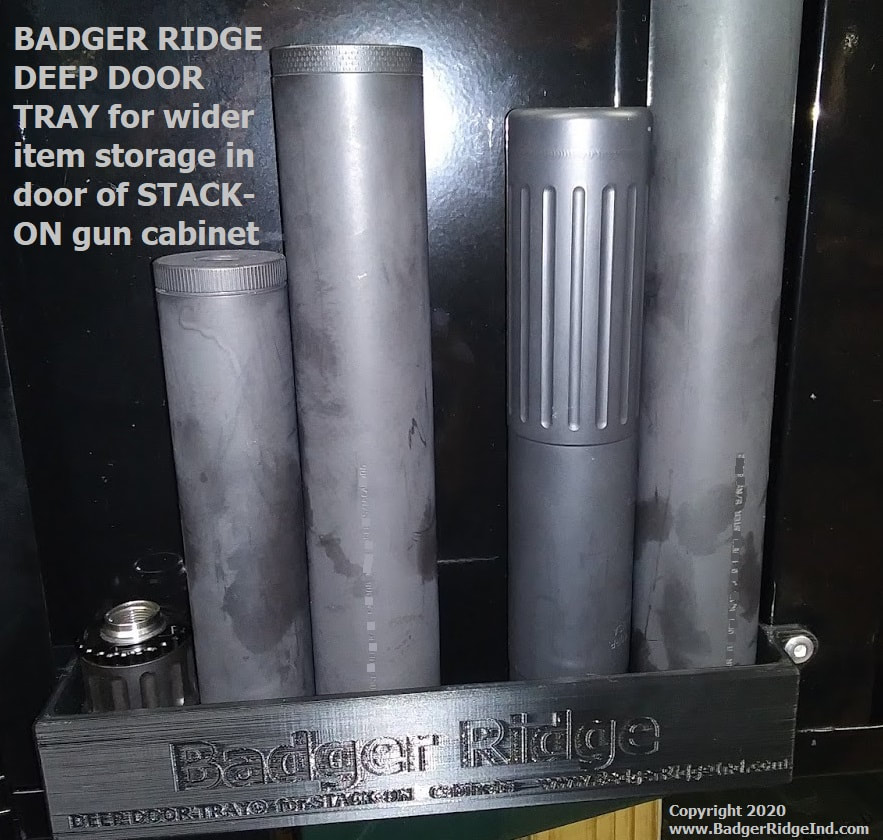
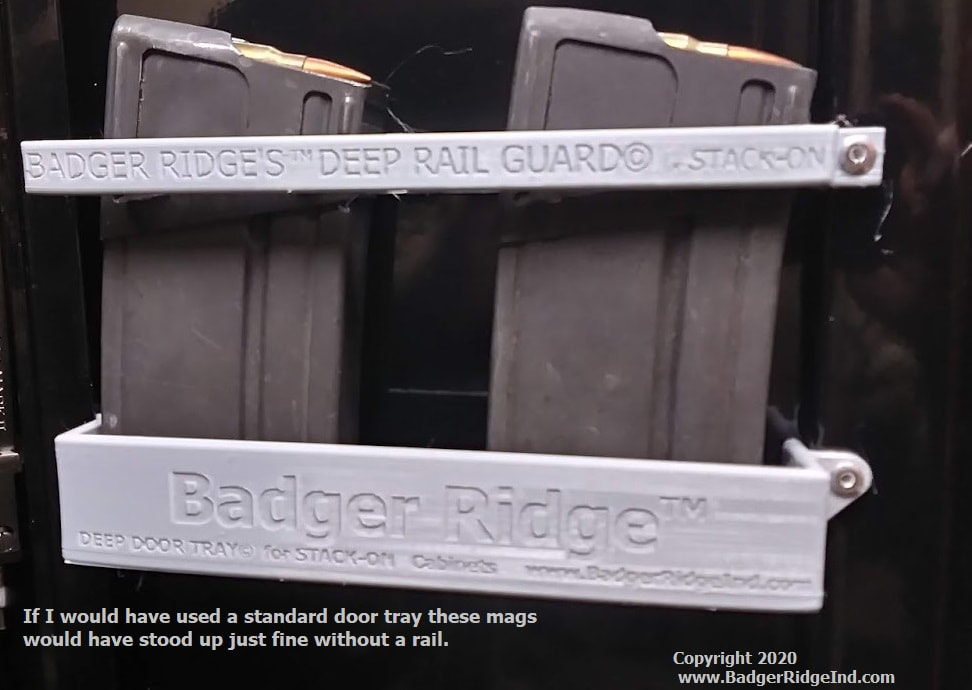
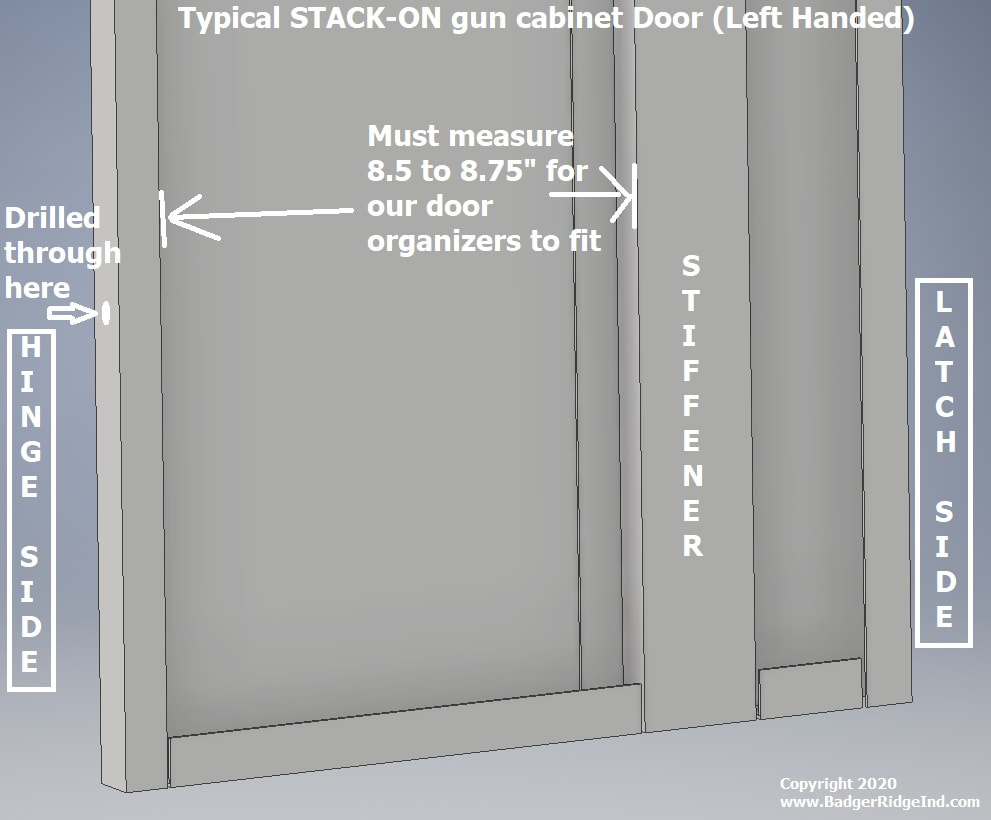
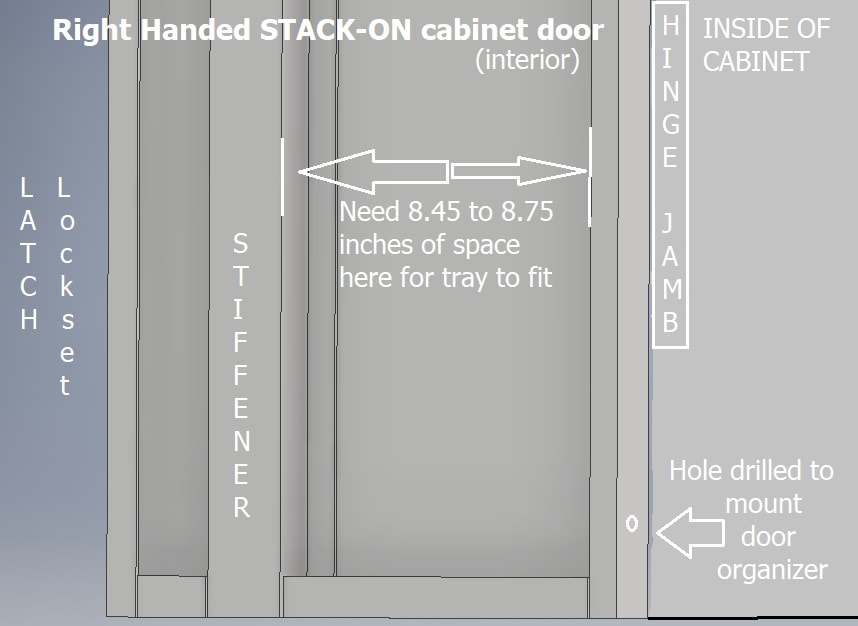
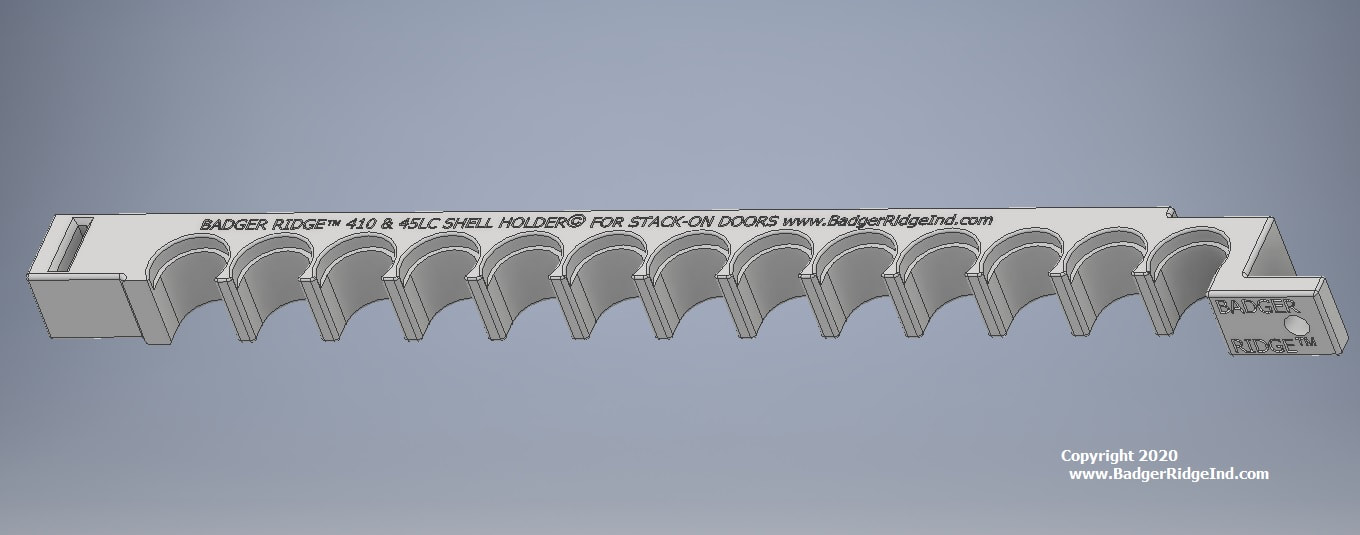
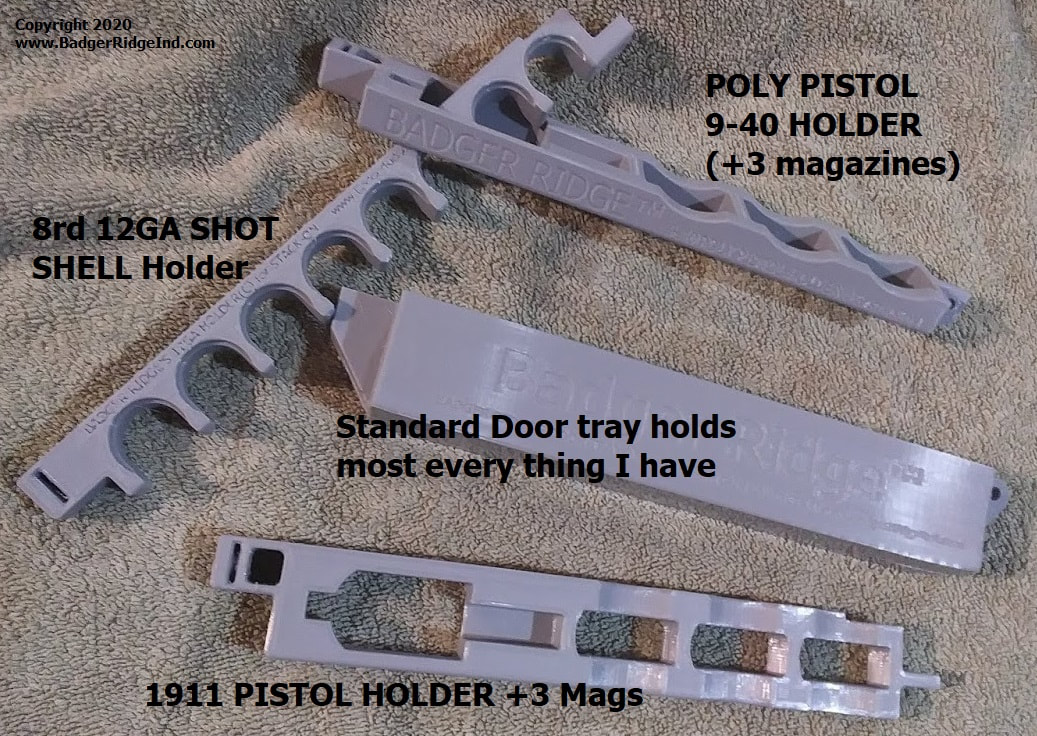

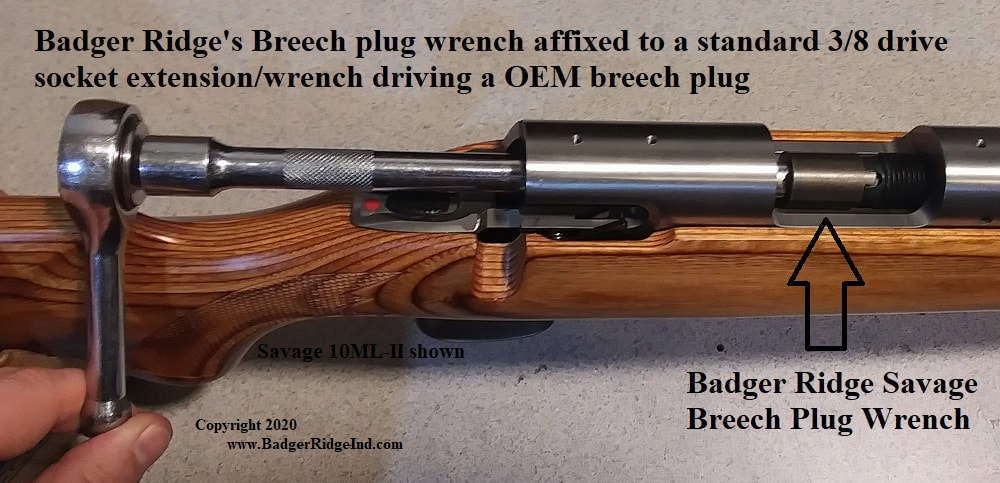
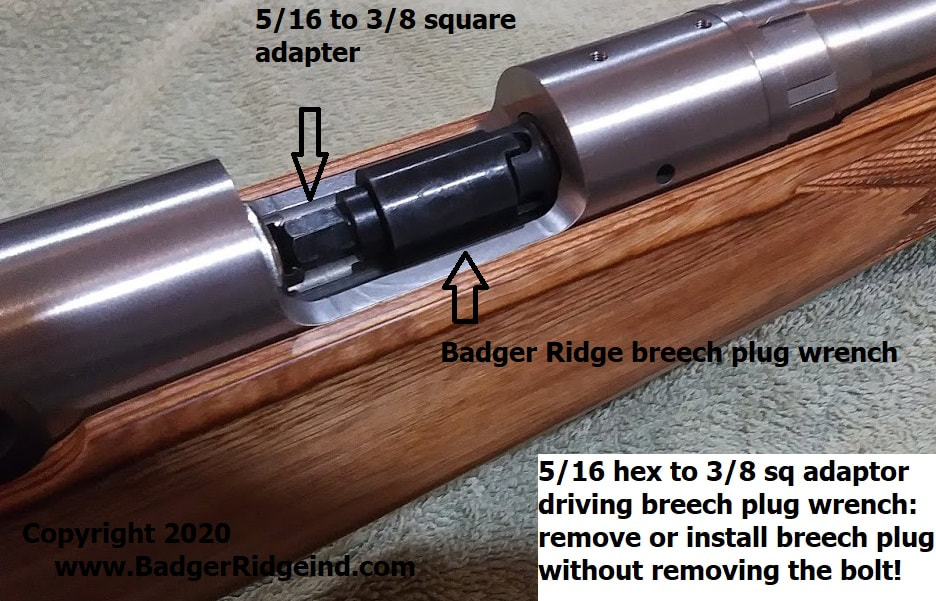
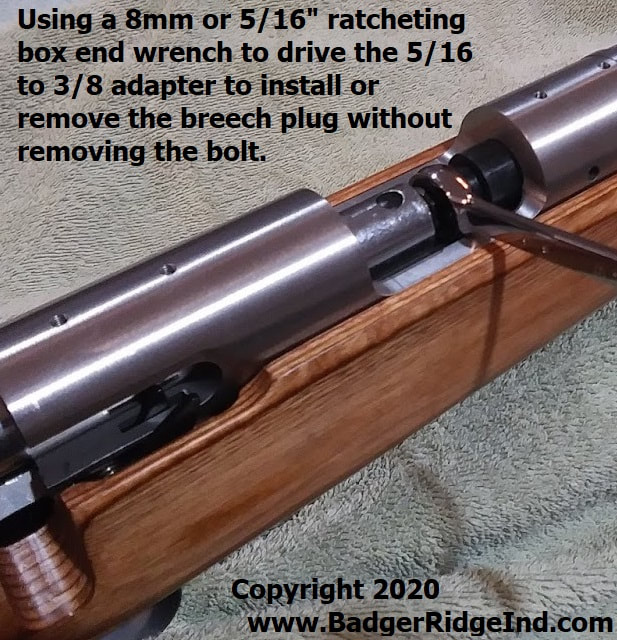
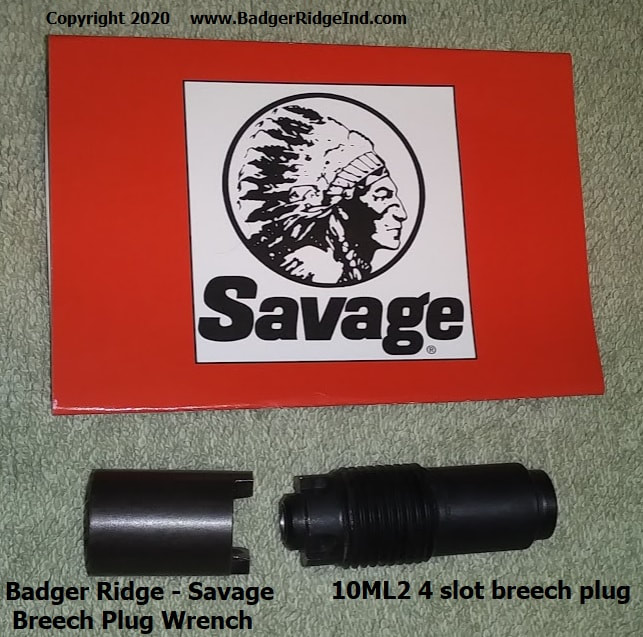
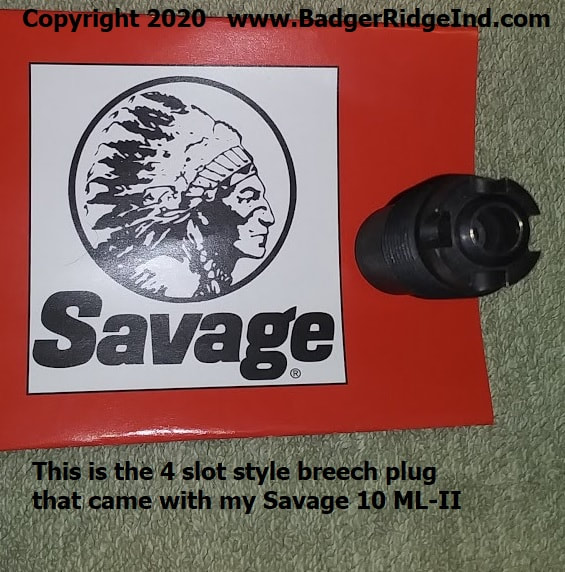
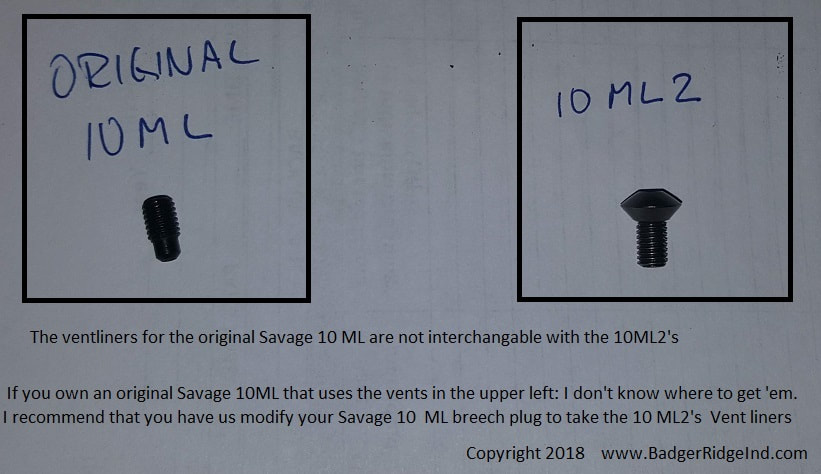
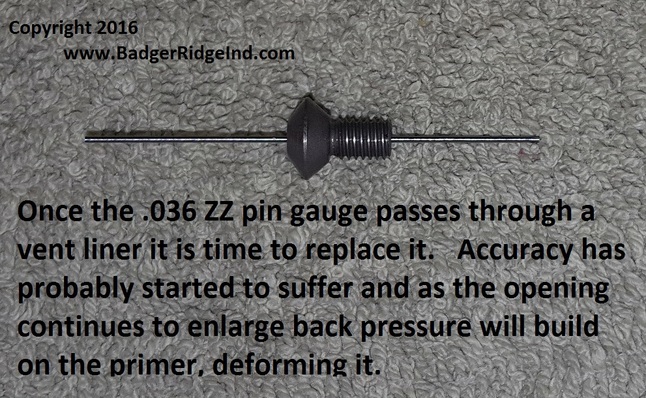
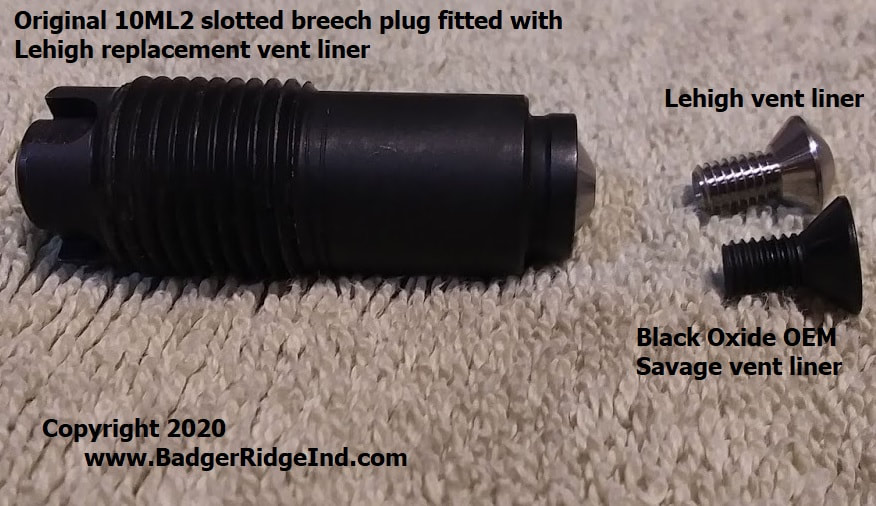
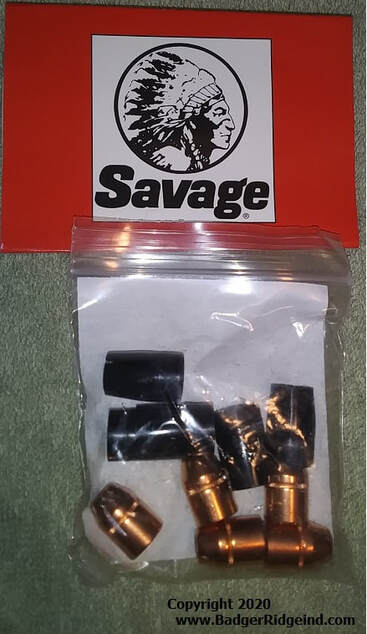
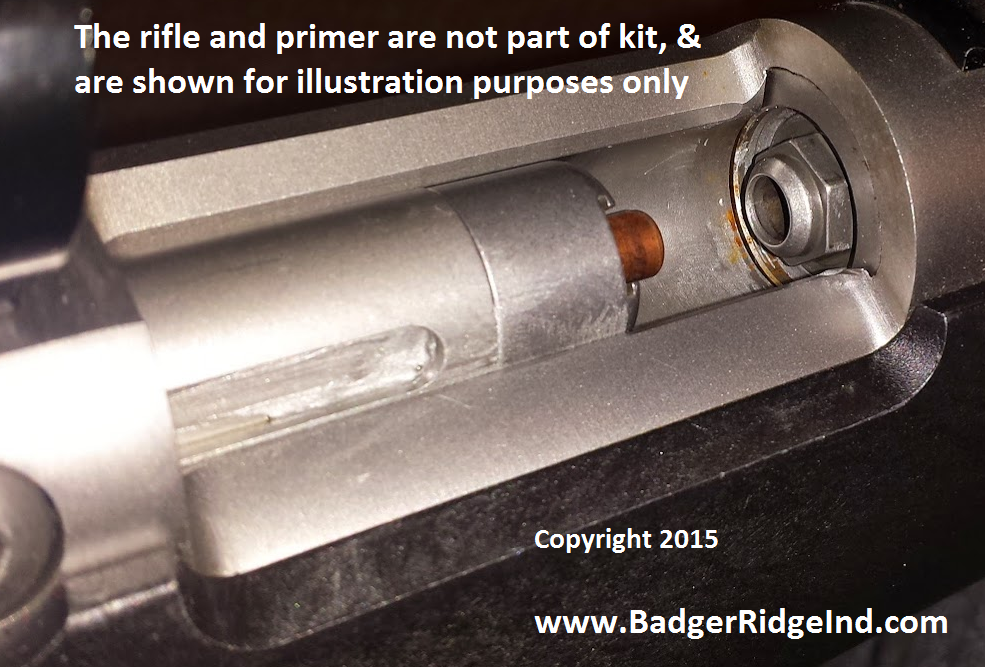
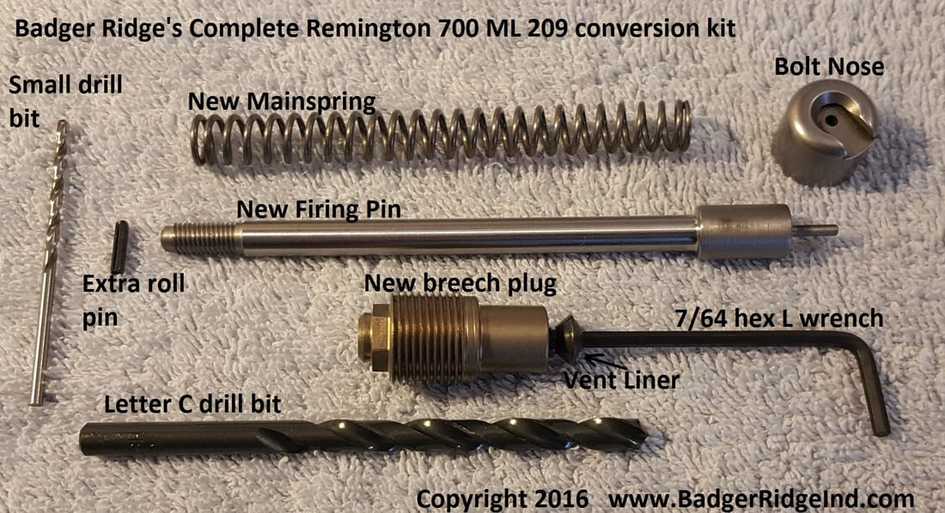
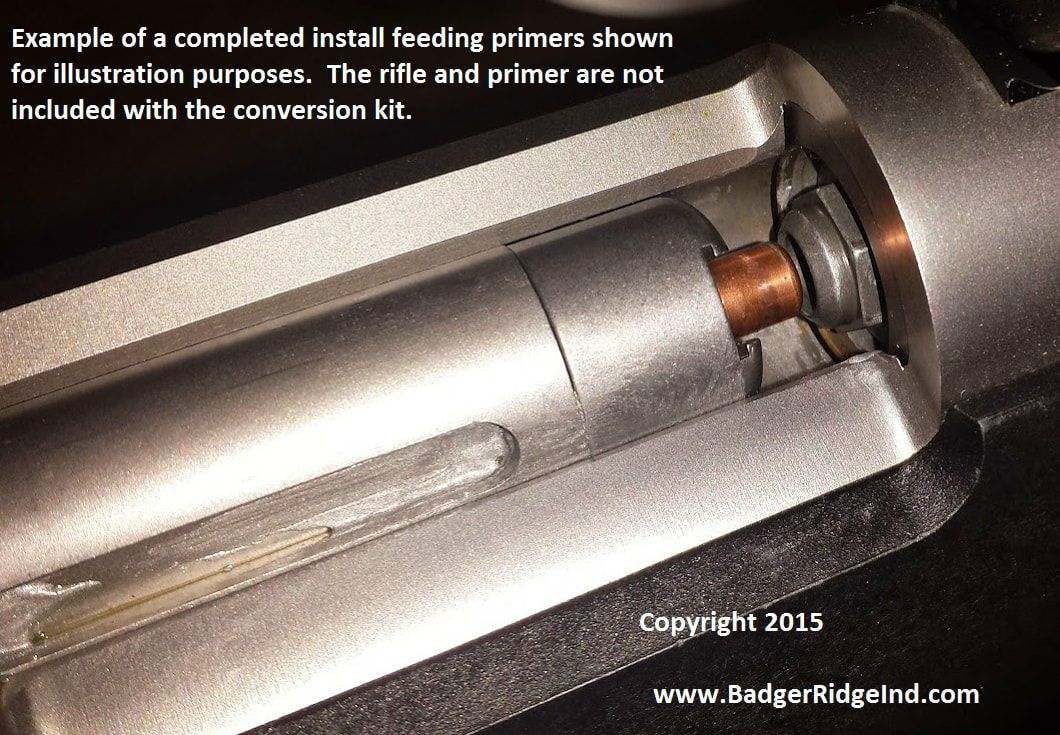
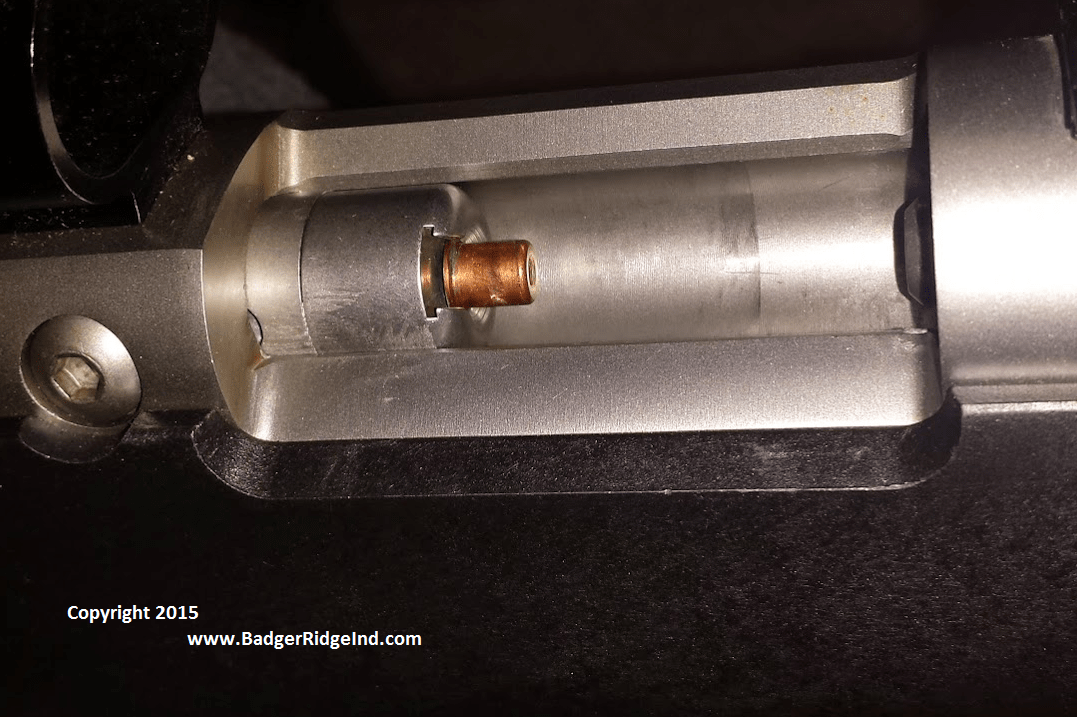
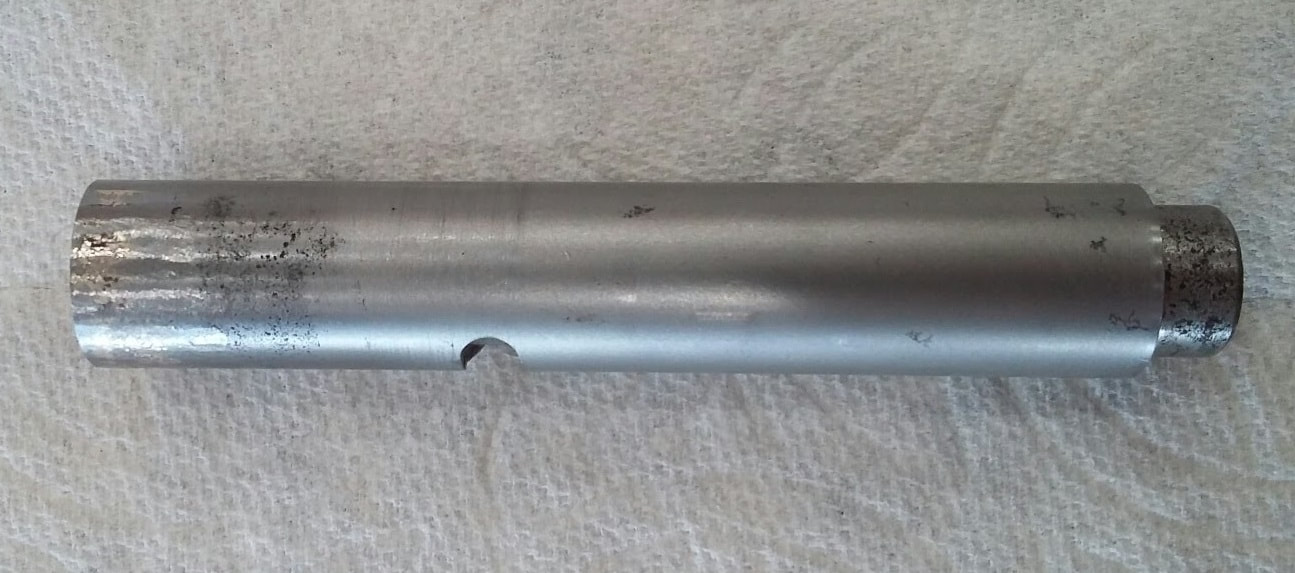
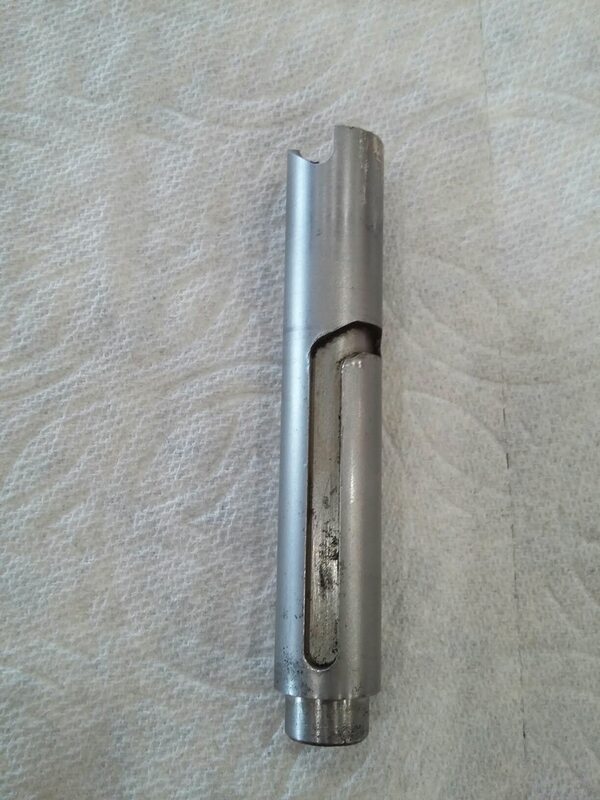
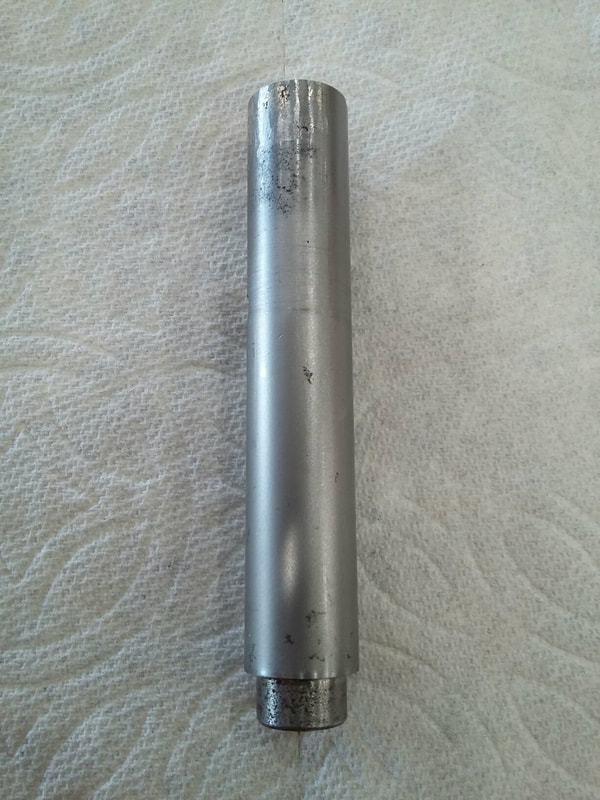
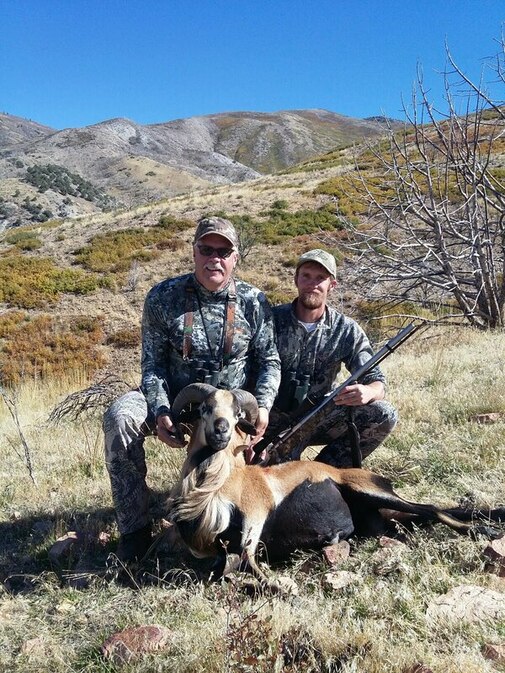
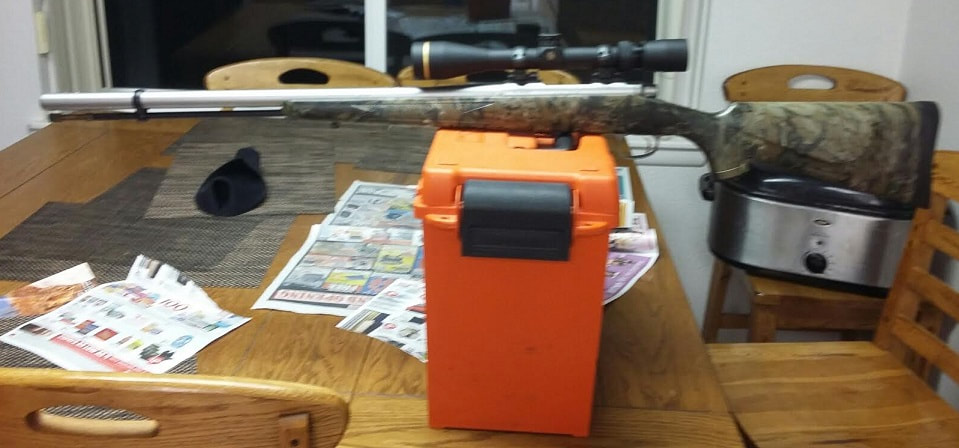
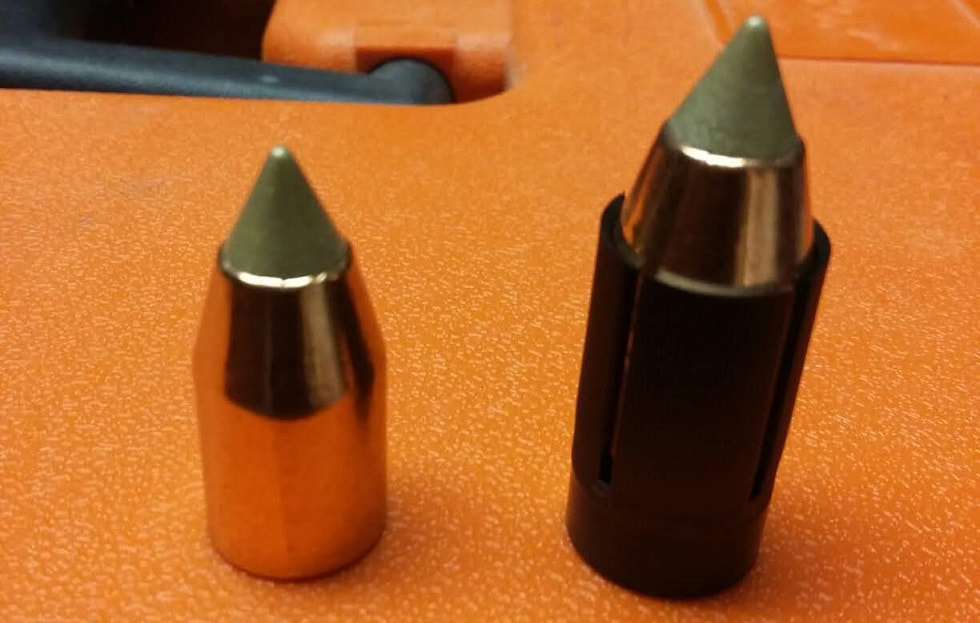
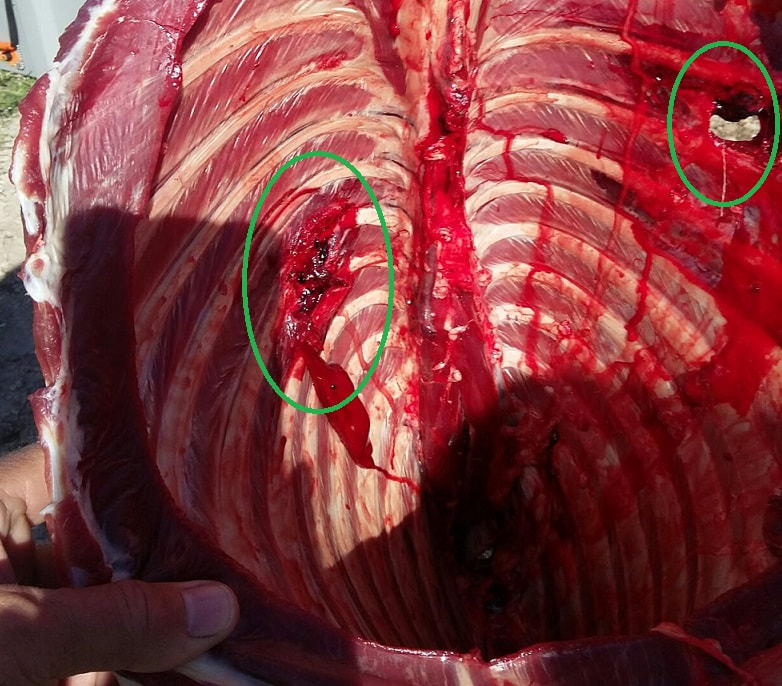
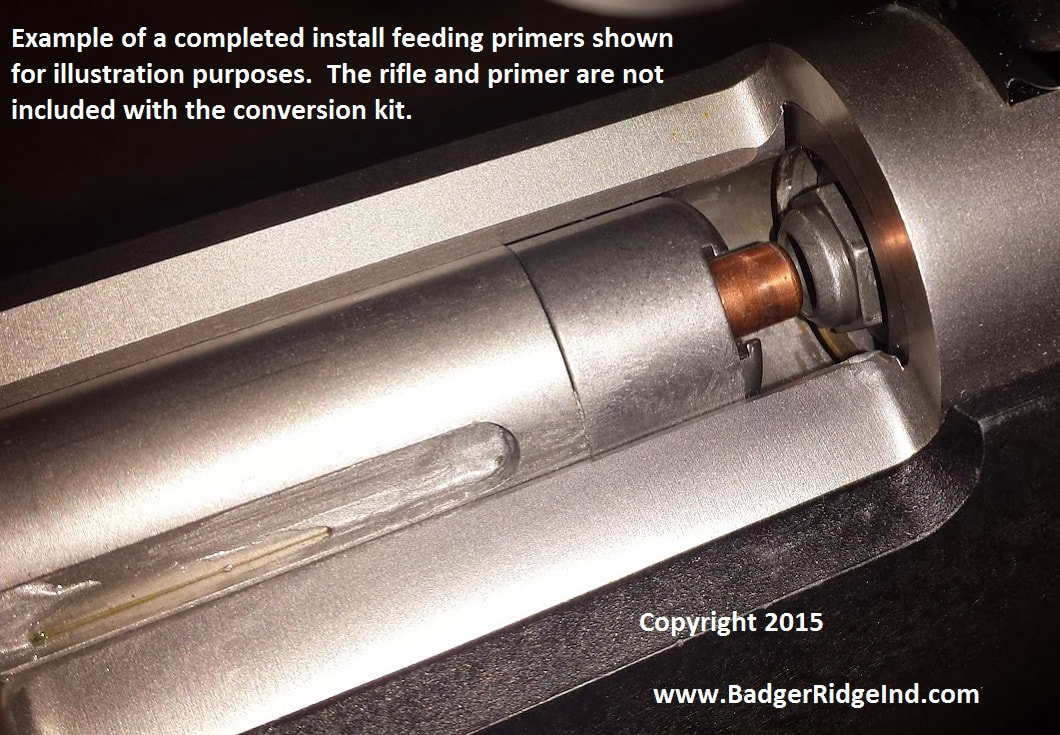
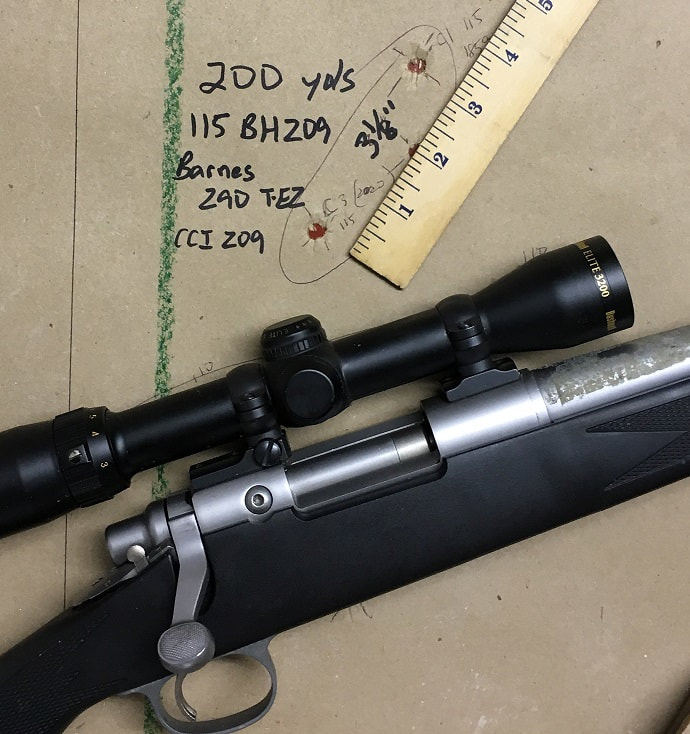

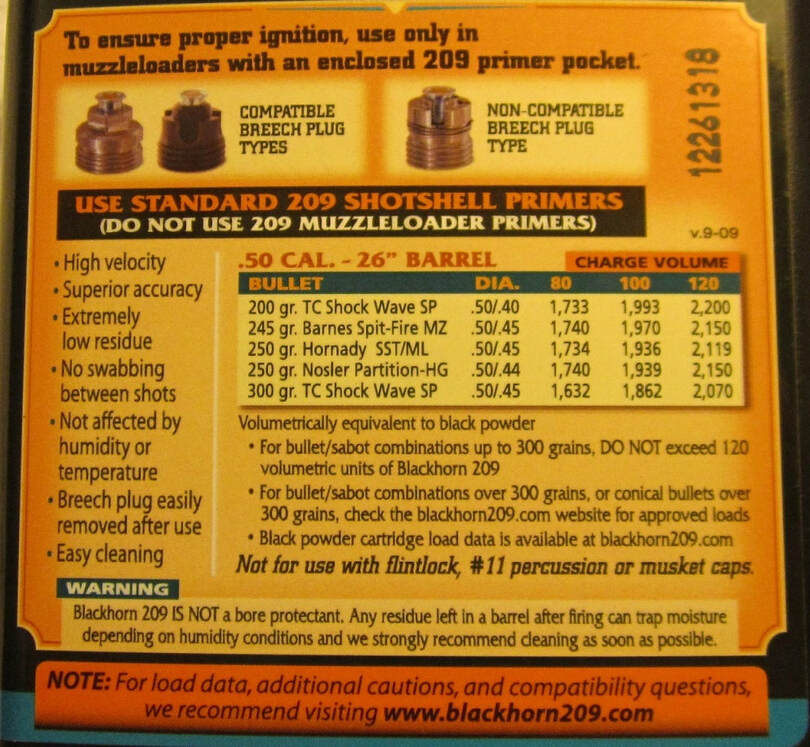
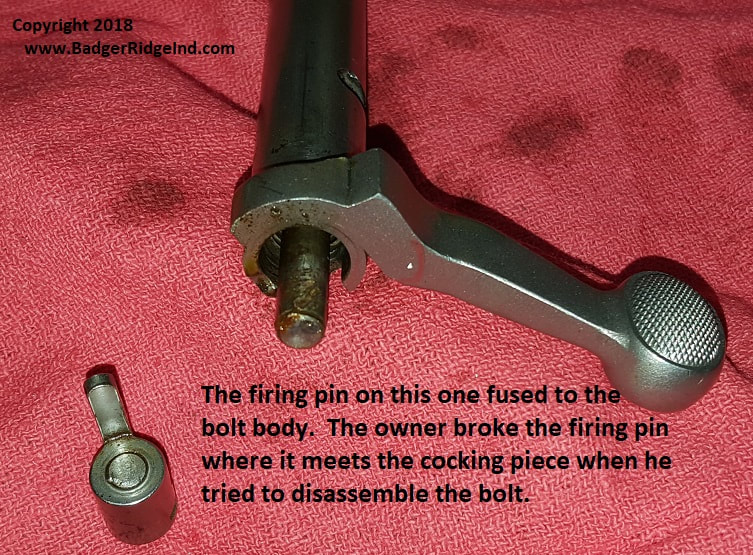
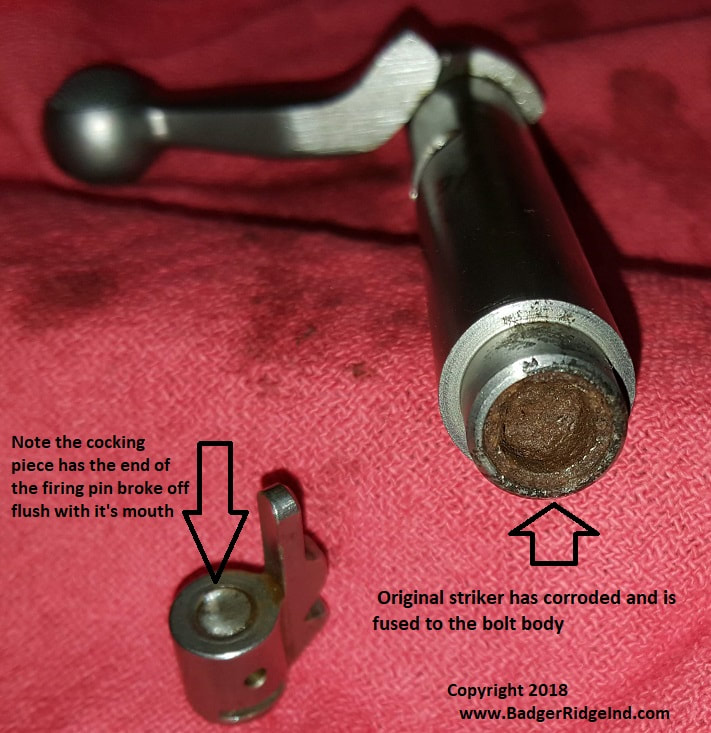
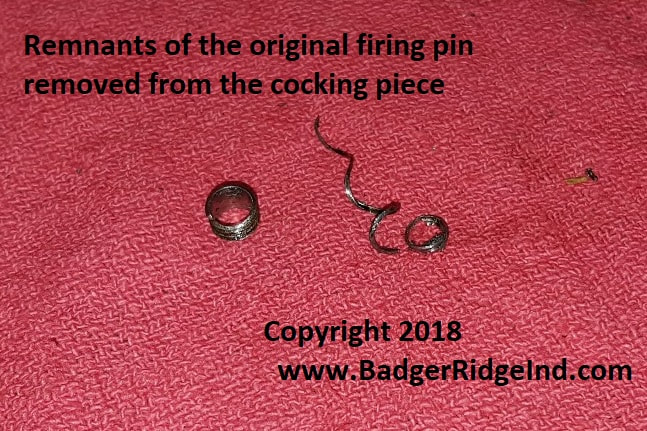
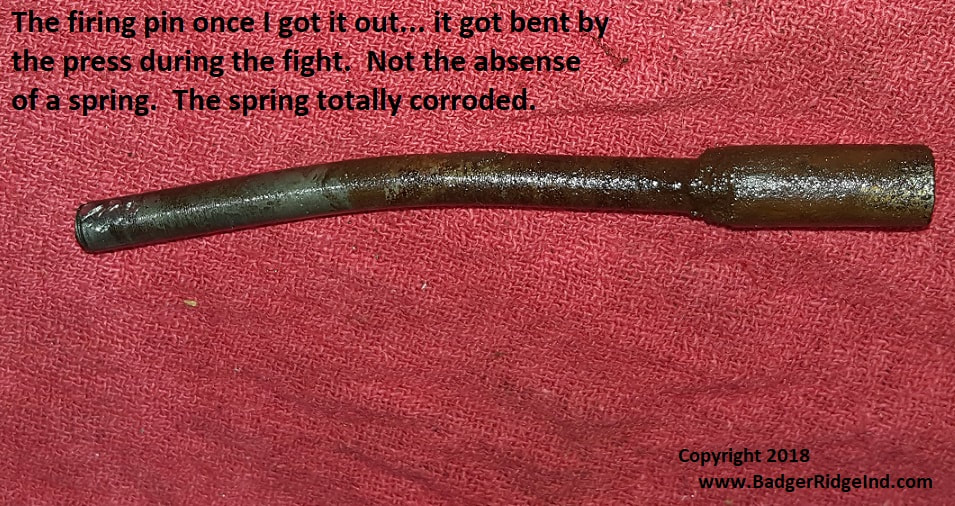
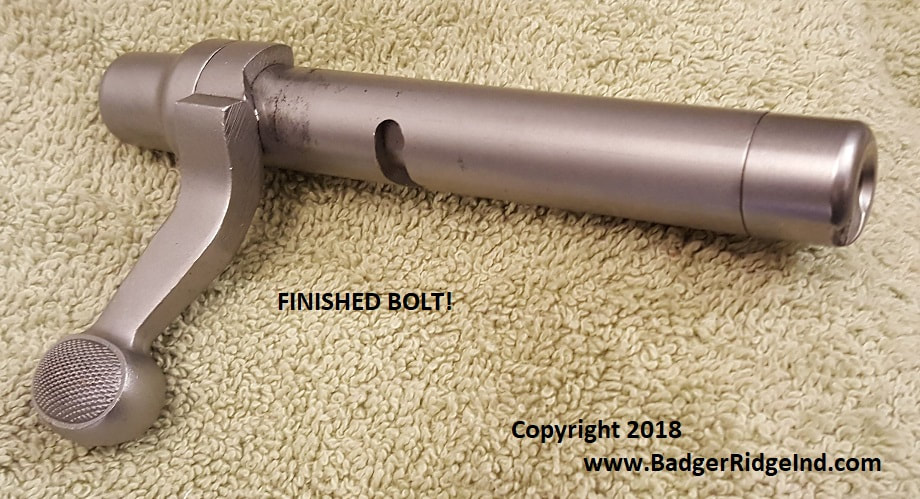
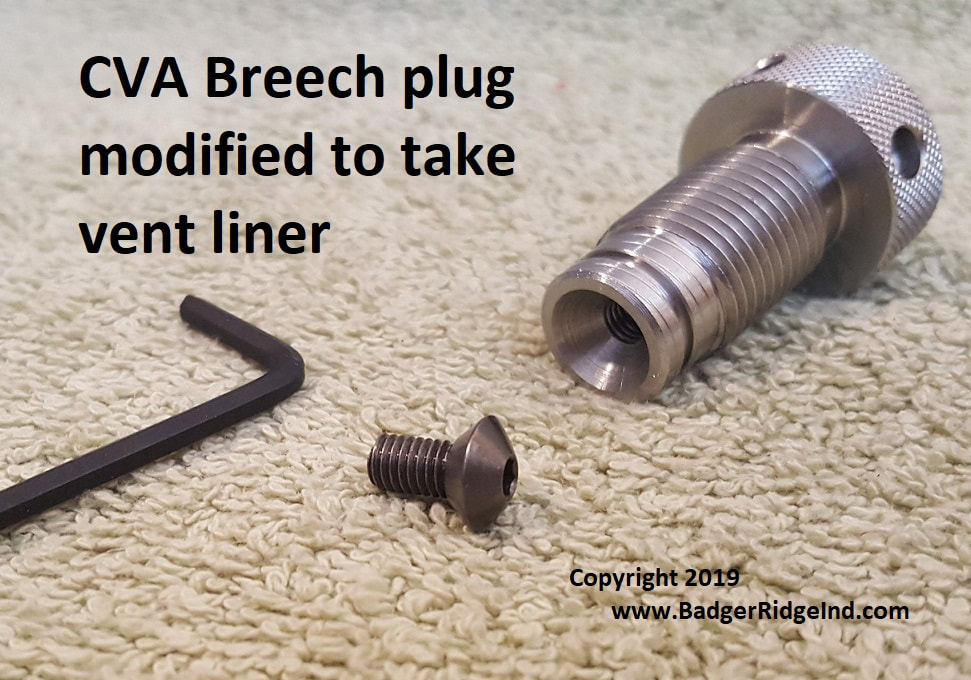
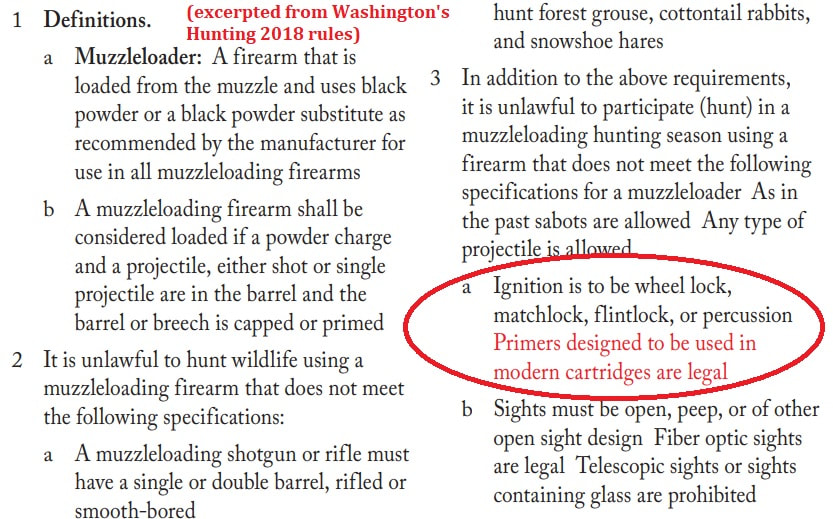
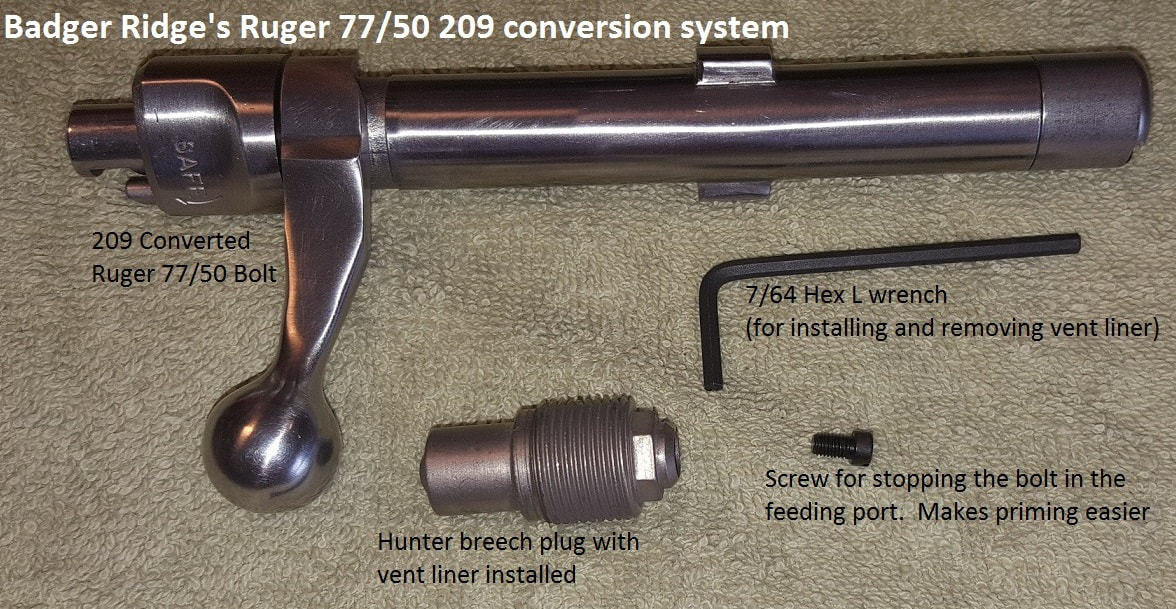
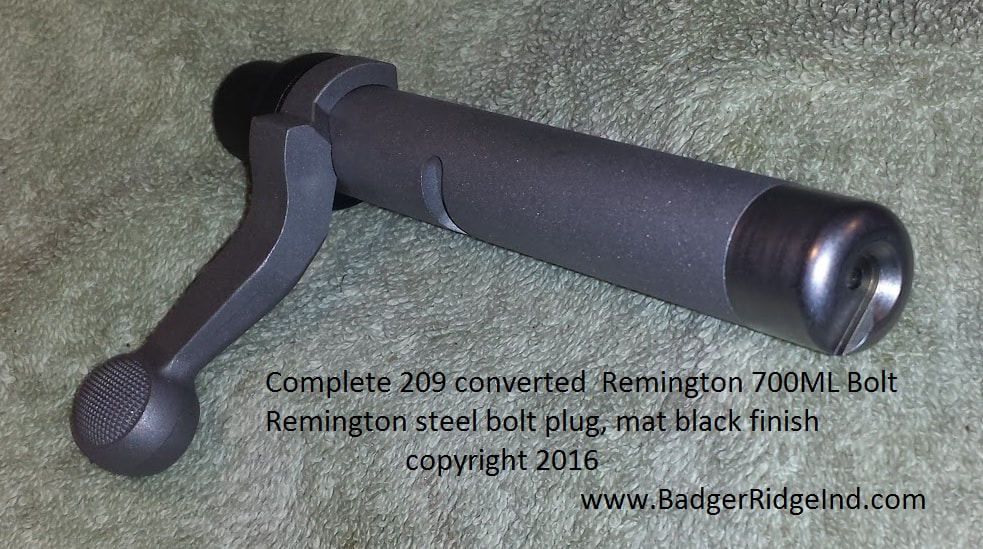




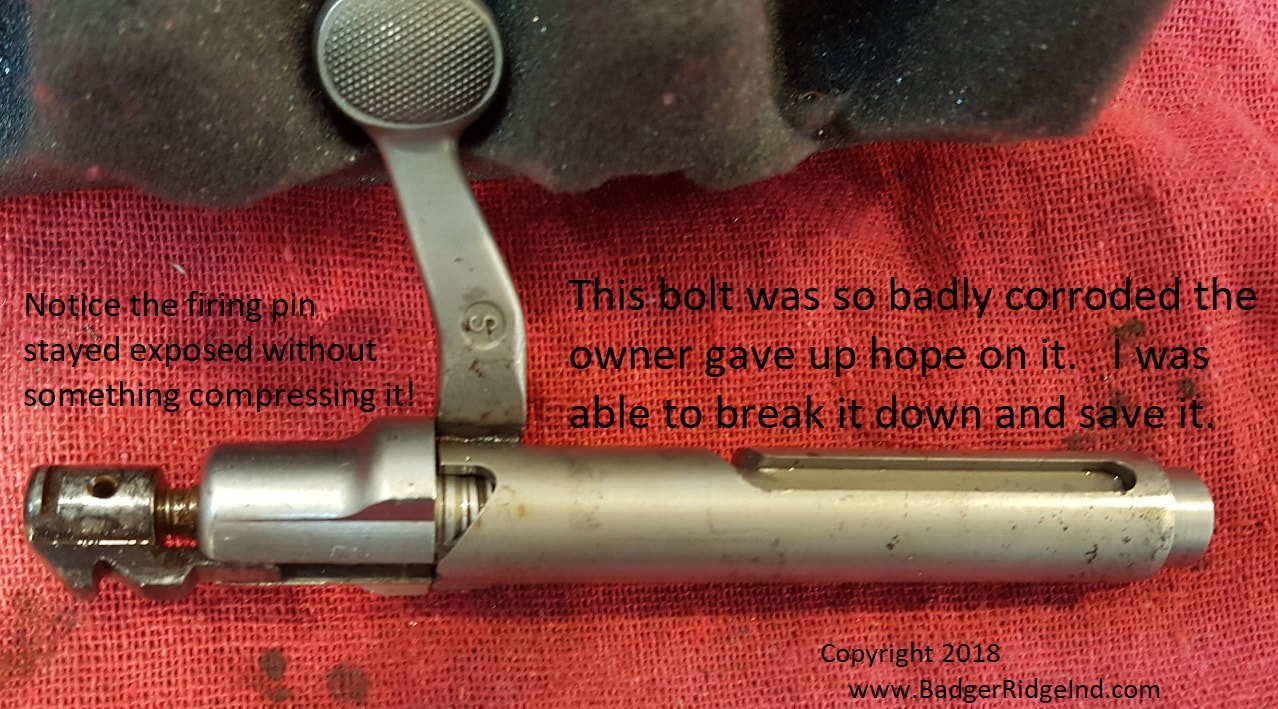
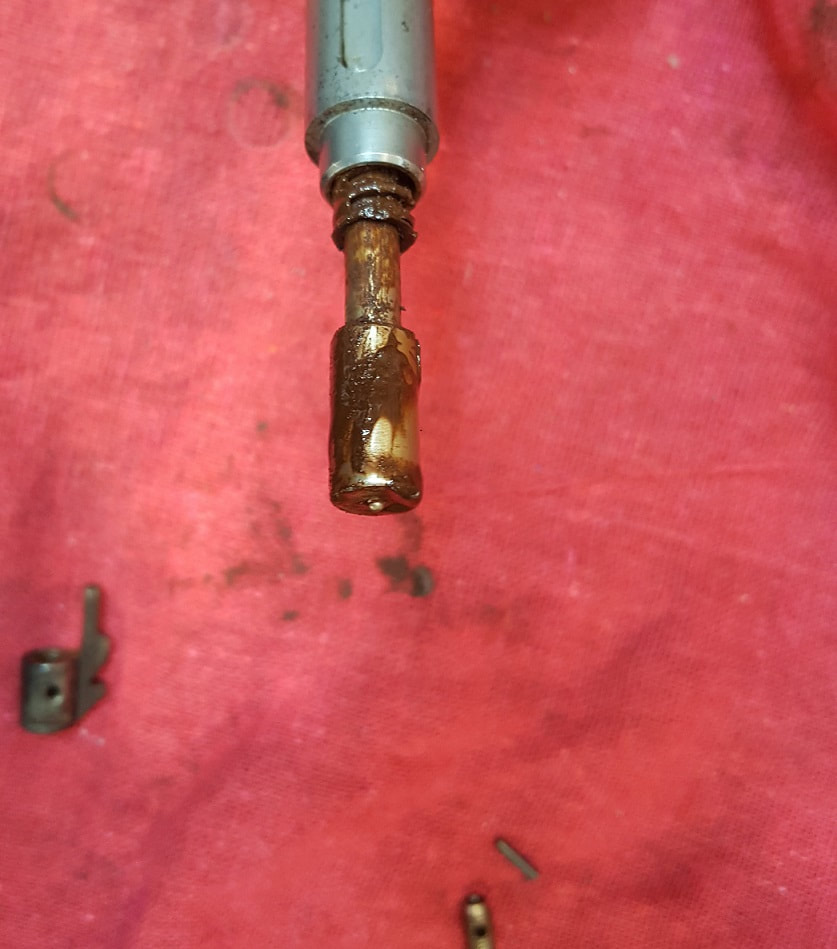
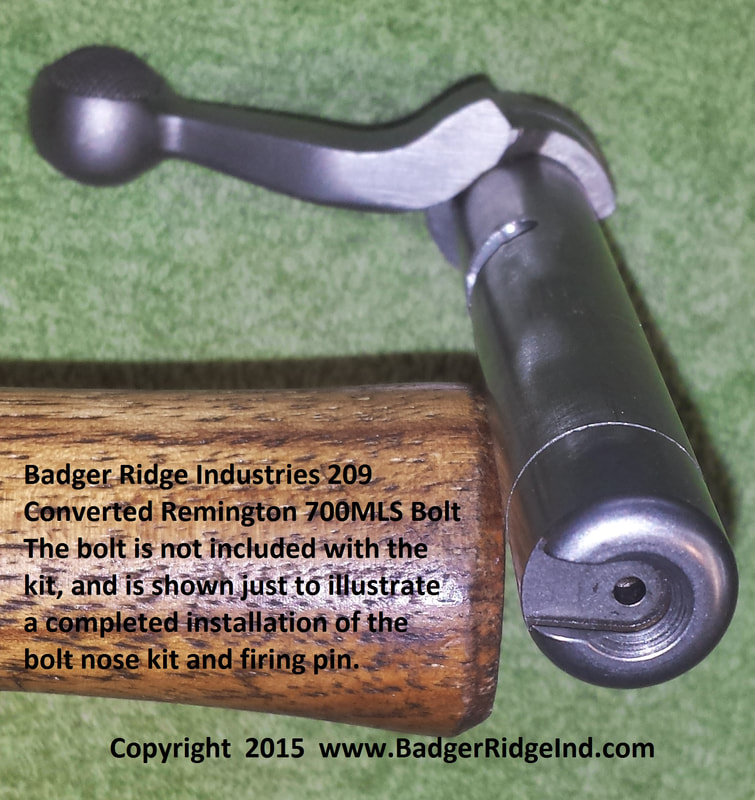
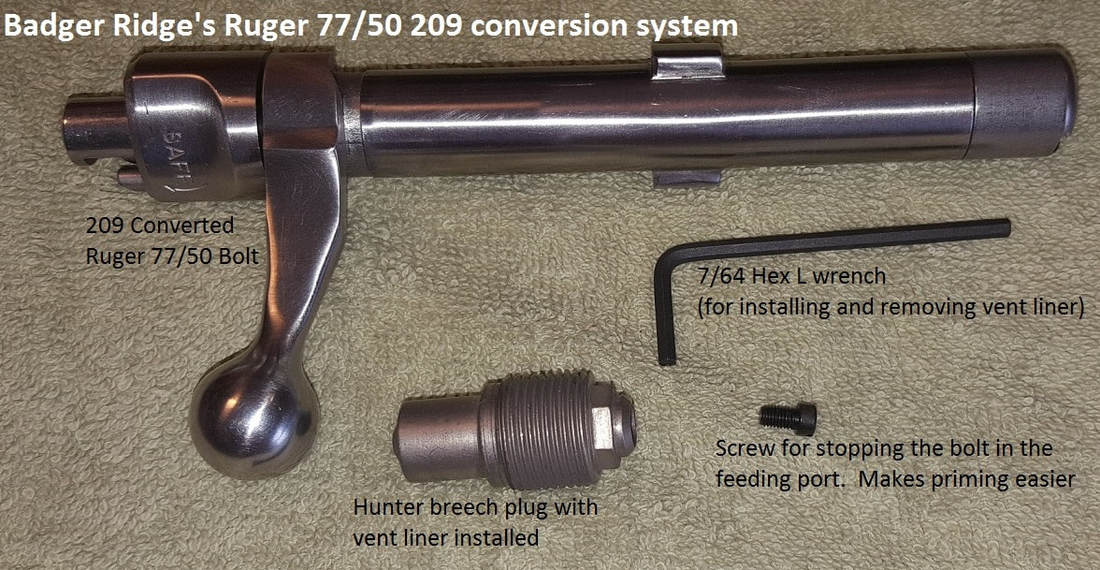
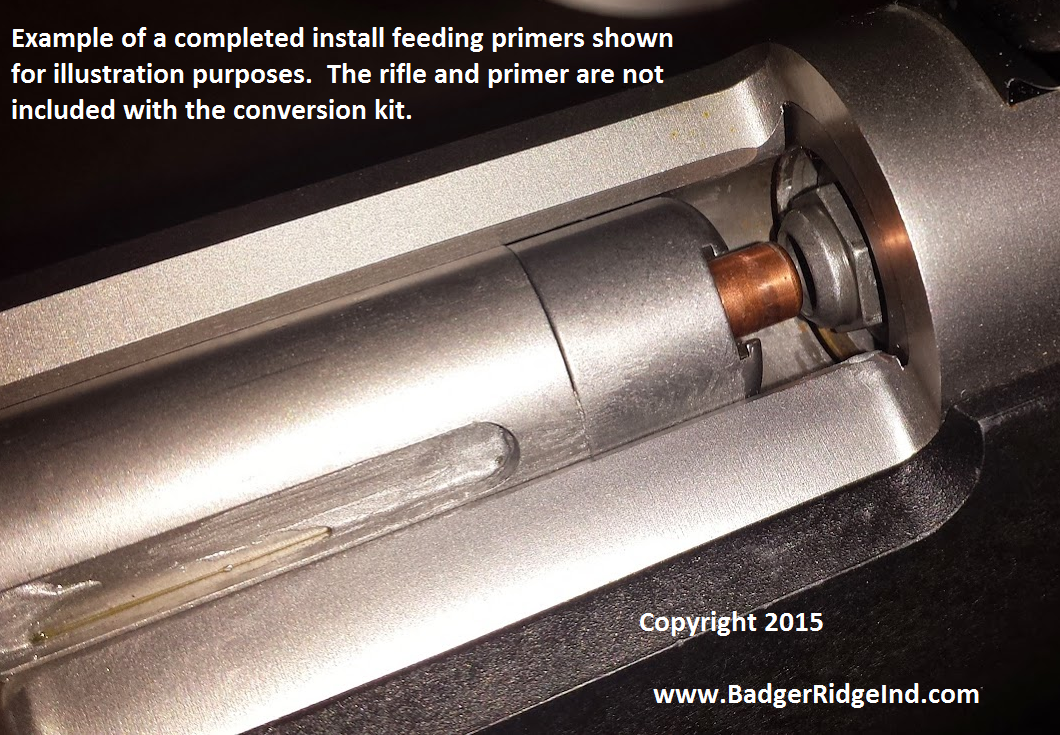
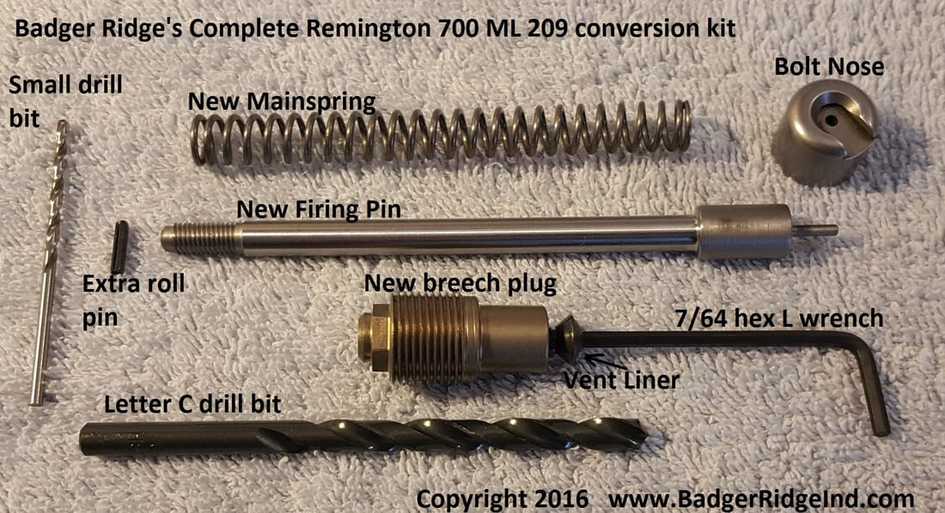
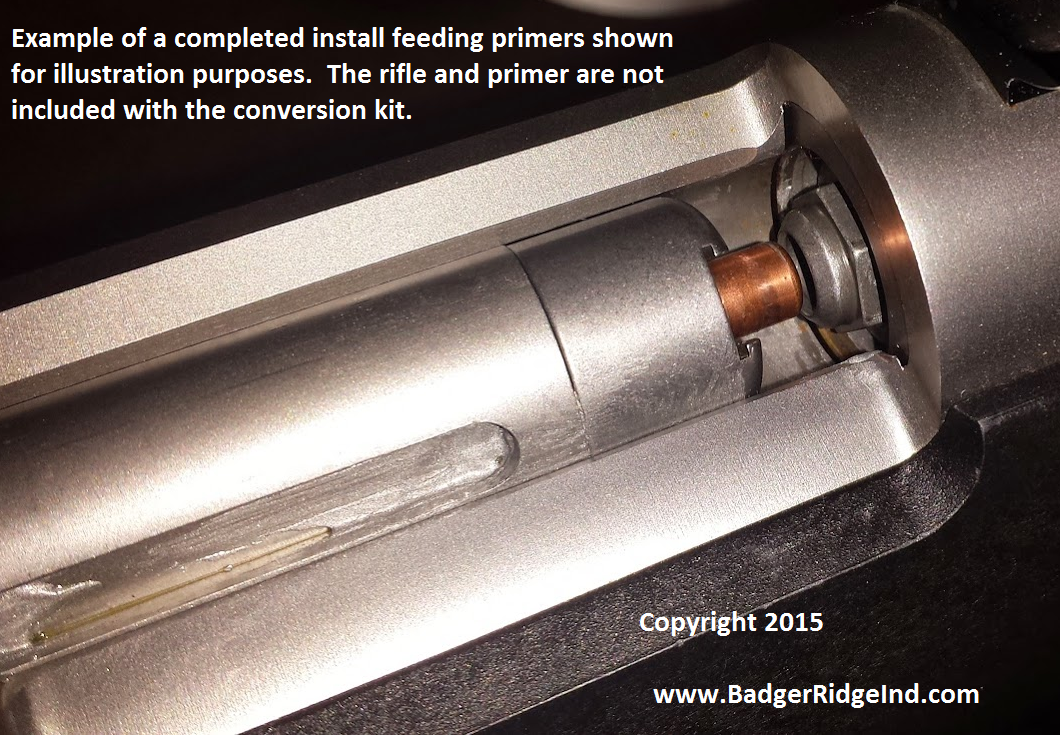
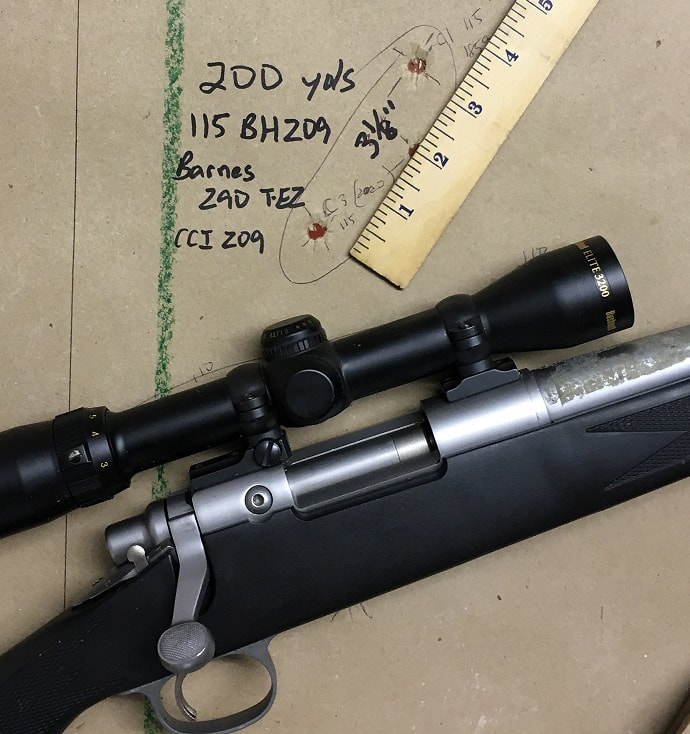
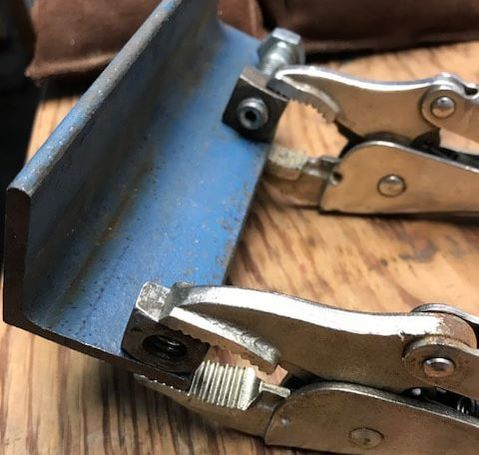
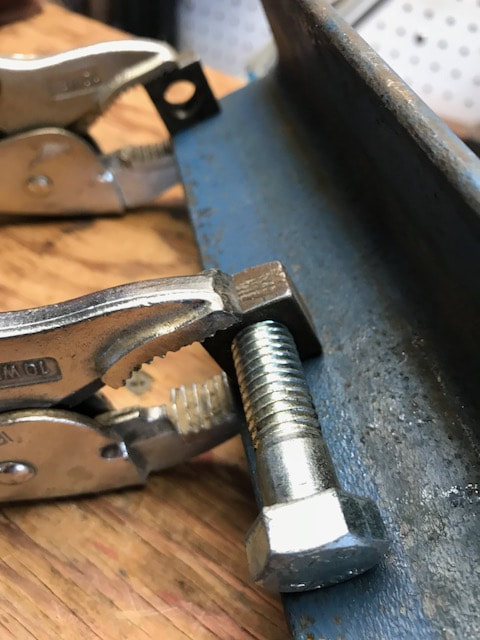
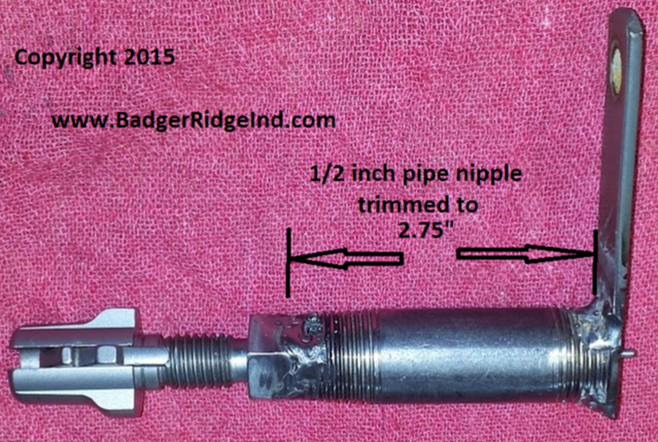
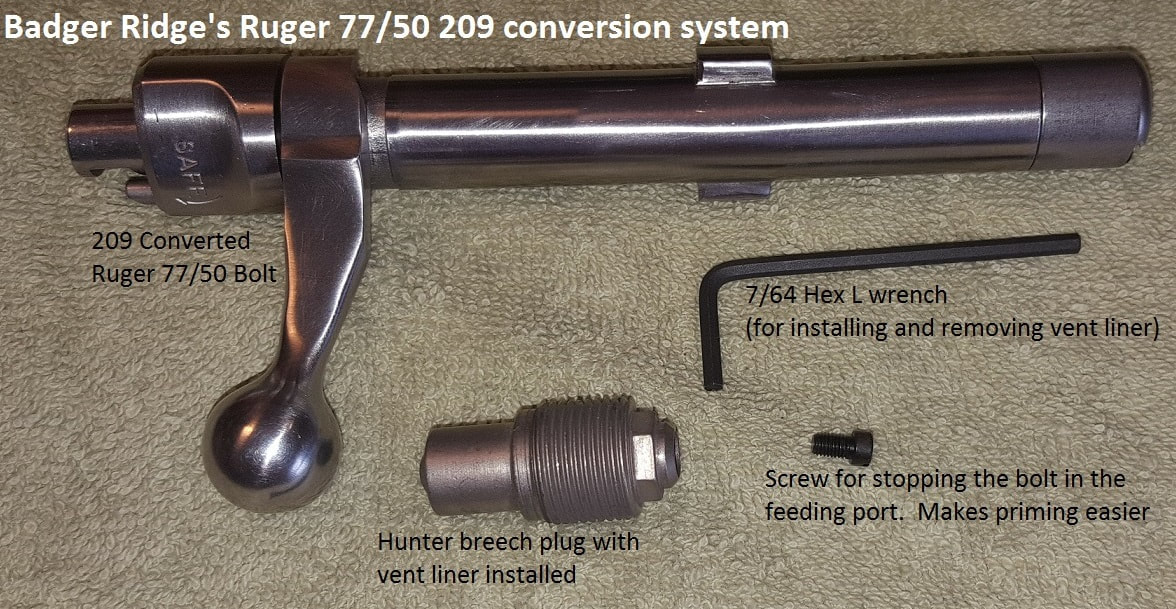
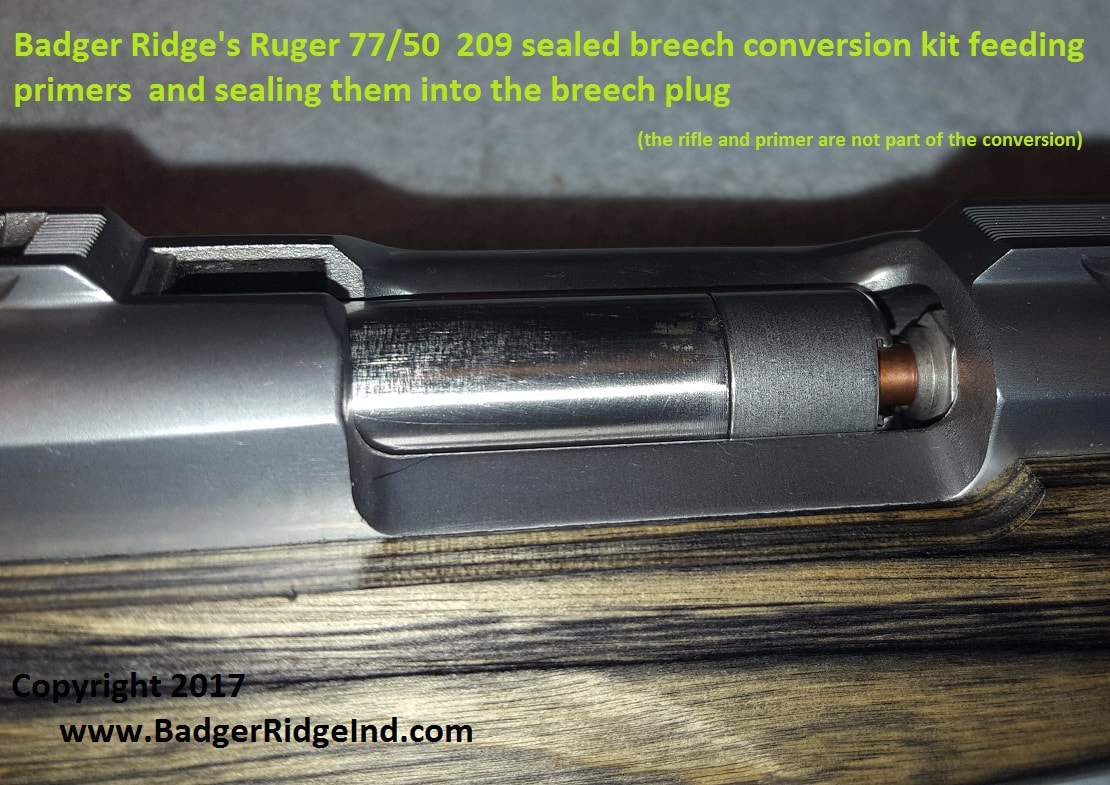
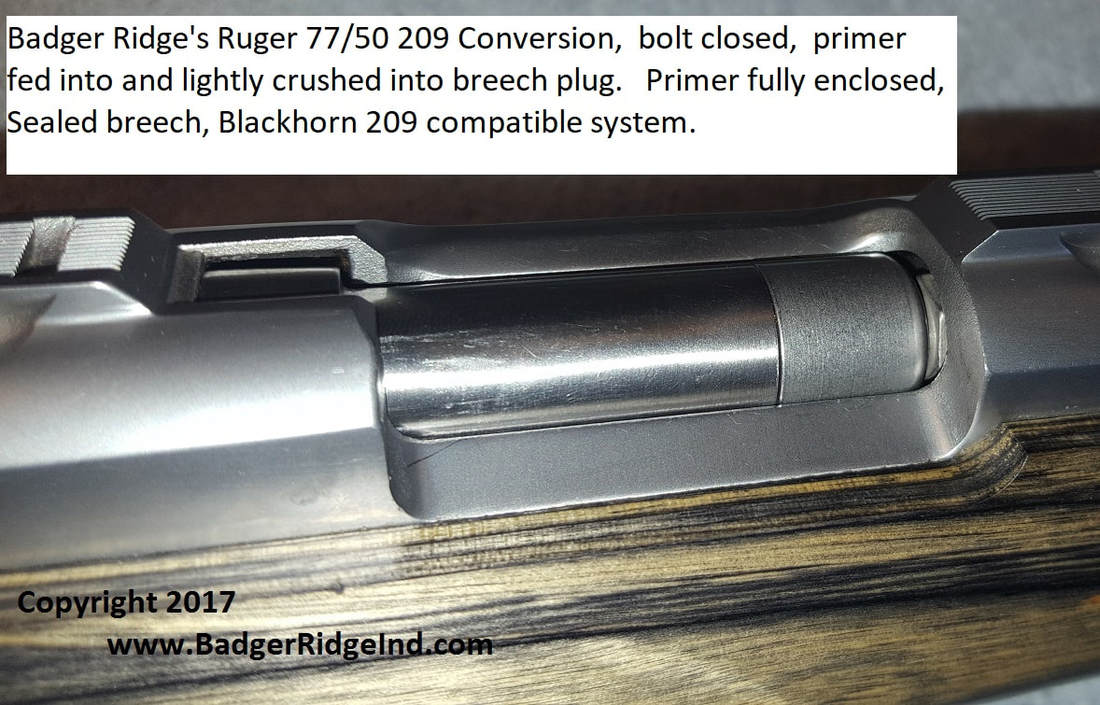

 RSS Feed